8 Undo and remove the bolts securing the fan
cowlings to the radiator, move the cowlings
as far as possible toward the engine and
carefully lift out the radiator. If a two piece
cowling is fitted, lift off the top half.
Refitting
9 Refitting is the reverse sequence to
removal. Apply a little rubber grease or liquid
detergent to the inside diameter of the hoses,
to allow them to be refitted more easily.
10 With the radiator in position, refill the
cooling system as described in Chapter 1,
and refit the bonnet and (if removed) the front
grille panel as described in Chapter 11.
5 Thermostat - removal, testing
and refitting
2
Note: Refer to the warnings given in Section 1
of this Chapter before proceeding.
Removal
1 Partially drain the cooling system
(approximately 1 litre) as described in Chap-
ter 1.
2 Undo the retaining bolts securing the upper
radiator mounting bracket to the radiator
cowl.
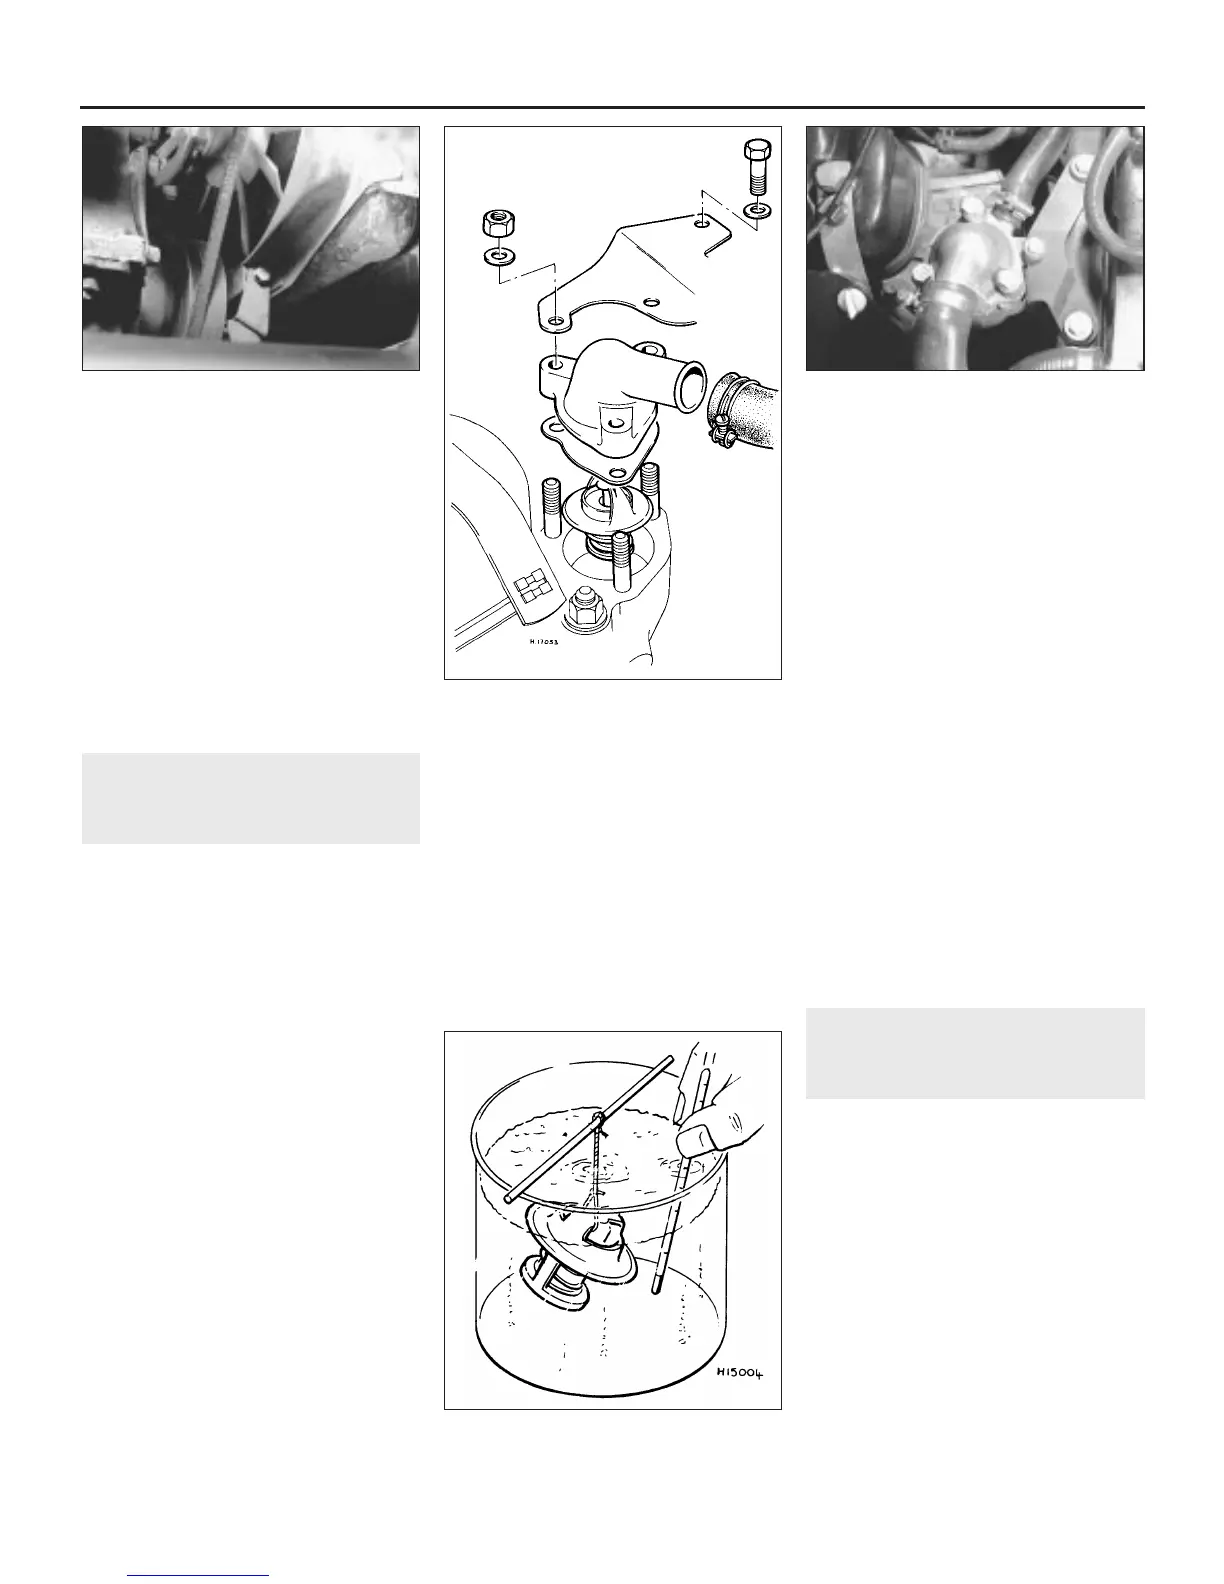
3 Undo the two nuts or bolts securing the
upper radiator mounting bracket to the
thermostat cover, or the single nut securing
the bracket to the thermostat housing body
(see illustrations). Remove the bracket.
4 Slacken the radiator top hose retaining clip
and disconnect the hose from the thermostat
cover. Where applicable, disconnect the
heater hose from the thermostat housing
body and the wiring from the thermostatic
switch or vacuum hoses from the
thermostatic valve in the side of the housing
body. Note the correct fitted positions of the
vacuum hoses before disconnection.
5 Undo the remaining nut, or the three bolts
(according to type) securing the thermostat
cover, and lift off the cover and gasket. Where
the cover is retained by nuts and studs, it is
likely to be quite tight due to corrosion of the
retaining studs. If so, apply liberal amounts of
penetrating oil to the studs and allow time to
soak. Now very gently tap the cover from side
to side, using a soft-faced mallet or block of
wood. This should ease the corrosion and
allow the cover to be lifted off.
6 With the cover removed, take out the
thermostat.
7 On models with a separate thermostat
housing body beneath the cover, lift off the
housing body together with its lower gasket.
Testing
8 To test the thermostat for correct
functioning, suspend it on a string in a
saucepan of cold water together with a
thermometer (see illustration). Heat the water
and note the temperature at which the
thermostat begins to open. The correct
opening temperatures are given in the
Specifications at the beginning of this Chapter.
Continue heating the water until the thermostat
is fully open. Then let it cool down naturally.
9 If the thermostat does not fully open in
boiling water, or does not close down as the
water cools, then it must be discarded and a
new one fitted. Should the thermostat be
stuck open when cold, this will be apparent
during removal.
Refitting
10 Refitting is the reverse sequence to
removal bearing in mind the following points:
a) Clean off all traces of old gasket from the
component mating faces and renew any
parts which show signs of corrosion.
b) Where the thermostat is located directly in
the cylinder head, use a new gasket
between the cylinder head and thermostat
cover. On models with a separate
thermostat housing body, use new gaskets
on both sides of the housing body.
c) Refill the cooling system as described in
Chapter 1 on completion.
6 Water pump - removal and
refitting
3
Note: Water pump failure is indicated by water
leaking from the gland or front of the pump, or
by rough and noisy operation. This is usually
accompanied by excessive play of the pump
spindle which can be checked by moving the
fan blades from side to side. Water pumps are
relatively inexpensive items and the simplest
course of action, should the above symptoms
be evident, is to fit an exchange reconditioned
unit. Refer to the warnings given in Section 1
of this Chapter before proceeding.
Removal
Note: If the car is fitted with exhaust emission
control equipment, it will be necessary to
remove the air pump and drivebelt, as
described in Chapter 4C, to provide access to
the water pump.
3•4 Cooling, heating and ventilation systems
4.7 Radiator lower support mounting bolt
accessible through grille panel
5.3a Exploded view of the thermostat and
housing components (early models)
5.3b Thermostat housing and radiator
upper mounting bracket
(later 1275 cc models)
5.8 Testing the thermostat
 Loading...