4 Prise the fan off the motor spindle, undo
and remove the retaining nut and washer,
then lift away the motor.
5 Undo and remove the screws securing the
mounting bracket to the cowling, lift off the
mounting bracket and withdraw the heater
matrix.
6 Clean off all traces of rust and dirt from the
matrix, and carefully inspect it for leaks or
signs of excessive corrosion. The matrix
should be renewed if it is badly corroded or
leaking.
Reassembly
7 Reassembly is the reverse of the
dismantling procedure.
Fresh air type (first version)
Dismantling
8 Remove the heater assembly from the car
as described in Section 11.
9 Undo and remove the two screws securing
the control panel to the heater casing and lift
off the panel (see illustration).
10 Carefully prise off the spring retaining
clips and separate the two halves of the
casing.
11 Withdraw the motor assembly and then lift
out the heater matrix.
12 The two rotors may be removed from the
blower motor by releasing the retaining clips
and sliding off the rotors.
13 Clean off all traces of rust and dirt from
the matrix, and carefully inspect it for leaks or
signs of excessive corrosion. The matrix
should be renewed if it is badly corroded
leaking.
Reassembly
14 Reassembly is the reverse of the
dismantling procedure.
Fresh air type (second version)
Dismantling
15 Remove the heater assembly from the car
as described in Section 11.
16 Detach the wire from the fan motor at the
rear of the fan switch.
17 Undo and remove the three screws and
lift off the heater control mounting plate.
18 Undo and remove the nine screws
securing the right-hand end cover and lift off
the cover.
19 Carefully slide out the heater matrix.
20 Undo and remove the screws securing the
fan motor to the main casing, release the
motor wires and grommet, and withdraw the
motor assembly.
21 If necessary, remove the two fans from
the motor spindle.
22 Clean off all traces of rust and dirt from
the matrix, and carefully inspect it for leaks or
signs of excessive corrosion. The matrix
should be renewed if it is badly corroded or
leaking. Note that on later models, the
diameter and length of the heater inlet hose
has been increased. If the heater matrix is to
be renewed, it is important that the longer
(1005.0 mm) hose is also fitted.
Reassembly
23 Reassembly is the reverse of the
dismantling procedure.
Fresh air type (third version -
1985 models onward)
Dismantling
24 Remove the heater assembly from the car
as described in Section 11.
25 To remove the heater matrix, undo the
two screws securing the matrix endplate, and
withdraw the endplate, complete with matrix,
from the heater casing.
26 Undo two screws each, and lift the pipe
stubs off the matrix endplate (see
illustration).
3•8 Cooling, heating and ventilation systems
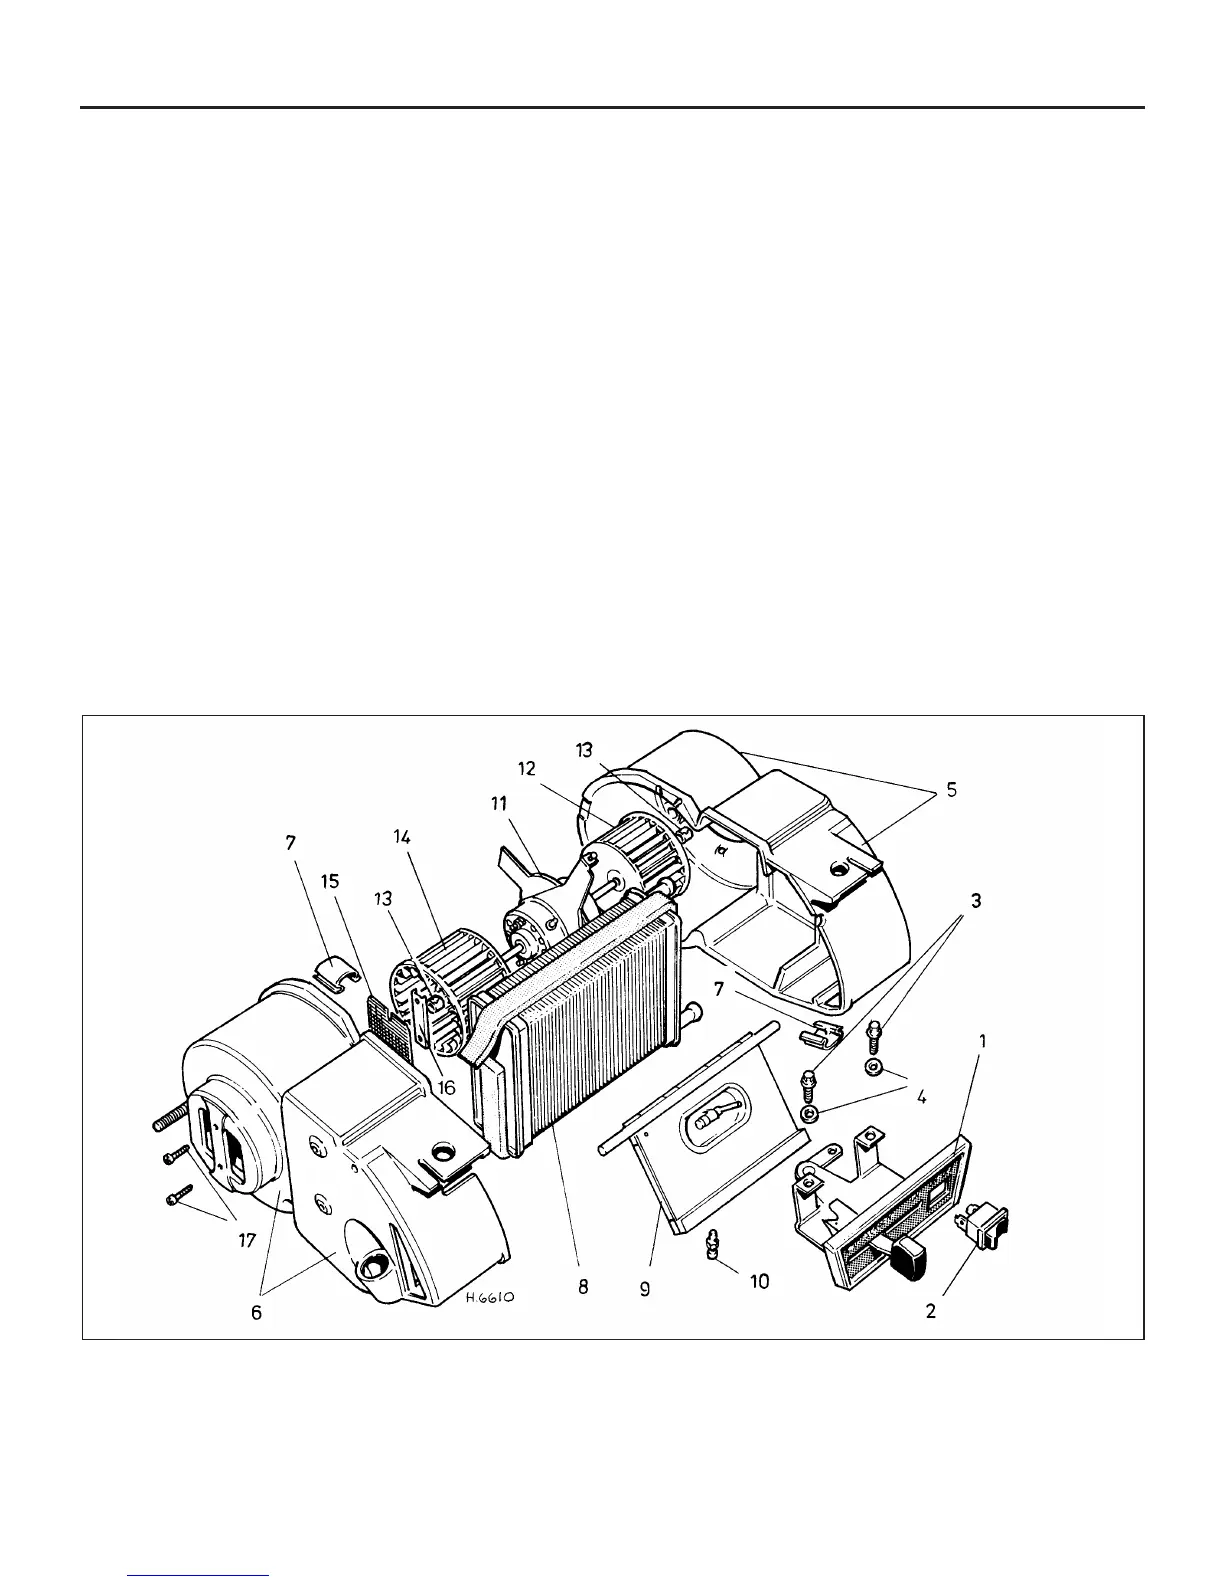
12.9 Exploded view of the early type fresh air heater
1 Control panel
2 Fan switch
3 Control panel
securing screws
4 Washer
5 Heater casing
6 Heater casing
7 Retaining clip
8 Matrix
9 Air distribution flap
10 Trunnion screw
11 Fan motor
12 Air intake fan
13 Retaining clips
14 Recirculating fan
15 Flap valve
16 Valve securing
plate
17 Valve securing
screws
 Loading...