3 Accelerator cable - removal
and refitting
1
Removal
1 Working in the engine compartment,
disconnect the throttle return spring(s) and
undo the nut and washer securing the cable
to the bolt on the throttle lever (see
illustration). On later models the cable is
attached to the throttle lever by means of a
small clamp with a locking bolt through its
centre. Hold the clamp and unscrew the bolt
using either 4 BA or 7 BA spanners according
to clamp type.
2 Pull the cable through the bolt or clamp and
slide it out of the steady bracket on the rocker
cover (if fitted).
3 From inside the car, depress the
accelerator pedal and withdraw the ferrule on
the cable from the slot in the top of the pedal
arm.
4 The cable can now be withdrawn through
the opening in the bulkhead and into the
engine compartment.
Refitting
5 To refit the cable, feed it through the
bulkhead and engage the ferrule into the slot
on the pedal arm.
6 Now feed the other end of the cable
through the brackets on the rocker cover and
carburettor, and then insert the inner cable
into the slotted bolt or clamp on the throttle
lever.
7 Pull the cable through the bolt to take up any
slack and then refit the washer and nut or the
clamp locking bolt. Avoid straining or distorting
the cable as the fixings are tightened.
8 Reconnect the return spring and check that
a slight amount of free play exists between
the pedal and cable.
9 Start the engine and check the operation of
the cable.
4 Accelerator pedal - removal
and refitting
1
Removal
1 Depress the accelerator pedal and detach
the accelerator cable ferrule from the slot at
the top of the pedal arm.
2 Undo and remove the two bolts securing
the pedal assembly to the bulkhead and lift
out the pedal.
Refitting
3 Refitting is the reverse sequence to
removal.
5 Choke cable - removal and
refitting
2
Removal
Note: On models fitted with a centre console
it will be necessary to remove the centre
console and console glovebox retaining
screws. This will allow the console to be
moved slightly to provide access for the
following operations.
1 Disconnect the battery negative lead.
2 Refer to Section 2 and remove the air
cleaner assembly.
3 Working in the engine compartment,
disconnect the choke inner cable from the
trunnion screw on the choke linkage and the
outer cable from the support bracket (see
illustration). Withdraw the complete cable
from the carburettor.
4 From inside the car, undo and remove the
two screws securing the heater assembly to
the front of the parcel shelf. Now lower the
heater slightly at the front.
Fuel system - carburettor engines 4A•5
4A
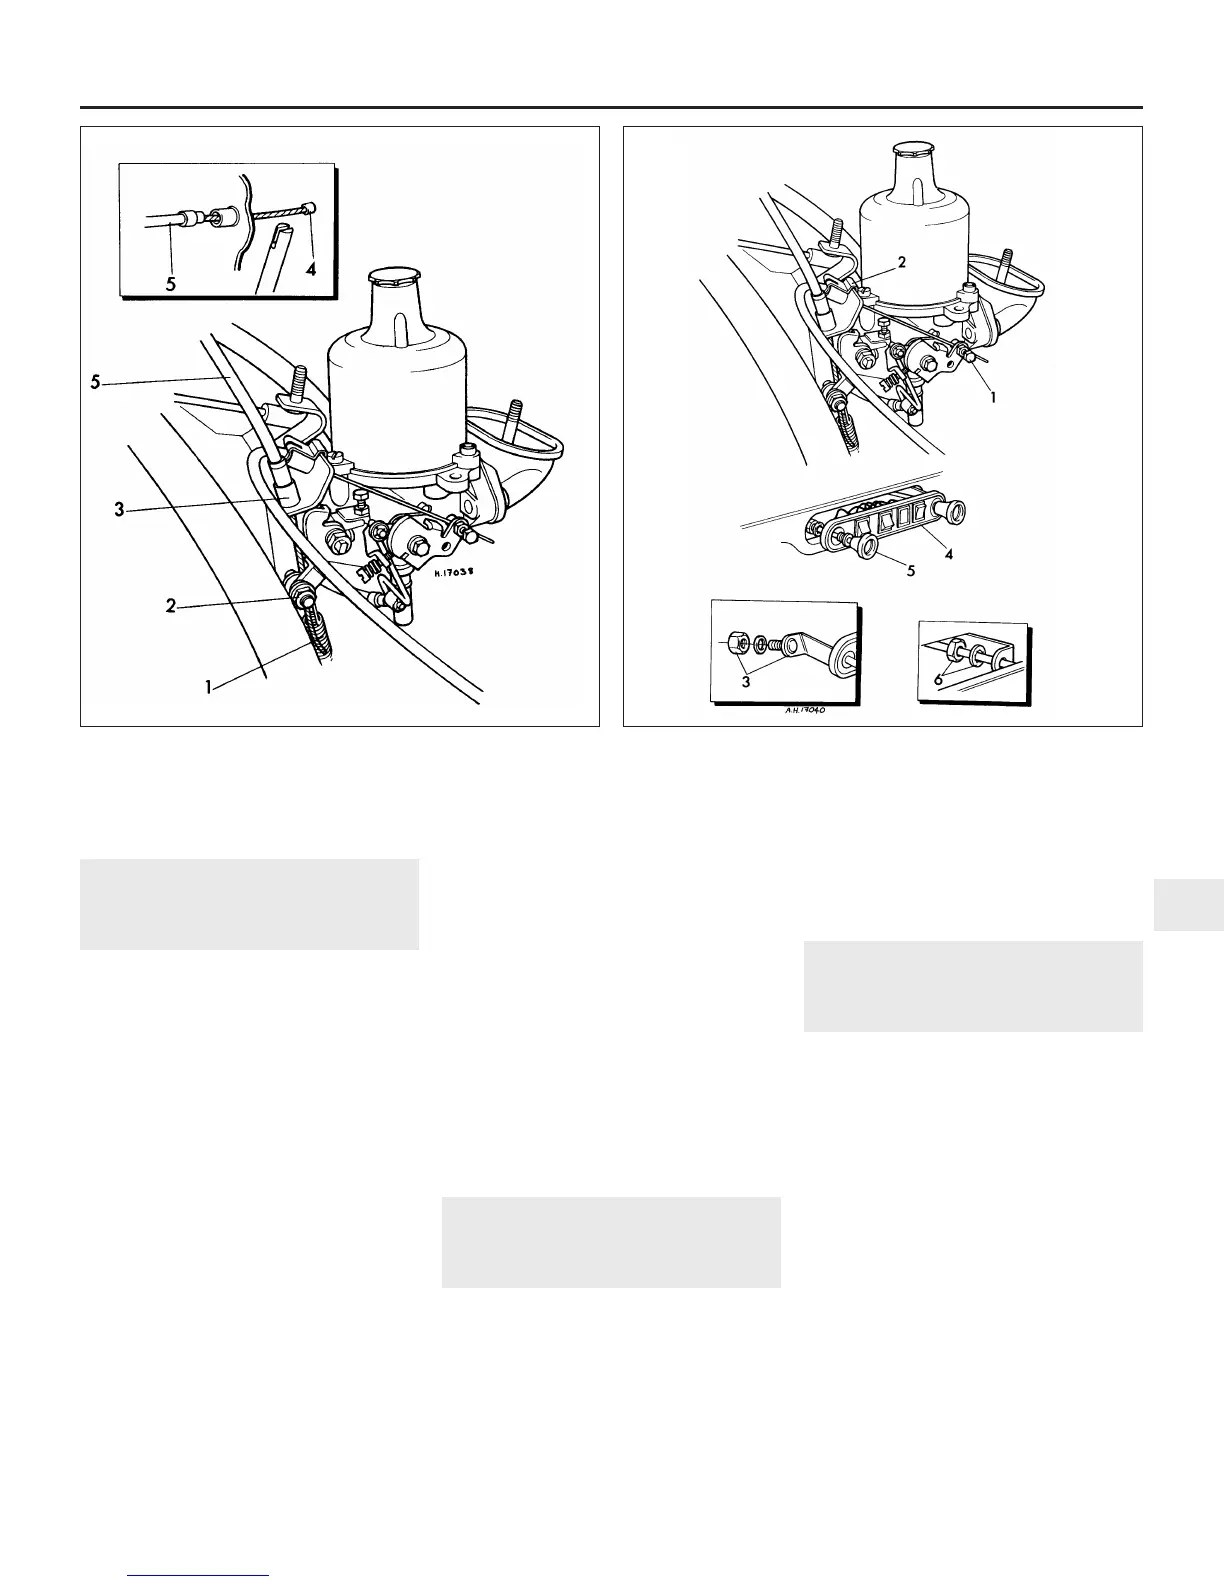
3.1 Accelerator cable attachments
1 Throttle return spring
2 Cable-to-throttle lever
securing bolt
3 Cable support bracket
4 Cable ferrule – pedal end
5 Outer cable
1 Inner cable-to-linkage
attachment
2 Outer cable support bracket
3 Switch panel retaining nuts
4 Switch panel
5 Choke cable
6 Cable retaining nut and
washer
5.3 Choke cable attachments
 Loading...