then taken from the exhaust tailpipe, there
may be little difference between the two
readings. However, this does not mean that
the catalytic converter is functioning correctly,
and it will not adversely affect the unit.
11 Check the fast idling speed by pulling out
the choke until the arrow on the carburettor
fast idle cam is aligned with the adjustment
screw. If adjustment is necessary, turn the
fast idle screw.
12 Stop the engine and disconnect the
tachometer and exhaust gas analyser. On
Cooper models, refit the plug to the sampling
pipe. On all other models, remove the
sampling pipe, refit and tighten the threaded
plug, and lower the vehicle to the ground.
17 Anti-run-on valve (1990-on
Cooper models) - removal
and refitting
1
Removal
1 The anti-run-on valve is mounted onto a
bracket in the right-hand rear corner of the
engine compartment. Its function is to prevent
the engine running-on (“dieseling”) after the
ignition is switched off. If the valve is
disconnected or damaged, it may prevent the
engine from running or idling smoothly.
2 To remove the valve, disconnect the wiring
connector and both hoses from it.
3 Unscrew the bracket retaining bolt, and
remove the valve complete with its bracket.
Refitting
4 Refitting is a reverse of removal, ensuring
that the wiring connector and hoses are
securely connected.
18 Inlet manifold - removal and
refitting
2
Removal
Note: On vehicles fitted with emission control
equipment it will be necessary to remove
certain additional fittings, hoses and brackets
to provide access to the inlet manifold. The
items requiring removal will be obvious after a
visual inspection, and full information
regarding their removal will be found in Part C
of this Chapter.
1 Refer to Section 12 and remove the
carburettor(s) from the inlet manifold.
2 On models fitted with a brake servo,
slacken the retaining clip screw and remove
the vacuum hose from the union on the inlet
manifold.
3 If working on Cooper S models, undo and
remove the nuts, large flat washers and spring
washers securing the manifold to the cylinder
head. Lift off the manifold. On all other models
proceed as follows.
4 Chock the rear wheels then jack up the
front of the car and support it on axle stands
(see “Jacking and vehicle support”).
5 From underneath the car, undo and remove
the nut and bolt securing the exhaust front
pipe support strap to the transmission
bracket.
6 Undo and remove the two bolts and nuts
securing the two halves of the exhaust
manifold clamp to the front pipe. Lift away the
clamp assembly.
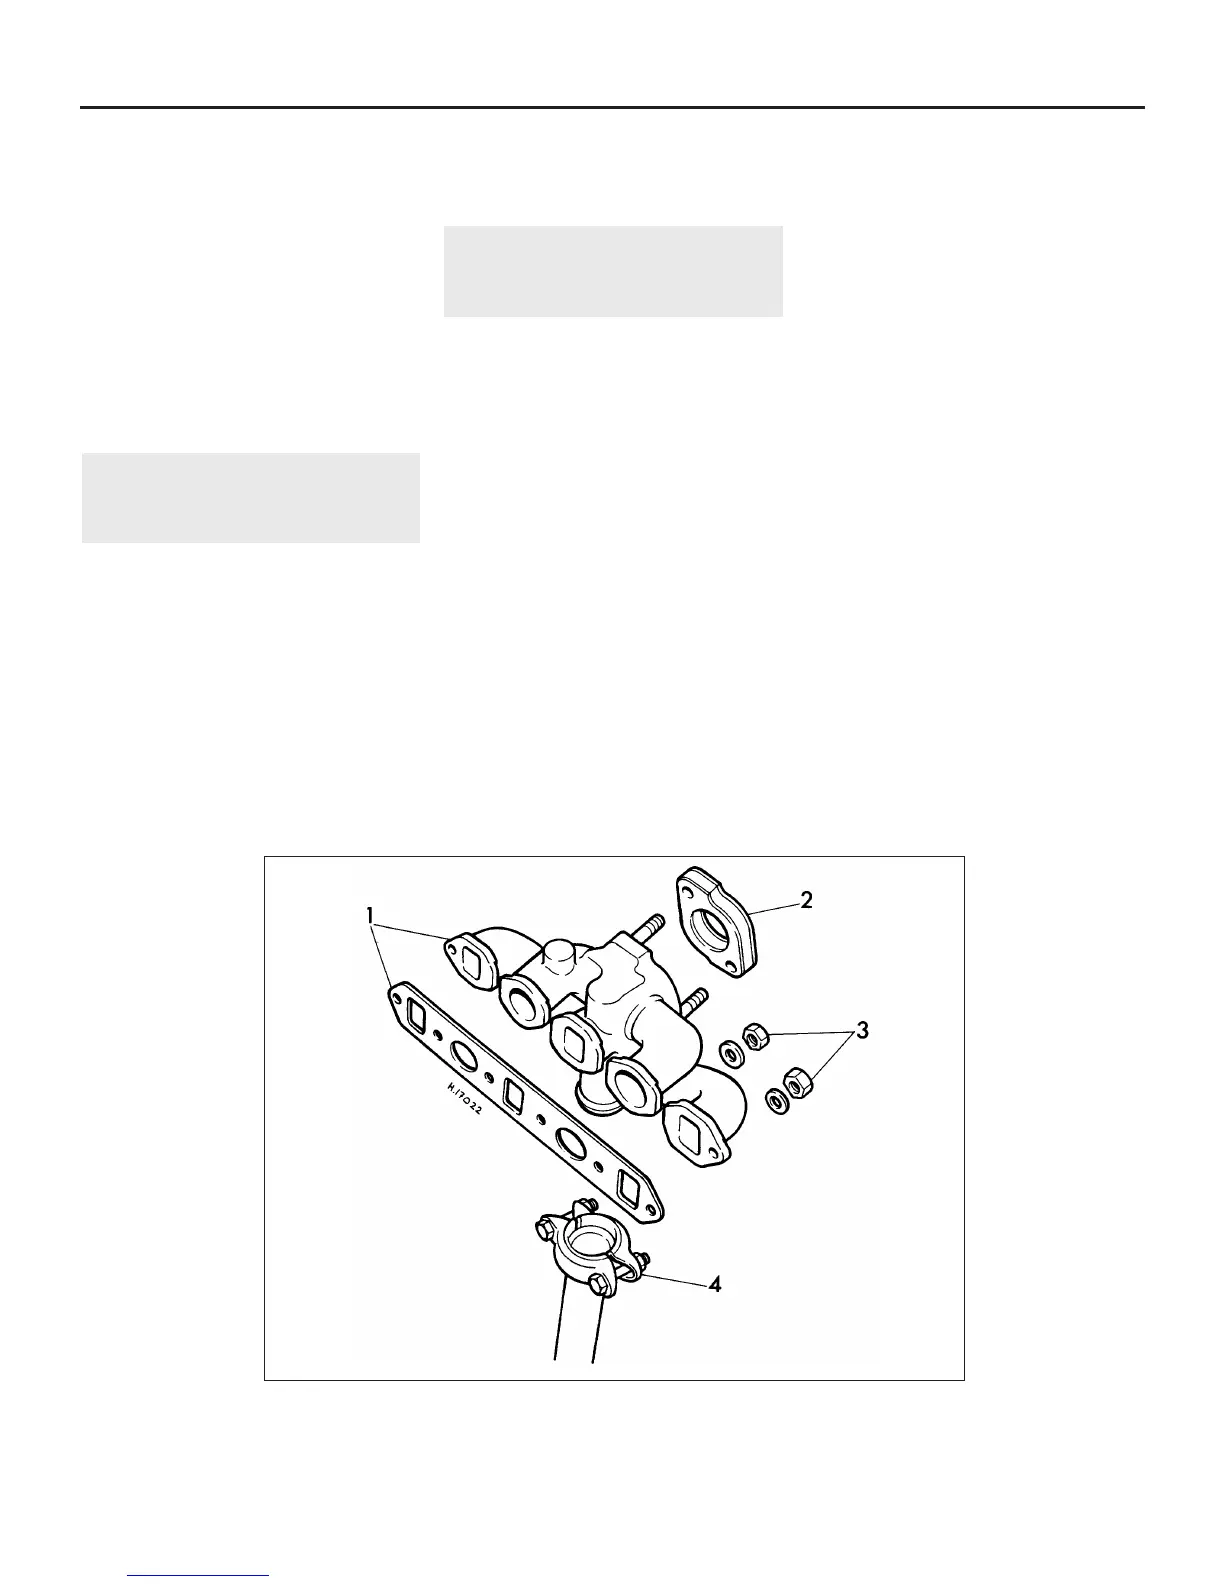
7 Undo and remove the six nuts and flat
washers securing the manifold to the cylinder
head (see illustration).
8 Lift off the hot air shroud, where fitted, and
then slide the inlet and exhaust manifold
assembly off the studs and withdraw it from
the engine. Recover the manifold gasket.
Refitting
9 Refitting is the reverse sequence to removal
bearing in mind the following points:
a) Ensure that the mating surfaces of the
manifold and cylinder head are clean, and
use a new gasket.
b) Refit the exhaust manifold-to-front pipe
clamp before tightening the front pipe
support strap bolt.
4A•20 Fuel system - carburettor engines
18.7 Inlet and exhaust manifold assembly
1 Manifold and gasket
2 Carburettor insulating block
3 Retaining nuts
4 Manifold-to-front pipe clamp
 Loading...