211102
5
Vedpak 137_Version 2_110609
4. Selected by selector switch
DC and AC Current measurement
test lead to socket and red test lead to the
SELECT key to choose
Amp. connect the red test lead “10 Amp.” socket. Set
SELECT
c. Connect the probes across the source or load under
measurement.
WARNING.
never attempt an in-circuit current measurement where
before proceeding. Never place the probes in parallel
with a circuit or component when the leads are plugged
into the current terminals.
The “OL” sign will appear on the display when the
input current is more than 10Amp.
Note: Not to measure a current in a circuit with voltage
Battery test
a. Connect the black test lead to the socket and
the red test lead to the “mA/BAT” socket.
b. Set the selector switch to “BATT 1.5 V.” position for
“BATT 9 V.” position for 9 V. battery.
voltage to the marked value with the condition that the
measured battery is loaded.
Ω
Ω
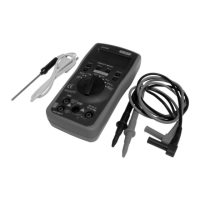
Temperature measurement
a. Set the selector switch to the “TEMP °C/°F” range
and connect the k type thermocouple’s plug ÷ to
TEMP °C/°F socket.
b. °C or °F can be selected by pressing the SELECT key.
RPM (TACH) / DUTY / DWELL measurement
a. Connect the black test lead to the socket and
position.
c. Pressing the SELECT key can shift the folowing
d. Use RANGE key to select for different car cylinders.
or DWELL angle.
Other Functions
1. Beeper Function
sound.
b. Beeper will keep 5 sounds for warning in 1 minute before
while pressing SELECT
2. Auto Power-OFF
auto power off mode and the auto power off indicator
will appear on LCD. When the meter at auto power
the auto power off indicator will disappear from LCD
and the meter will cancel auto power off mode.
Care and Maintenance
Your Digital Multimeter is an example of superior design
and craftmanship. The following suggestions will help
you care for the multimeter so you can enjoy it for years.
immediately. Liquids can contain minerals that can
corrode electronic circuits.
2. Use and store the multimeter only in normal tempera-
ture environments. Temperature extremes can shorten
distort or melt plastic parts.
3. Handle the multimeter gently and carefully. Dropping it
can damage the circuit boards and case and can
cause the multimeter to work improperly although the
holster can provide enough protection.
can cause premature wear of parts.
5. Wipe the multimeter with a damp cloth occasionally to
multimeter.
Always remove old or weak batteries. They can leak
chemicals that destroy electronic circuits.
 Loading...