6-32 x 3/8"
FLAT HEAD
SCREW
/ SWITCH
/
4INSULATOR
1
11
O
S ST \\\A
SWITCH
P
WITH
SPRING
RETURN
WOOD-GRAIN
TRIM
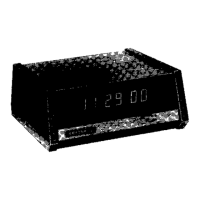
Detail 3-1B
efer to Detail 3-1B, remove the narrow wood-grain
im piece from the protective paper backing, center
the trim between the sides of the window, and apply it
as shown.
WOOD-GRAIN
TRIM
Page
15
Locate the 5-1/2" x 1-7/8" fish paper, refer to Detail
3-1C, and cut a
1/4"
wide strip from one end as
shown. Then cut the strip in half.
Detail 3-1A
44
)
Cut a 1" wide strip from the fish paper as shown. Set
this 1" wide strip and the remaining large piece of fish
CABINET TOP
paper aside. They will be used later.
Refer to Pictorial 3-1 for the following steps.
In the following(steps, you will install parts in the cabinet
top.
Refer to Detail 3-1A and install an SPST switch with
spring return at B. (Operate the switch to make sure it
is a spring-return switch.) Use two 6-32 x 3/8" flat
head screws and a #6 solder lug, and be sure the
switch lugs and solder lug are positioned as shown.
Slide a switch insulator over the switch lugs and bend
the lugs as shown in the Pictorial.
As before, mount an SPST switch (without spring
return) at A. Use two 6-32 x 3/8" flat head screws and
a #6 solder lug. Be sure the switch lugs are positioned
as shown. Then slide a switch insulator over the switch
lugs and bend the lugs.
Prepare a 7" length of black wire by removing 3-1/4"
of insulation from one end and 1/4" of insulation
from the other end.
) Pass the 3-1/4" bared end through the solder lug at A
to the solder lug at B. Solder this wire to both lugs.
The other end will be connected later.
Detail 3-1D
Refer to Detail 3-1D and mount the window. Remove
the protective paper backing from the two 1/4" wide
strips of fish paper and apply them to the window and
cabinet top as shown in Pictorial 3-1 to hold the
window in place.
)'‘ ) Set the cabinet top aside temporarily.
34
1
1/
A
0
Z2
1"
2"
3
"
4"
5"
1
6
"
 Loading...