EasyManua.ls Logo

HEIDENHAIN LIC 4007 User Manual

HEIDENHAIN LIC 4007
12 pages
To Next Page IconTo Next Page
Page #1 background imageLoading...
Page #1 background image
LIC 4007
7/2017
Instrucciones de montaje
Tener en cuenta las instrucciones suministradas por separado para el montaje de la regla.
Kit de piezas
Istruzioni di montaggio
Per il montaggio della testina fare riferimento al relativo manuale.
Set componenti
Instructions de montage
Pour le montage de la tête captrice, veuillez tenir compte des instructions distinctes.
Jeu de pièces
Für Montage des Abtastkopfes bitte separate Anleitung beachten.
Montageanleitung
Teilesatz
For mounting the scanning head, please refer to the separate Instructions.
Mounting Instructions
Parts Kit
Question and Answer IconNeed help?

Do you have a question about the HEIDENHAIN LIC 4007 and is the answer not in the manual?

HEIDENHAIN LIC 4007 Specifications

General IconGeneral
BrandHEIDENHAIN
ModelLIC 4007
CategoryAccessories
LanguageEnglish

Summary

General Safety and Warnings

Qualified Personnel and Power Disconnection

Mounting must be done by qualified specialists with power disconnected.

Tightening Torque for Steel Mounting

Torques are valid only for mounting on steel surfaces.

Items Supplied

Optional Components

List of parts that must be ordered separately for installation.

Mounting Procedure

Mounting Position and Contamination Protection

Select mounting attitude for maximum traverse range and protect graduation from contamination.

Mounting Details

Mounting Tolerances and Guideways

Specifies mounting tolerances (F=Machine guideway) and key dimensions.

Attaching Stop Pins or Stop Rail

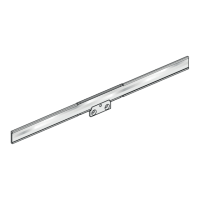
Instructions for attaching stop pins or the stop rail for positioning.

Mounting Surface Preparation and Adhesive Film Application

Mounting Surface Requirements

Ensure mounting surface is free of paint, dust, or grease.

Adhesive Film Application Conditions

Apply adhesive film above 15°C, mind expiration date, protect surface.

Scale-Tape Carrier Positioning and Spacing

Thermal Expansion Spacing

Maintain spacing due to thermal expansion (ML > 2040 mm).

Correct Positioning of Carriers

Place scale-tape carriers on stop pins/rail, slide, and press gently.

Scale-Tape Carrier Installation and Adhesive Strength

Evenly Pressing Carriers with Roller

Press scale-tape carriers evenly using the roller, then remove stop pins/rail.

Adhesive Strength Development

Maximum adhesive strength is reached after approx. 70 hours at room temperature.

Scale Tape Installation and Securing

Absolute Track Position Check

Ensure correct absolute track position (cable outlet right).

Inserting and Securing Scale Tape

Insert scale tape into carrier without bending, secure with fixing clamp.

Related product manuals