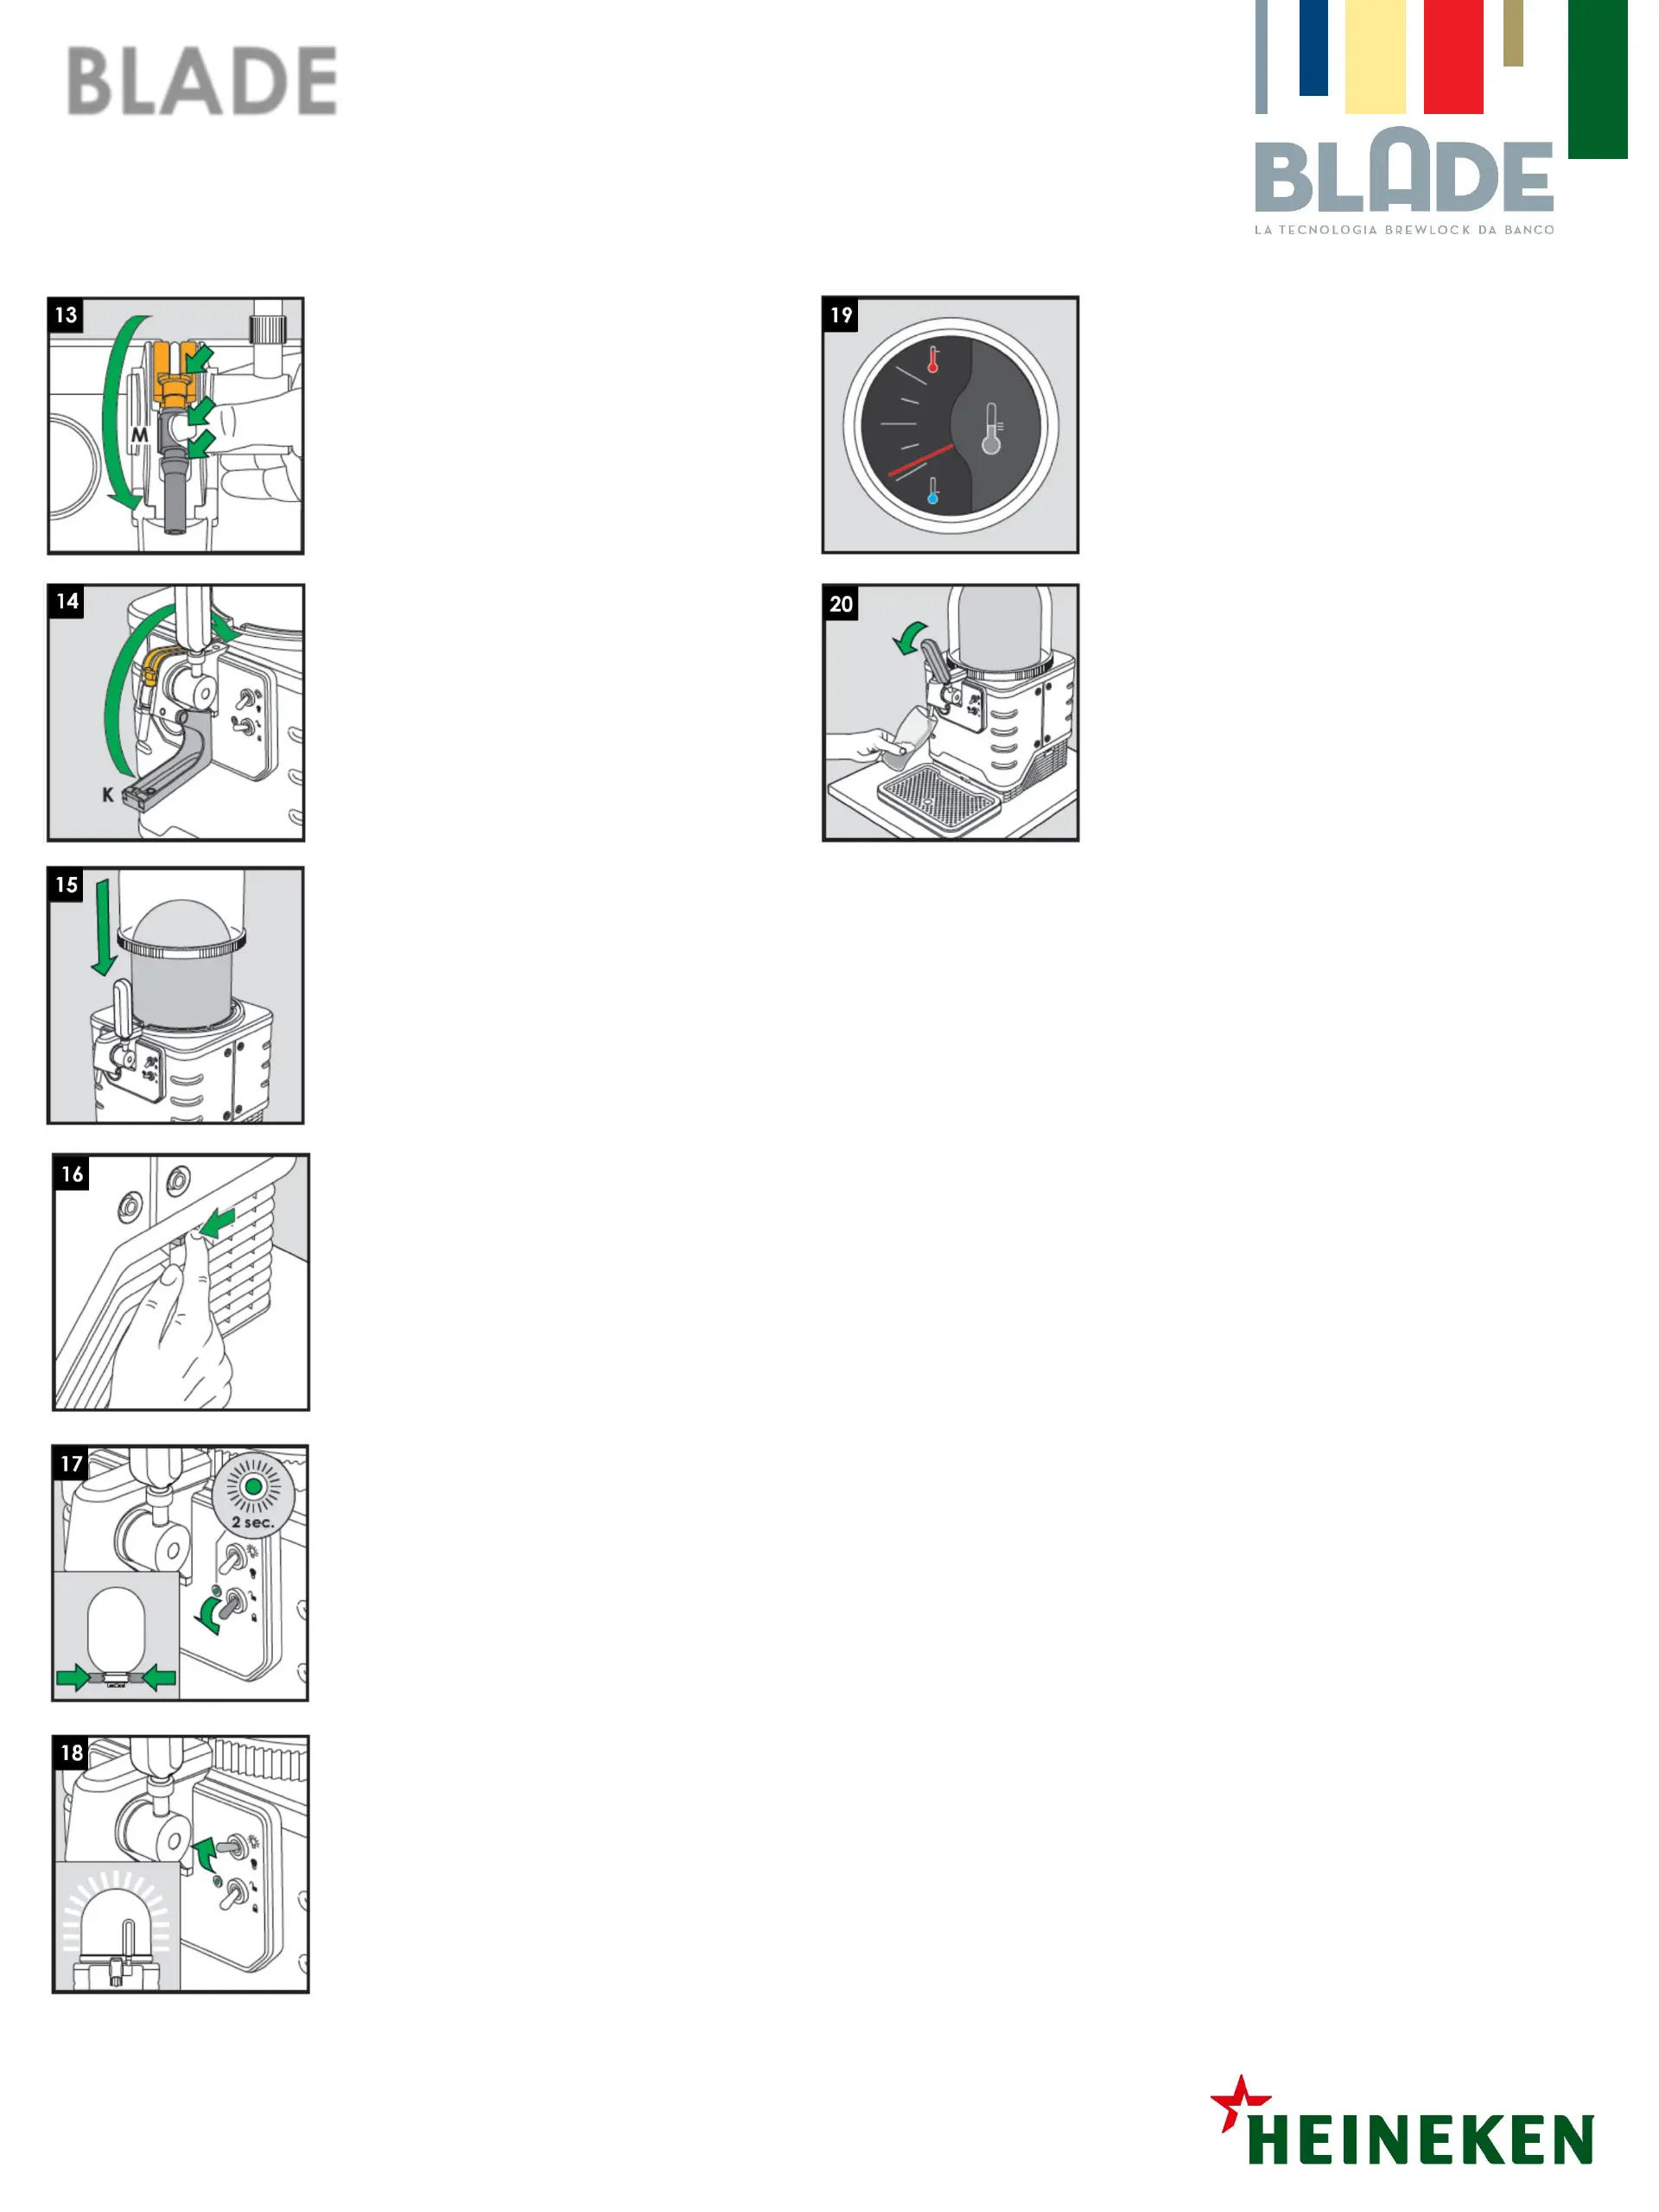
13. Fastening the «tube»
With a finger, press the end of
the “beer tube” into its housing
until hearing “click”.
14. Closing the tap
Close the tap cover.
15. Positioning the dome
Take the transparent dome out of
its packaging and place it
vertically over the installed keg.
16. Switching on Blade
Press the power switch on the
lower right side of the Blade.
17. Pressurizing the keg
Press down the bottom lever on
the right of the tap. After about 2
seconds the led at its side will
turn green showing the keg is
pressurized.
18. Lighting
Raise the top lever on the right of
the tap to switch on the leds
situated around the base of the
keg.
19. Temperature check
Check that the temperature is
correct (the needle must be
close to the first line at the
bottom) on the dial situated on
the right below the tap.
20. Tapping
The Blade is now ready and you
can pour all the beer you want
to ensure your clients enjoy a
great draft beer experience.
BLADE
Quick start
 Loading...