35
EN
lock
Arrows
insert
Arrows
insert
lock
User Manual | 92070 / 92170 eVest Clip-in/eVest
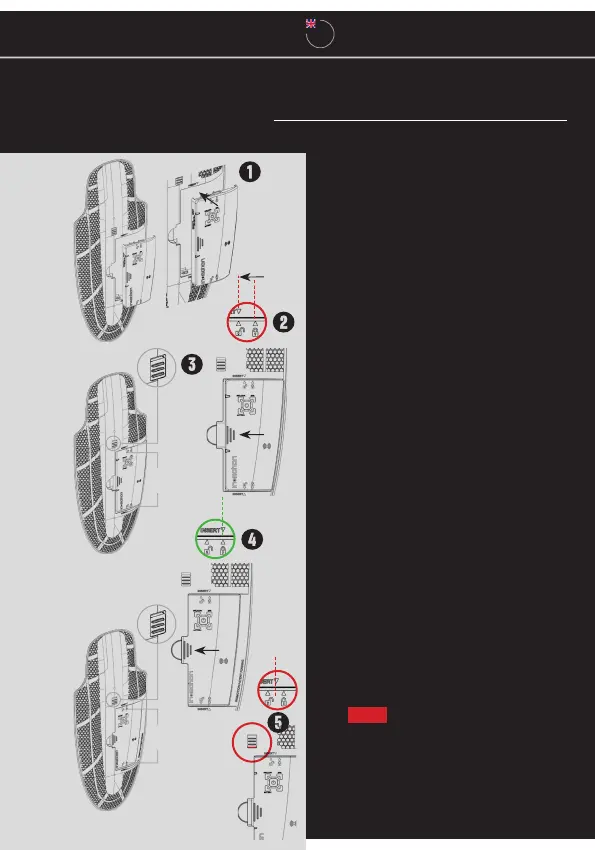
Insertion and release of the In&box
into and from the vest
01 Insert your In&box into the shell
» Place the In&box into its slot.
» The arrows pointing upwards and downwards
from the open lock symbol must align with the
arrows next to the “INSERT” lettering to the top
and bottom of the In&box’s slot.
» Whilst pulling up the locking mechanism to the
center of the shell, push the In&box to the le
side to clip it into place.
» The arrows pointing upwards and downwards
from the closed lock must align with the arrows
next to the “INSERT” lettering to the top and
bottom of the In&box’s slot.
» [Warning]: Make sure the lock is fully closed
and there is no red marking visible at the locking
mechanism to the center of the shell.
 Loading...