4
MiniVent M1/100/120 N / C
Installation and Operation Instructions
3.2 Drill holes
Set casing against the wall, mark the holes and drill. Fasten with at least 2 screws and plugs.
For surface installation the casing is provided with a side entry knockout (Fig.5, Pos.1) for the cable!
The mains supply cable is to be kept in such a way that no ingress of moisture is made possible along the
cable.
3.3 Wall or ceiling installation
3.4 Installation of extraction duct
Extraction ducts, which are installed in cold zones, must be isolated. With heavily occurring condensate, a “water
pocket” in the duct system must be integrated in an appropriate way.
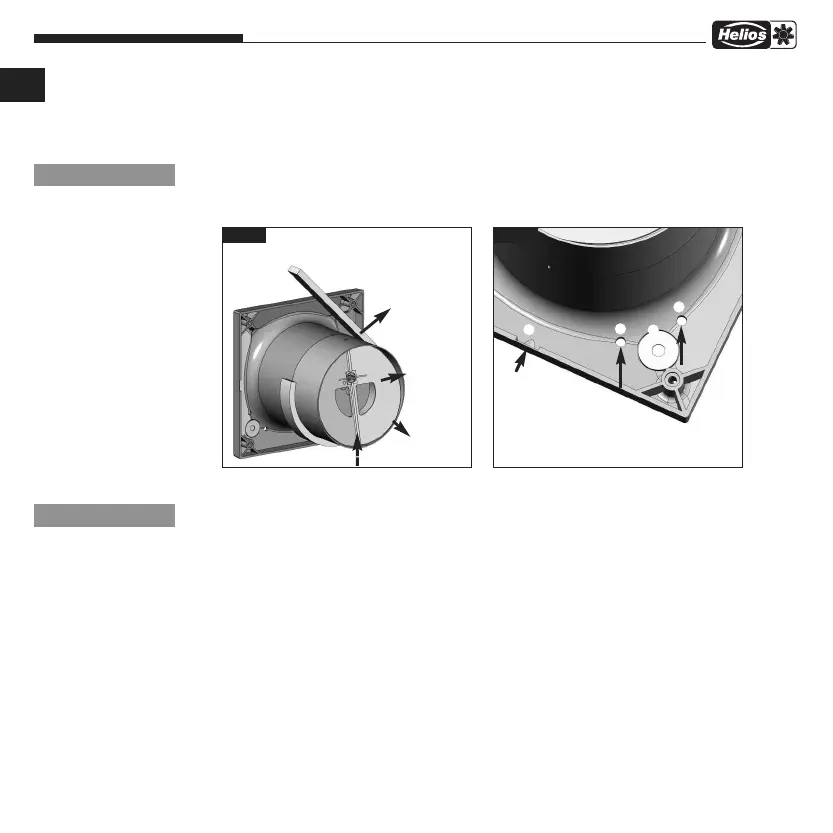
fig.5fig.4
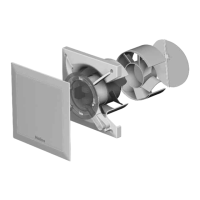
With installation of the device, the
guide vane ➎ must be mounted
vertically (as shown). Snaps into
place every 90° rotation.
➁
Ceiling suspension
pre-cut drillings because of possible
condensate formation.
➀
➀ Break out entry
knockout for cable.
➁
➁
Guide vane ➎
removable
Back dr-
aught
shutter ➏
removable
➎
Affix the
rubber foam
vertical
UK
ATTENTION
☞
NOTE
☞
➂
 Loading...