2
Instalación General /
General Installation
tezontle
gravel
concreto
concrete
adhesivo
adhesive
tezontle
gravel
concreto
concrete
NPT (nivel de piso terminado)
FFL (finished floor level)
2
5
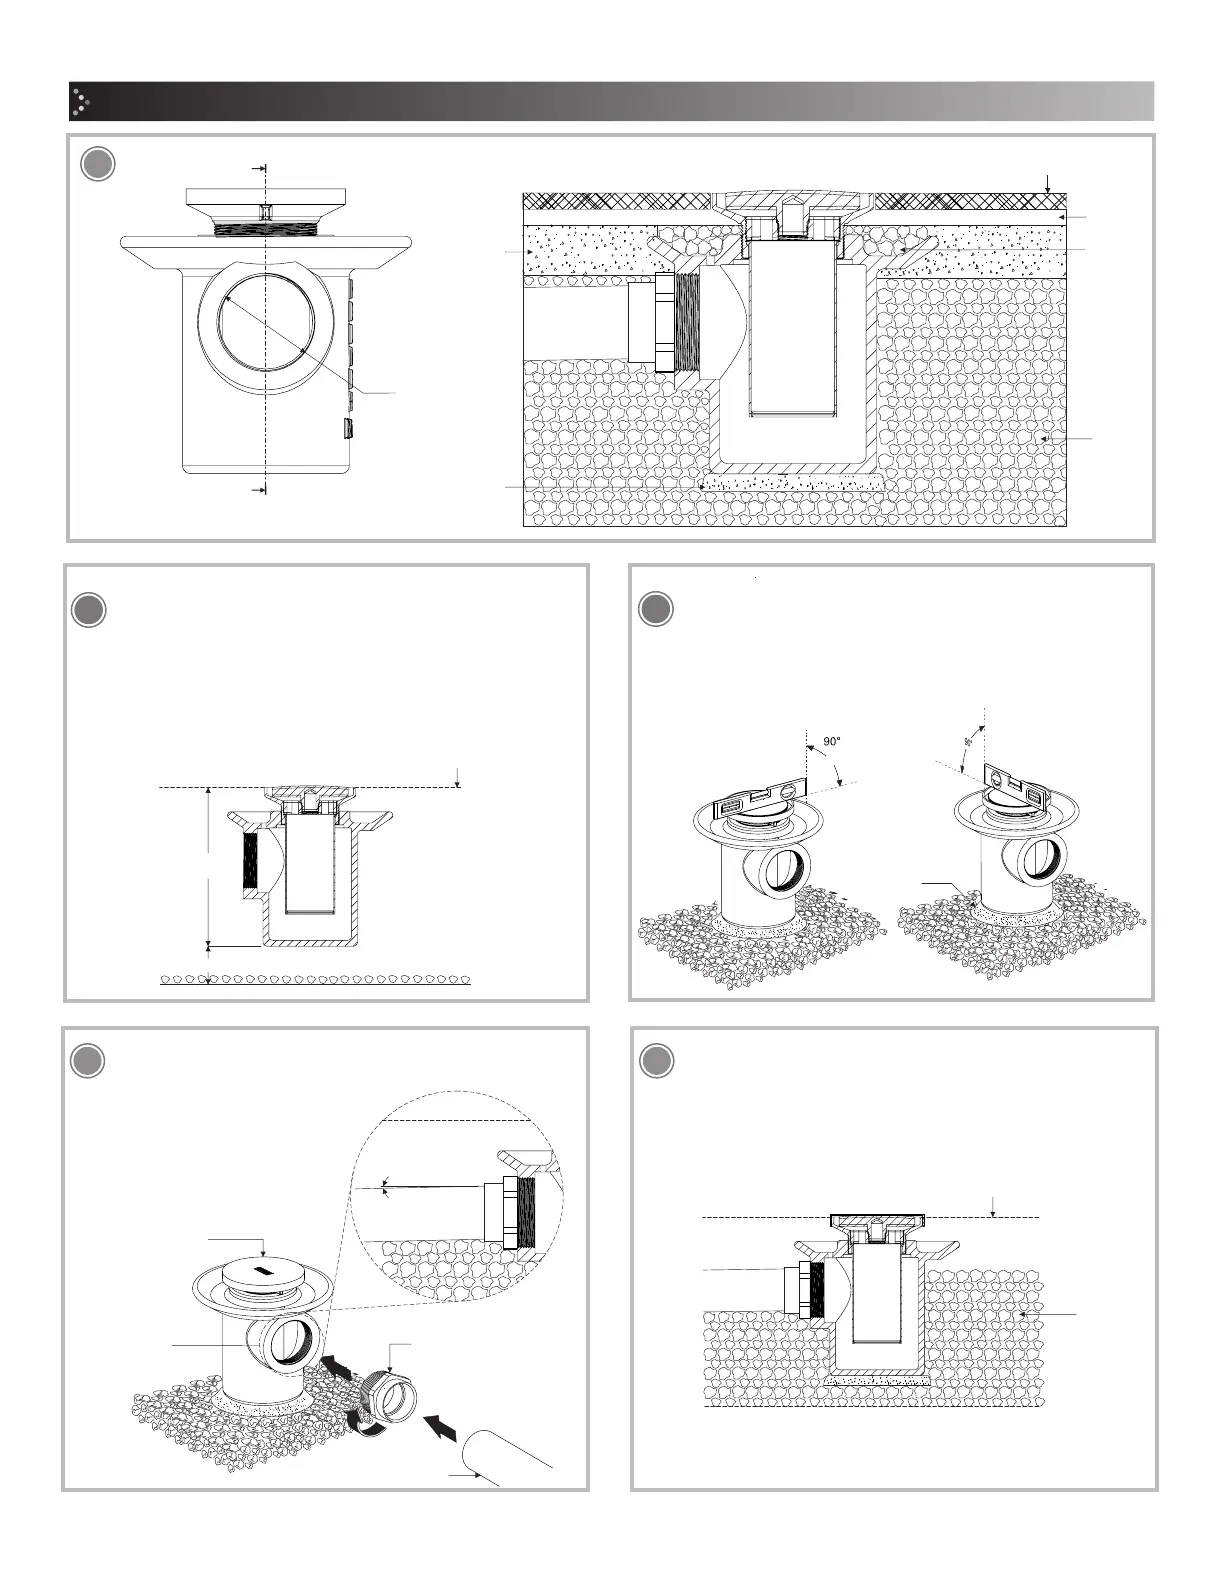
Ubique la coladera en el área a instalarse. Confirme y marque la
altura necesaria para que la coladera quede al nivel del piso
terminado. / Place the floor drain in the area to be installed.
Confirm and mark the height required for the floor drain to be
installed at the level of the finished floor.
4
Coloque la coladera encima de una base de cemento para
nivelarla y fijarla. / Place the shower drain on top of a cement
base to level and fixing it.
NOTA: Para nivelar la coladera, retire la tapa protectora y vuelva
a colocarla después de nivelar.
NOTE: To level the floor drain, remove the protective cap and
place it again after to level
tubería (no incluida)
pipe (not included)
2”-11 ½ NPSM
Enrosque el conector roscado de 2"-11 1/2 NPSM e instale la tubería con
el 2% de inclinación por cada metro. / Screw the 2"-11 1/2 NPSM threaded
connector and install the pipe with 2% tilt per meter.
6
Rellene el área con tezontle. / Fill the area with gravel.
3
tapa protectora
protective cap
a: altura de la base de fijación
fixing base height
A: altura de instalación
installation height
A
a
conector roscado de
2"-11 1/2 NPSM
2"-11 1/2 NPSM
threaded connector
NPT
FFL
cemento
concrete
NPT
FFL
tezontle
gravel
2%
salida
outlet
2"-11 ½ NPSM
A
A
VISTA FRONTAL / FRONT VIEW
SECCIÓN A-A / A-A SECTION
 Loading...