3
7
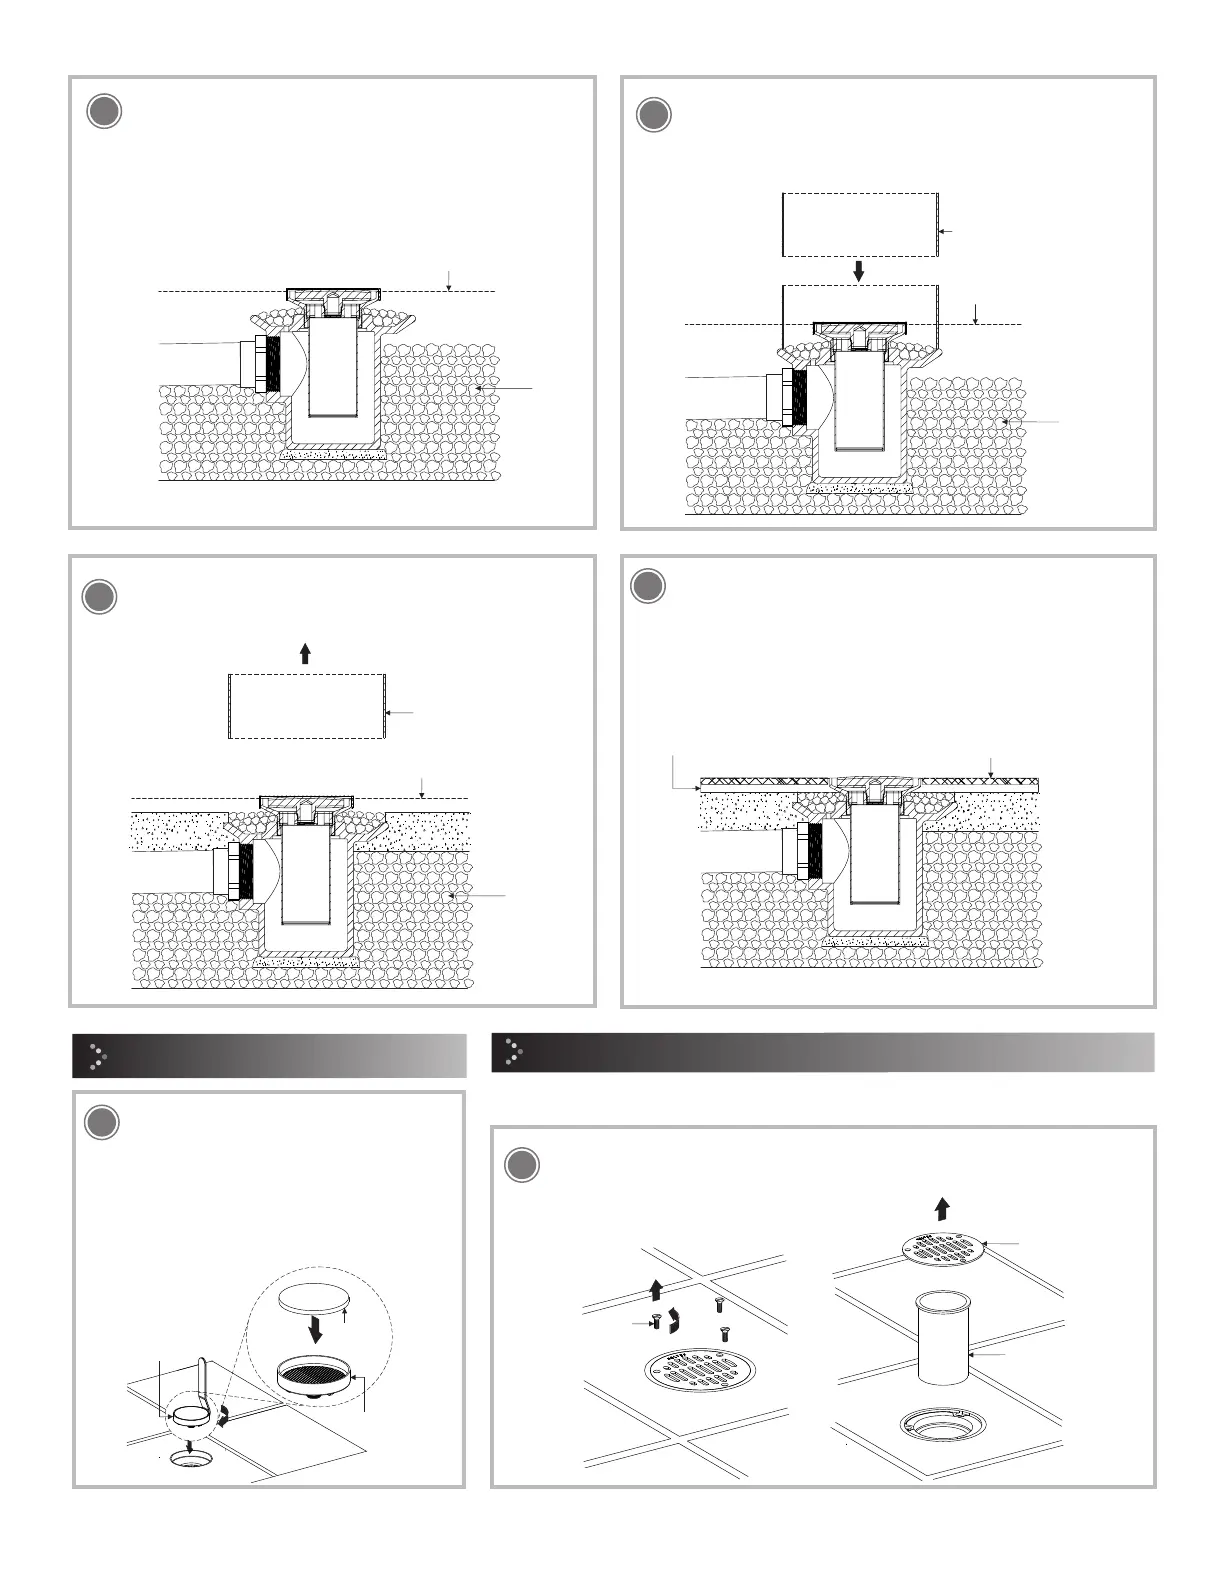
Coloque tezontle en el plato de la coladera. / Place the gravel
over the floor drain receptor.
8
Coloque una sección de tubo PVC sanitario para separar la contra
del concreto cuando se coloque. / Place an PVC sanitary tube
section to separate the adjustable drain barrel from the concrete
when placed.
Coloque el concreto y cuando seque retire la sección del tubo de
PVC. / Place the concrete and when dry remove the PVC tube
section.
9
10
Coloque el adhesivo y el acabado final. / Place the adhesive and the
final finished.
NOTA: Retire la tapa protectora de la contra para insertar el acabado final.
NOTE: Remove the protective cap from the counter to insert the final finished.
tubo PVC sanitario
PVC sanitary tube
12
porta inserto
con inserto
insert holder
with insert
inserto
insert
Para los modelos 24-HLI y 24-CHLI, corte el
acabado final a la medida del porta inserto y
colóquelo con el adhesivo correspondiente. /
For model 24-HLI and 24-CHLI, cut the final
finish to fit the insert holder and place it with the
corresponding.
porta inserto
insert holder
Instalación General /
Mantenimiento
/ Maintenance
tornillo
screw
casquillo
bushing
rejilla
grid
11
Para los modelos 4 y 2 CH, desenrosque los tornillos y retire la rejilla.2 4- / For
models 4 and 24-CH, unscrew the screws and remove the grid.2
Instalación General /
Ceramic Insert Installation
Instalación del Inserto Cerámico /
Retire el casquillo para limpiar la coladera. / Remove the bushing to clean the inside of
floor drain.
NPT
FFL
tezontle
gravel
NPT
FFL
tezontle
gravel
tubo PVC sanitario
PVC sanitary tube
NPT
FFL
tezontle
gravel
NPT
FFL
adhesivo
adhesive
 Loading...