33
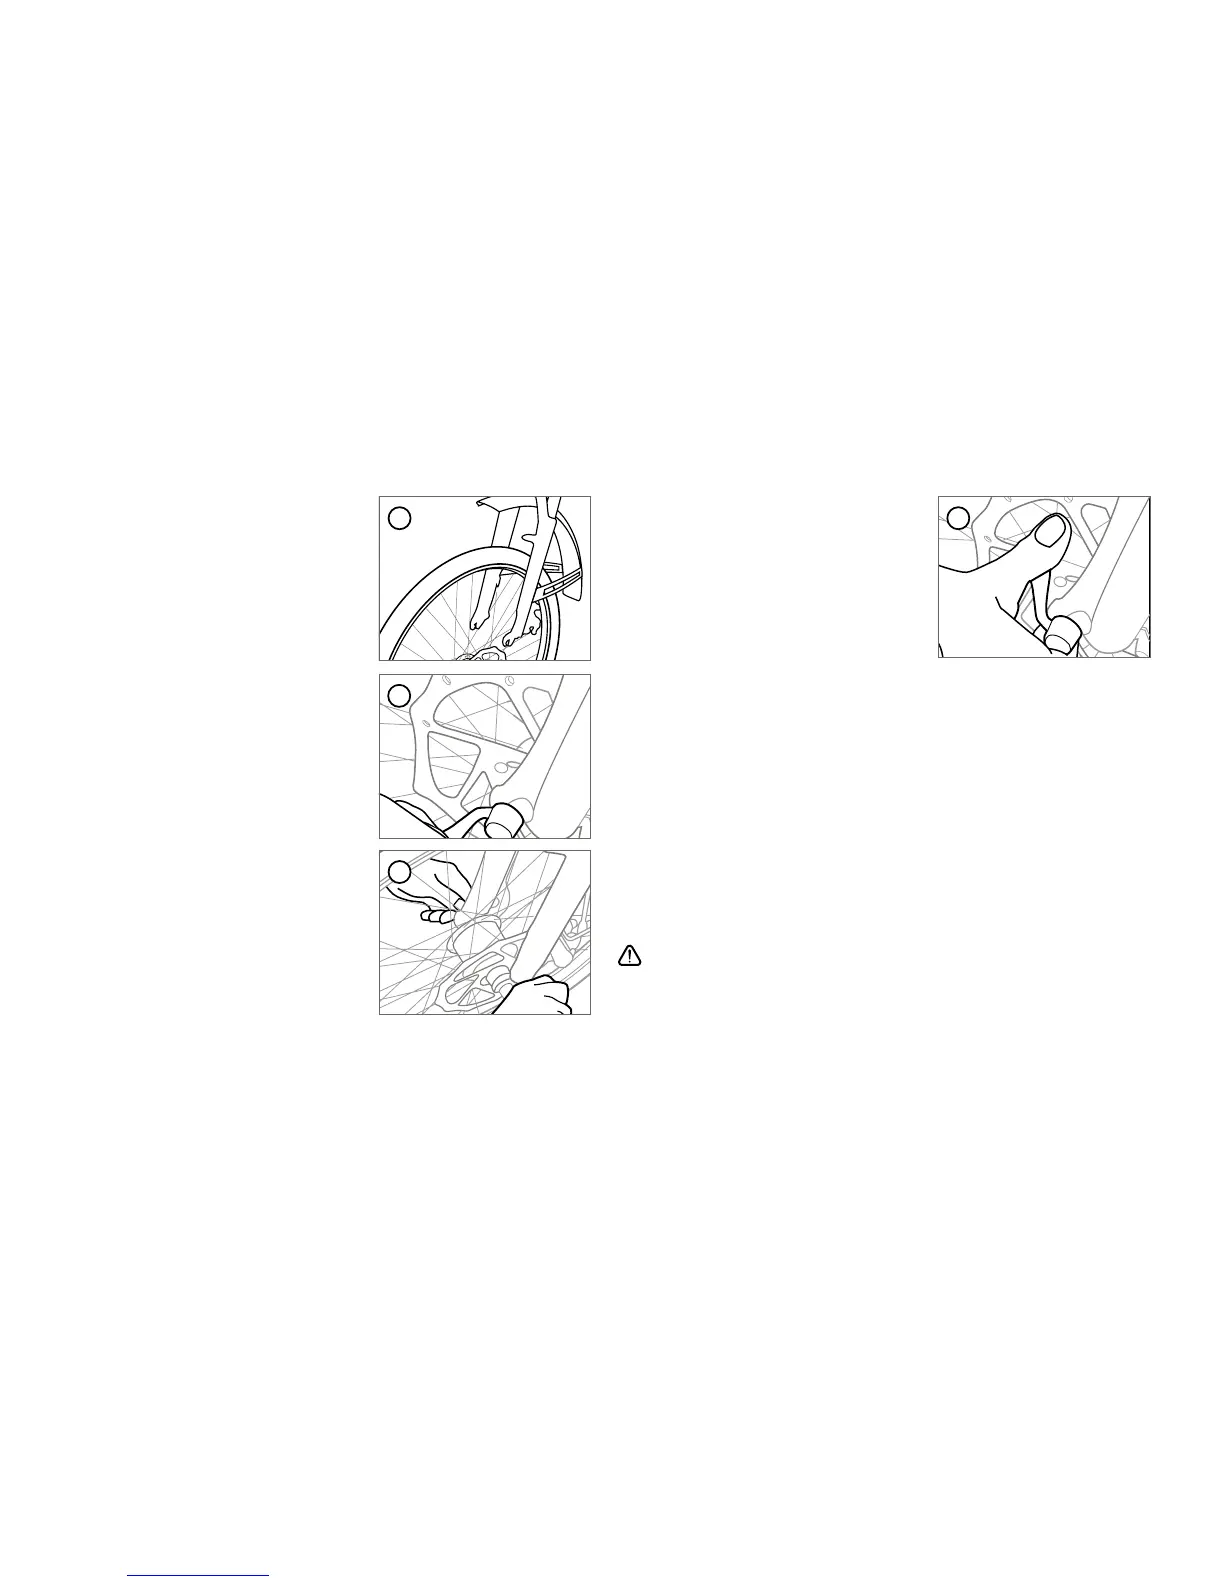
4. Firmly grip the fork with your left
hand, and push the lever over to
the closed position towards the
fork, ensuring that it does not pro-
trude so as to cause injury to the
rider. The lever is securely tight-
ened when it takes a
significant amount of force to
position it in the closed position. The appropriate amount of
force necessary to close the lever when it is properly adjusted
will result in an imprint of the lever in the palm of your hand.
Once closed, the OPEN designation on the lever will no longer
be visible. When properly closed, it is impossible to move
unless you open it again by reversing the steps above. If you
can easily move it, open the quick release lever and tighten the
adjusting nut another 180º and try again.
* Ensure that the brake disc is correctly inserted into the brake
callipers and is correctly adjusted.
If you are unsure about this brake set-up and adjustment
procedure, please take your A2B to your A2B dealer and ask for
assistance in adjusting the brakes. Improperly adjusted brakes may
cause reduced braking performance, leading to an accident that
could result in serious or fatal injury and/or property damage. DO
NOT ride your vehicle if you are not confident that the brakes are
working properly.
Re-installing front wheel
1. Position the wheel in the front fork
so that the quick release lever is
located on the left side of the front
fork.
2. Move the quick release lever to
the OPEN position (lever curves
away from the hub) and position the
wheel in the front fork so that the
axle is located in the fork
drop-outs.
3. Turn the adjusting nut on the right
side of the hub clockwise such that
you feel resistance to closing the
lever when the lever is parallel to
the centreline of the hub.
1
2
4
3



 To Next Page