Do you have a question about the HHB CDR-800 and is the answer not in the manual?
| Brand | HHB |
|---|---|
| Model | CDR-800 |
| Category | Recording Equipment |
| Language | English |
Install in a well-ventilated location, away from heat, sun, and moisture.
Consult service center for cleaning; use specialized cleaners carefully.
Allow unit to stand for an hour or warm room gradually if condensation forms.
Avoid placing near heat sources, tuners, TVs, or on unstable surfaces.
Wipe with a soft, dry cloth or damp cloth with mild detergent.
Store discs vertically in a cool, dry environment away from extreme temperatures.
Handle discs by edges and center hole; clean gently.
Do not move the unit during high-speed disc rotation to avoid damage.
Allows recording on CD-R discs with high sound quality and durability.
Plays back finalized CD-R, partially recorded CD-R, and prerecorded CDs.
Finalized CD-R discs play on any CD player like ordinary CDs.
Converts digital sources to 44.1 kHz sampling frequency for CD compatibility.
Provides high accuracy and preserves original music quality with zero-cross distortion.
Stabilizes operations and reproduces rich medium and low frequencies.
Reduces cross-interference for high-purity musical signal reproduction.
Records digital sources in sync with playback of source component.
Reduces vibrations for improved frequency response and clarity.
Controls copying permissions for created CD-R discs.
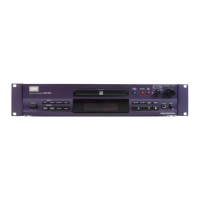
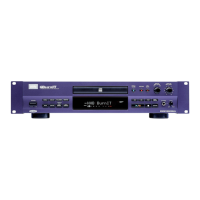
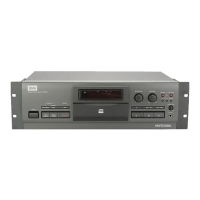
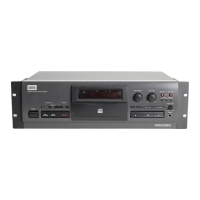
Front panel designed for 19-inch EIA standard rack mounting.
Instructions for inserting AAA/R03 batteries into the remote control.
Tips for battery usage, including polarity and mixing types.
Details on CD-R and CD discs compatible with the recorder.
Information on CD-R discs, including recordable space and type.
Details on standard CD discs and their compatibility.
Instructions for cleaning discs to ensure proper playback and recording.
Guidelines for storing discs to prevent warping and damage.
Connect to equipment with balanced output jacks for reduced noise.
Sets copy permission/prohibition using SW2 DIP switches.
Requires separate purchase of a cable for balanced connection.
Connect to digital output jacks on sources like CD players.
Handle optical cables carefully to prevent damage and ensure connection quality.
Instructions for using and storing terminal caps for coaxial connectors.
Connect analog sources using RCA or XLR connectors.
Overview of operations performable by remote control buttons.
Enables/disables remote control via wireless or parallel input jacks.
Connect external switches for remote operation, prioritizing parallel control.
Specifies the operational range and angle for the remote control.
Notes on operating the remote to avoid errors or decreased range.
POWER switch, POWER indicator, and COPY BIT indicator.
Disc loading tray, Open/Close, and FINALIZE buttons.
INPUT SELECTOR, DIGITAL SYNCHRO, REC LEVEL, and other recording buttons.
Play, Stop, Pause, search, and headphone controls on the front panel.
Lights and blinks indicating recording, playback, and status modes.
Shows operational messages, input status, and error codes.
Allows checking recording/playback time and switching display modes.
Procedure for inserting and ejecting discs, including disc type identification.
Shows disc status like 'NEW DISC', 'CD-R', or 'ROM'.
Records one track automatically, stops after the track. Convenient for edited recording.
Records all tracks automatically, stops after last track. Convenient for full disc recording.
Records all DAT tracks automatically, using DAT start IDs for track numbering.
Records from digital sources without home-use digital code. Start/stop manually.
Records analog output from source equipment. Input level can be monitored.
Set digital copy permission/prohibition using SW2 switch.
Set digital copy permission/prohibition using SW2 switch.
Confirm unit is in stop mode, pause DAT before start, avoid search/programmed playback.
Set digital copy permission/prohibition using SW2 switch.
Adjusts detection sensitivity for automatic track number writing.
Explains how to write track numbers manually or automatically.
Set digital copy permission/prohibition using SW2 switch.
Final processing to make a CD-R playable on ordinary CD players.
Step-by-step guide for finalizing a recorded CD-R disc.
Procedure to begin playing a disc using the play button.
Select specific tracks using numeric buttons on the remote.
Skip to the next or previous track using track search buttons.
Fast forward or rewind within a track using manual search.
Restart recording on a disc with remaining time, before last recorded track.
Display shows remaining recordable time on the disc.
Initiate record-pause mode to check recording status and end point.
Warning about consequences of power interruption during recording.
Notes on how digital signal interruption affects recording.
Unit is designed for audio signals only; non-audio signals are not recorded.
Create silent tracks or blanks using REC MUTE button.
Gradually increase recording level at the start of recording.
Gradually decrease recording level at the end of recording.
Automatic fade-out occurs when recording time falls below 3 seconds.
Stops recording automatically during digital input interruption.
Ensures tracks are at least 4 seconds long, adding blank space if needed.
Manually set track numbers by pressing the MANUAL WRITE button.
Automatically writes track numbers based on detected track intervals.
Set skip IDs to tracks to be skipped during playback.
Remove skip IDs from tracks to allow them to play during playback.
Set 1-track repeat or all-track repeat for continuous playback.
Displays individual track playing times in forward or reverse order.
Applies fade-in/fade-out effects during pause or playback.
Enables playback to skip tracks with set skip IDs.
How to load a disc and initiate skip playback.
Select and order tracks for playback using the PGM button.
Programmed playback starts automatically after normal playback completes.
Erases all programmed tracks from memory.
Removes individual tracks from the programmed playback sequence.
Displays programmed track numbers and their sequence.
Modifies existing tracks in the program with new track numbers.
Displays diagnostic messages for unit errors.
Displays messages concerning recording status and errors.
Displays messages concerning playback status and errors.
Troubleshooting for power, playback, recording, sound, remote control, and skip issues.
General model information, power, and operating conditions.
Technical specifications for audio performance and signal processing.
Details on all analog and digital input/output connections.
List of available recording modes and functions.
List of available playback modes and functions.
List of included accessories with the unit.