EasyManua.ls Logo

Hifonics ZS35CX - User Manual

Hifonics ZS35CX
2 pages
Print Icon
To Next Page IconTo Next Page
Loading...
Quick Start
Installation Guide
ZS35CX - ZS4CX
ZS46CX - ZS525CX
ZS5768CX - ZS65CXS
ZS65C - ZS653
ZS693
Vehicles that have premium
sound systems will often
have separate tweeters in
a dash or door location.
Try to use this location for
mounting the component
tweeter if possible.
If there is not a suitable
factory location for woofer
or tweeter to be mounted,
custom mounting may be
necessary. Before making
any permanent changes to
your vehicle make sure there
is adequate mounting depth.
There are two primary
ways the tweeter can be
mounted. Surface and Flush
mounting. The ush mount
conguration is shown here.
The crossover is necessary for the proper operation of
the component speaker system. Secure the crossover
to a surface that is free of interference from window
mechanisms and excessive moisture.
Factory location
behind door panel
Custom location
Tweeter mounting
Crossover wiring
A
B
C
D
Component installation
Question and Answer IconNeed help?

Do you have a question about the Hifonics ZS35CX and is the answer not in the manual?

Summary

Component Installation Guide

Factory Location Behind Door Panel

Use the factory tweeter location behind door panels for premium sound systems if available.

Custom Mounting Location

Custom mounting may be necessary if no suitable factory location exists. Check mounting depth.

Tweeter Mounting Methods

Details on surface and flush mounting options for tweeters, with the flush configuration shown.

Crossover Wiring and Securing

Secure the crossover away from interference and moisture for proper operation.

Speaker Installation Procedures

Factory Speaker Removal

Guidance on accessing and removing factory door and rear speakers, noting panel removal techniques.

Coaxial Speaker Installation Locations

Details on installing speakers in factory door, small panel, custom, or rear locations.

Speaker Fit and Wiring Check

Verify speaker fit and depth, and use factory boots for routing wires.

Overview

This document provides an installation guide for Hifonics car speakers, covering both component and coaxial speaker systems. It offers detailed instructions for various mounting scenarios, technical specifications, and important considerations for installation and maintenance.

Component Speaker Installation

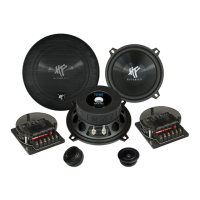
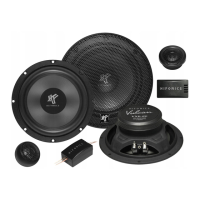
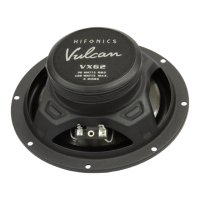
Function Description: Component speaker systems, such as the Hifonics ZS35CX, ZS4CX, ZS46CX, ZS525CX, ZS5768CX, ZS65CXS, ZS65C, ZS653, and ZS693, are designed to deliver high-quality audio by separating the woofer and tweeter. This allows for optimal placement of each driver to achieve a superior sound stage. The system includes a crossover network to properly distribute audio frequencies to the respective drivers.

Usage Features:

  • Factory Location (Behind Door Panel): For vehicles with premium sound systems, tweeters are often located in the dash or door. This is the preferred location for mounting the component tweeter.
  • Custom Location: If suitable factory locations for the woofer or tweeter are unavailable, custom mounting may be necessary. Users must ensure adequate mounting depth before making permanent changes to the vehicle.
  • Tweeter Mounting: Two primary methods for tweeter mounting are surface mount and flush mount. The guide specifically illustrates the flush mount configuration.
  • Crossover Wiring: The crossover is essential for the correct operation of the component speaker system. It must be securely mounted to a surface free from interference from window mechanisms and excessive moisture.

Maintenance Features:

  • Ensure proper wiring connections to the crossover to prevent damage to the speakers and ensure optimal sound quality.
  • Regularly check the mounting of the crossover to ensure it remains secure and free from moisture or interference.

Coaxial Speaker Installation

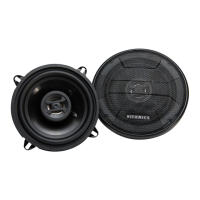
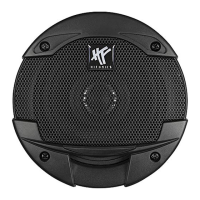
Function Description: Coaxial speakers integrate the tweeter and woofer into a single unit, simplifying installation while still providing enhanced audio quality compared to factory speakers. The Hifonics coaxial speakers are designed to replace existing factory speakers in various vehicle locations.

Usage Features:

  • Factory Location (Behind Door Panel): Once the speaker fit and clearance are confirmed, connect the positive and negative wires to the appropriate terminals. Securely screw the speaker into place and replace the door panel.
  • Factory Location (Behind Small Panel): Similar to the behind-door-panel installation, confirm fit and clearance, connect wires, secure the speaker, and replace the speaker cover panel.
  • Custom Location: For vehicles without a suitable door speaker location, custom installations are possible but more challenging. Professional installation is recommended in such cases.
  • Rear Factory Locations: Rear speakers are typically accessed from the trunk. This may involve removing the rear package tray, or a side panel in hatchbacks and SUVs. Mount the speakers in the same way as the factory speakers, ensuring positive and negative wires are correctly attached and secured.

Maintenance Features:

  • Pre-Installation Check: Before installation, confirm that the purchased speakers are the correct size for the vehicle. If unsure, professional consultation is recommended, as interior panel removal can be complex and may require special tools.
  • Factory Speaker Removal:
    • Door Speakers: Modern vehicles often have door speakers mounted directly to the door structure. Access is achieved by removing the door panel. Some vehicles may only require removing a small panel around the speaker.
    • Rear Speakers: Most rear speakers are accessed from within the trunk, potentially requiring the removal of the rear package tray or a side panel in hatchbacks and SUVs.
  • Fit and Wiring: After removing factory speakers, check the fit and depth clearance for the new speaker by rolling the window up and down while holding the speaker in place. If running new wires, use factory harness boots and grommets where possible.
  • Wiring Precautions: When using supplied speaker wire, route it through the factory boot. Avoid contact between speaker wires and metal edges of doors or other access holes to prevent damage.
  • Professional Installation: Always consider consulting a professional audio installer, especially if unfamiliar with car panel removal or wiring.

Important Technical Specifications (Speaker Dimensions)

The following table provides detailed dimensions (in inches and millimeters) for various Hifonics speaker models, crucial for ensuring proper fit in vehicle locations.

Model A (mm) B (mm) C (mm) D (mm) E (mm) F (mm)
ZS35CX N/A 1.63" (41) 2.13" (54) 2.76" (70) 3.1" (79) 4.62" (117)
ZS4CX N/A 1.78" (45) 2.08" (53) 2.76" (70) 3.72" (95) 4.02" (102)
ZS46CX N/A 1.77" (45) 2.12" (54) 2.76" (70) 3.53"/5.68" (90/144) 3.86"/6.02" (98/153)
ZS525CX 6.2" (158) 2.15" (55) 2.48" (63) 3.15" (80) 4.56" (116) 5.14" (131)
ZS5768CX N/A 2.15" (55) 2.52" (64) 3.15" (80) 4.92"/7.09" (125/180) 5.48"/8.68" (139/220)
ZS65CXS 6.91" (176) 1.71" (44) 1.92" (49) 3.15" (80) 5.64" (143) 6.49" (165)
ZS653 6.91" (176) 2.09" (53) 2.54" (65) 3.15" (80) 5.59" (142) 6.58" (167)
ZS65C 6.91" (176) 2.09" (53) 2.54" (65) 3.15" (80) 5.59" (142) 6.58" (167)
ZS693 7.07"/10.24" (180/260) 2.93" (75) 3.59" (91) 3.94" (100) 5.98"/8.74" (152/222) 6.5"/9.25" (165/235)

These dimensions are critical for verifying speaker compatibility with vehicle openings and ensuring adequate mounting depth. Always measure the available space in your vehicle before purchasing and installing speakers.

Hifonics ZS35CX Specifications

General IconGeneral
BrandHifonics
ModelZS35CX
CategorySpeakers
LanguageEnglish

Related product manuals