INSTALLATION
1)
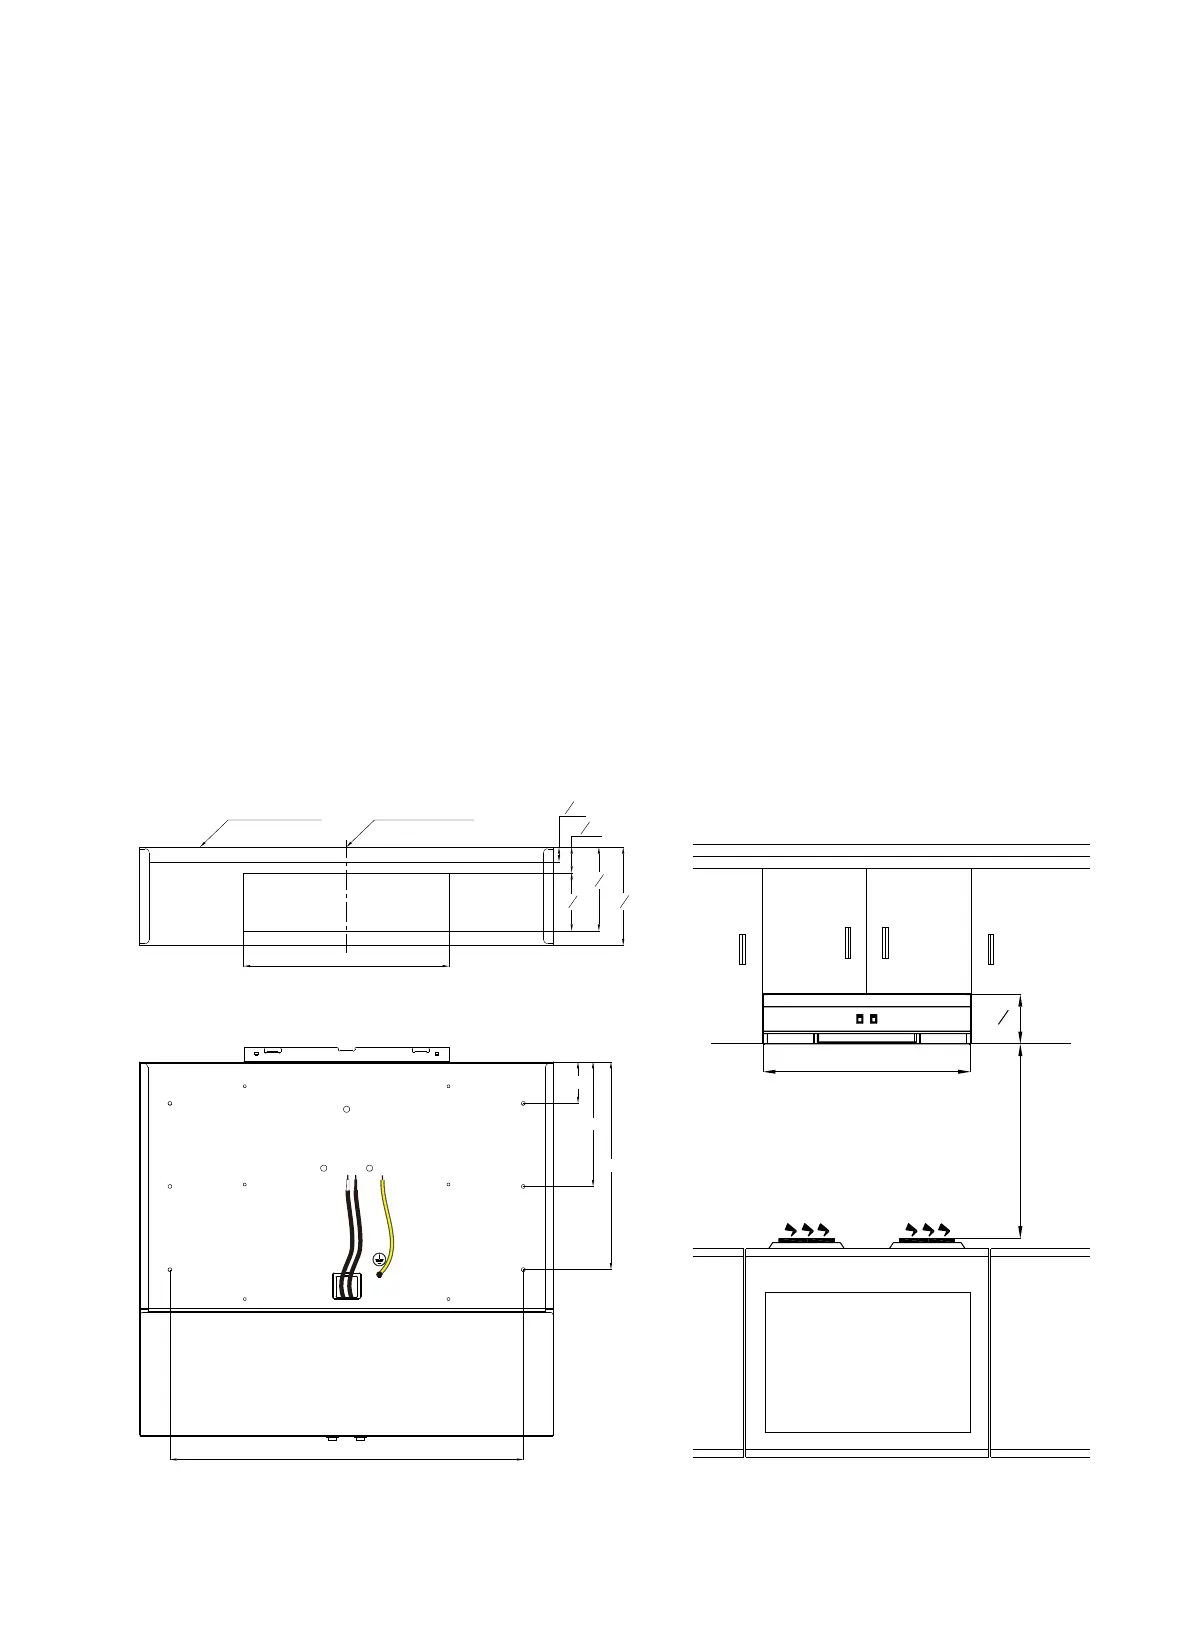
Mark centerline of range on wall and underside of cabinet and measure 5" from each side of
centerline on wall.
2)
Cut 10” x 2 7/8” hole located 1 13/16” down from rear cabinet edge, centered left to right with
range centerline through wall.
3)
Route electrical supply wire through opening and attach proper connector for type of wire
used.
4)
Attach extension duct to hood outlet if needed and insert duct into wall opening and attach
hood to underside of cabinet with screws of sufficient length through the four (4) mounting
holes.
NOT
E: Make all electrical supply connections in accordance with local and/or applicable codes.
5)
Remove the single screw holding the wiring compartment cover in place. Connect white to
white, black to black and attach bonding wire to green ground screw provided. Replace
wiring compartment cover by inserting tab on cover into the slot located on side of blower
housing and re-attach screw. Make sure all wiring is safely enclosed inside compartment.
6)
Verify that blower housing and ductwork are free of debris and that fan blade spins freely.
Install a suitable outside wall vent per manufacturers instructions if instruc
tions are
provided.
Note: The range hood must be placed at a minimum distance of 20” above the
of a hob. If the
total wall thickness requires the use of a duct
extension,
use
C0157
as per
below.
20"/22"/24"
Min. 20"
Max. 30"
4
3
4
"
2"
6"
10"
17"
GROUND
WIRE
GROUND
SCREW
WHITE
WIRE
(-)
BLACK
WIRE
(+)
1
3
16"
10"
2
7
8"
4
3
4"
4
1
8"
11
16"
BOTTOM OF
CABINET
CENTERLINE
OF RANGE
cooking
surface
 Loading...