3
HSL Mini-Matrix Quick Setup Guide
INSTALLATION
SECTIONS
Table of Contents
1 3
2
Installing the KVM
General
• Verify that all peripherals and computers are turned off prior to
connecting them to the product.
• The KVM’s back panel is divided into Console Ports and Computer
Ports sections.
– Connect peripherals which are due to be shared by the KVM
to the Console ports.
– Connect each computer that requires access to the shared
peripherals to a Computer port group.
– Make sure that every computer is connected to a separate
Computer port group.
– Computer port group numbers are represented by push
buttons on the product’s front panel.
– Switch peripherals between computers by pressing the push
buttons on the product’s front panel.
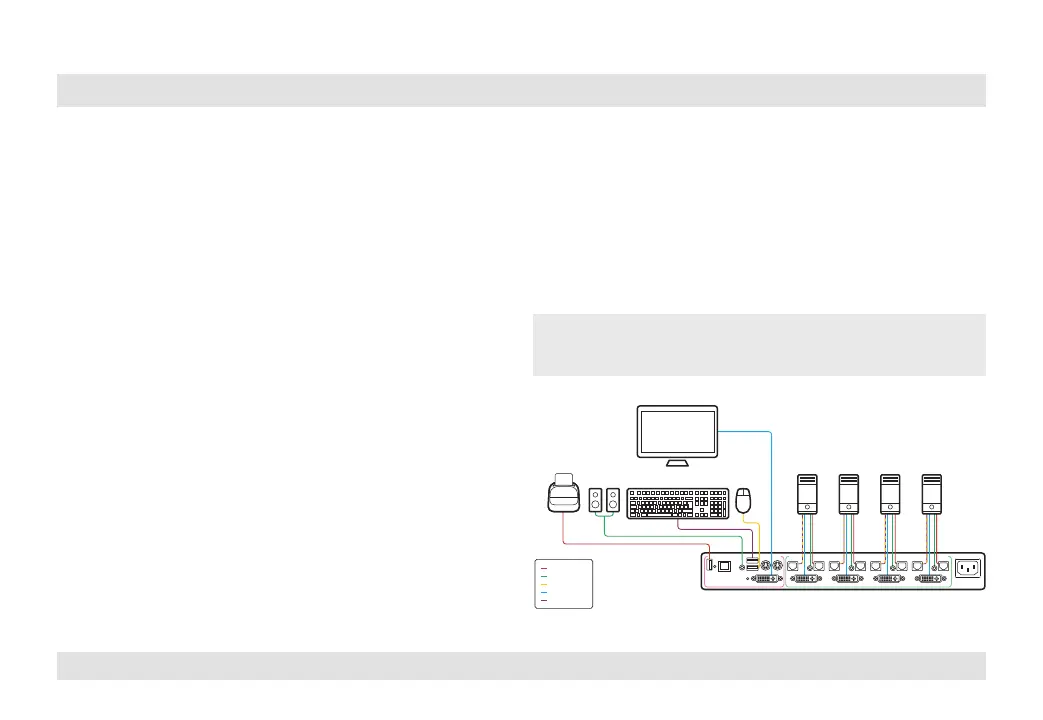
Step 1 – Connect peripherals to the KVM Console ports:
• Keyboard: Connect either a USB or PS/2 keyboard to the
corresponding KVM console keyboard port.
• Video: Connect the monitor cable to the KVM console video port.
• Mouse: Connect either a USB or PS/2 mouse to the corresponding
KVM console mouse port.
• Audio peripherals: Connect headphones / speakers to the KVM
console audio-out port.
• USB peripherals: Connect USB peripherals to the KVM console
fUSB port.
Note: Authentication devices such as smartcard and biometric readers are
enabled by default, other devices must be explicitly whitelisted – for further
information please refer to the KVM Administrator’s guide.
fUSB Cable
Audio Cable
Mouse Cable
Display Cable
Keyboard Cable
Smart-Card
Reader
Computers
CONSOLE PORTS COMPUTER/SOURCE PORTS
Audio Keyboard Mouse
 Loading...