Option 2: Launch using cable
Optionally, HiKam A7 can be configured and operated using a LAN cable. If wished, you can switch the
connection from LAN to WLAN later.
- Follow Steps 1, 2 and 3 of Preparation (see above).
- Connect the camera to the router using a LAN cable. Make sure the router is connected to the internet and
DHCP is activated.
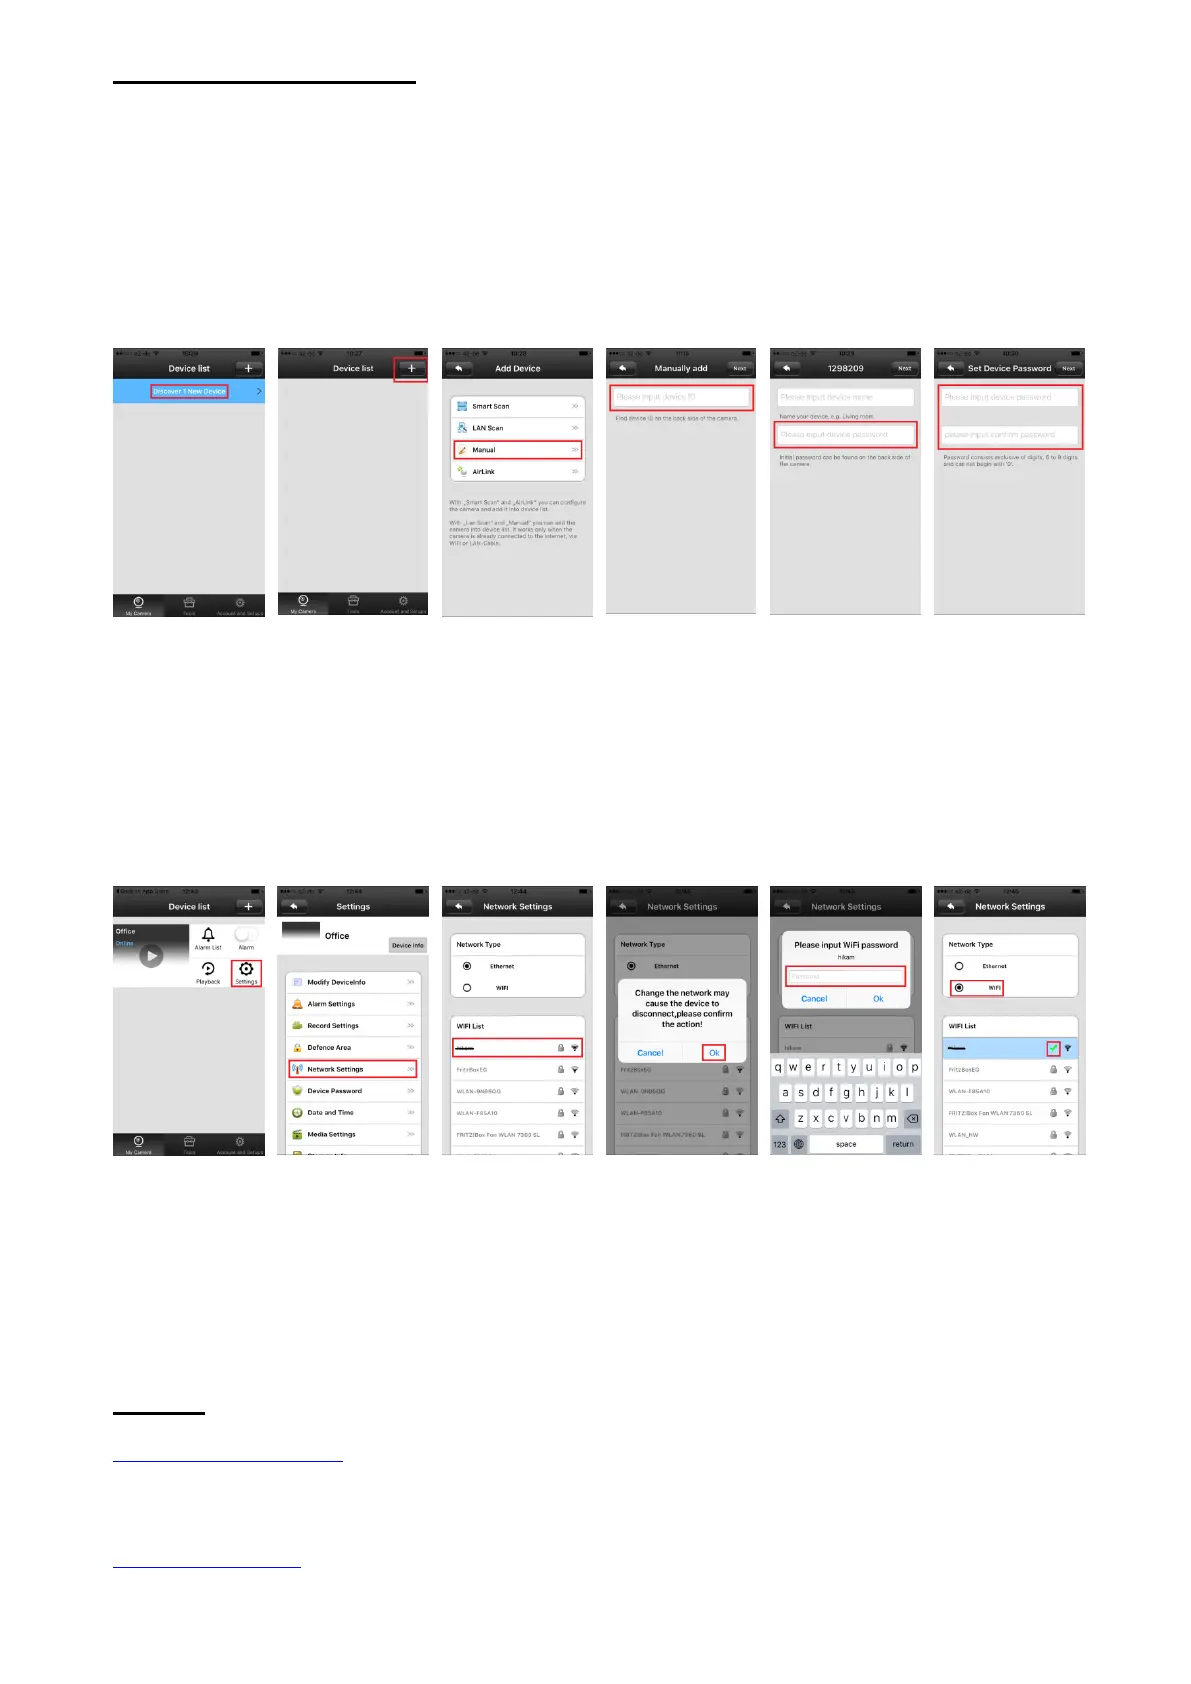
- Open app and wait a few seconds. Camera will be detected automatically (see picture 7). If not, you can add
the camera manually (see pictures 8, 9 and 10). You can find the device ID on the underside of the camera, please
note this number and keep it for future use.
- You are asked to name the camera and to enter the initial camera password which is 123. (see picture 11)
- You will then be asked to enter a new password, consisting of 6-9 digits. Please do NOT start with “0”
(see picture 12)
- You can now follow the live video stream on your smartphone
- You can now switch from LAN to WLAN or skip this step: My Camera -> Settings -> Network Settings ->
Choose WLAN -> Confirm -> Enter WLAN password (see pictures 13 to 17)
- If the green CHECK behind the WiFi appears, you successfully switched from LAN to WLAN. (see picture
18)
Please read the annex for mounting instructions.
Support:
http://support.hi-kam.com
For further instructions, video tutorials, software, data sheets, specs, FAQs.
service@hi-kam.com
Guaranteed feedback within 24hrs, often within 4hrs.