Do you have a question about the HIKVISION DS-2CE12DF3T-FS and is the answer not in the manual?
This document outlines the features, installation, and menu descriptions for a 2 MP Full Time Color Camera, available in various models (Type I, Type II, Type III, Type IV, and Type V). The camera is designed for surveillance applications, offering continuous color imaging and advanced video processing capabilities.
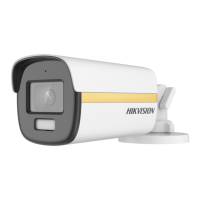
The 2 MP Full Time Color Camera is a high-performance surveillance device equipped with a CMOS sensor, capable of delivering 2-megapixel resolution. A key feature is its ability to provide 24-hour color images, ensuring clear and detailed visuals even in low-light conditions. This is achieved through its "Smart Light" function, which intelligently adjusts supplemental lighting to maintain image quality.
The camera incorporates an On-Screen Display (OSD) menu, allowing users to configure various parameters directly from the device. This includes settings for video format, exposure, video adjustments, audio, smart light, and other functions. The camera supports multiple video output formats, including TVI, AHD, CVI, and CVBS, providing flexibility for integration into different surveillance systems. Users can switch between these formats by pressing and holding a dedicated switch button for 5 seconds.
Audio capabilities are a significant aspect of this camera, particularly for DF8T series models. It offers high-quality audio recording through a built-in microphone and supports audio over coaxial cable. For models with a "Line-in" interface, external pick-up devices can be connected, allowing for versatile audio input options. The audio mode can be set to AUTO, BUILT-IN (using the internal microphone), or LINE IN (for external pick-up), with adjustable volume levels.
The camera's exposure control includes several modes to adapt to varying lighting conditions: GLOBAL, BLC (Backlight Compensation), HLC (Highlight Compensation), WDR (Wide Dynamic Range), and HLS (Highlight Suppression). GLOBAL mode provides normal exposure adjustment, while BLC compensates for strong backlighting to clarify foreground objects. HLC reduces the brightness of over-exposed areas, and WDR balances brightness across the entire image in scenes with both very bright and very dark areas. HLS darkens overly bright parts of the image to make the whole scene clearer. The Auto Gain Control (AGC) feature optimizes image clarity in poor light, with adjustable levels (HIGH, MEDIUM, LOW). SLOW SHUTTER increases exposure time for better low-light performance, and ANTI-BANDING prevents horizontal lines in images taken under low-frequency light or high brightness.
Video settings offer extensive customization, including IMAGE MODE (STD, HIGH-SAT, HIGHLIGHT), WHITE BALANCE (AUTO, MANUAL with R-GAIN/B-GAIN adjustment), BRIGHTNESS, CONTRAST, SHARPNESS, SATURATION, 3DNR (3D Digital Noise Reduction), and MIRROR. 3DNR significantly reduces noise in video by processing noise across multiple frames, resulting in clearer images. The MIRROR function, supported in TVI mode, allows for horizontal, vertical, or both horizontal and vertical flipping of the image.
Additional functions include MOTION DET (motion detection), which allows users to define specific zones for detecting movement, and PRIVACY masking, enabling users to block out certain areas of the scene to protect personal privacy from being recorded or live-viewed. The camera also includes a FACTORY DEFAULT option to reset all settings.
The camera's design emphasizes ease of installation and adjustment. All camera types (I-V) feature 3-axis adjustment, allowing for flexible positioning and precise aiming. This includes pan, tilt, and rotation adjustments, with specific ranges depending on the camera type (e.g., pan 0° to 360°, tilt 0° to 90° or 0° to 75°, rotation 0° to 360°).
Installation can be performed either directly to a ceiling/wall or with a junction box. Drill templates are provided to facilitate accurate placement of screw holes. For cement surfaces, wall plugs are supplied. Cables can be routed through the ceiling/wall or through designated holes in a junction box, ensuring a clean and secure setup. The camera body is secured using screws, and for some models, an installation plate is used to attach the camera to the mounting surface.
Operating the camera's OSD menu is intuitive. After connecting the camera to a TVI DVR and monitor, users can access the menu via the PTZ Control interface by clicking a specific button or calling preset No. 95. Direction buttons are used to navigate menu options, Iris+ confirms selections, and left/right direction buttons adjust values. This allows for quick and efficient configuration of all camera parameters.
The multi-format video output (TVI, AHD, CVI, CVBS) is a significant usage feature, making the camera compatible with a wide range of existing DVR systems without requiring additional converters. This simplifies upgrades and integrations into diverse surveillance infrastructures.
The manual provides general safety instructions and cautions to ensure proper use and longevity of the device. Users are advised to adhere to electrical safety regulations, ensure proper input voltage (SELV and Limited Power Source with 12 VDC), and avoid connecting multiple devices to a single power adapter to prevent overheating. Proper fixation during wall or ceiling mounting is crucial to prevent the device from falling. In case of smoke, odor, or noise, immediate power disconnection and contact with the service center are recommended, with a strict warning against unauthorized disassembly.
For physical maintenance, users are cautioned against dropping the camera, subjecting it to physical shock, or touching sensor modules with fingers. The camera should be installed in environments free from extreme temperatures (-40°C to 60°C), dust, dampness, or high electromagnetic radiation. Good ventilation is necessary to prevent heat accumulation. If cleaning is required, a clean cloth with a bit of ethanol should be used to gently wipe the camera.
Users are also warned against aiming the camera at the sun or other extremely bright places, and to ensure that the sensor surface is not exposed to laser beams, as this can cause permanent damage. For non-waterproof devices, keeping the camera away from liquids is essential. During delivery, the camera should be packed in its original packaging or similar protective material to prevent damage.
The "FACTORY DEFAULT" option in the OSD menu serves as a maintenance feature, allowing users to easily reset all settings to their original factory configuration, which can be useful for troubleshooting or reconfiguring the camera from scratch. The "SAVE & EXIT" option ensures that all changes made to the settings are saved before exiting the menu, preventing accidental loss of configuration.
| Image Sensor | 2 MP CMOS |
|---|---|
| Sensor Type | CMOS |
| Signal System | PAL/NTSC |
| Lens Mount | M12 |
| Day & Night | Color |
| WDR (Wide Dynamic Range) | Digital WDR |
| Power Supply | 12 VDC ±25% |
| Material | Metal |
| Ingress Protection | IP67 |
| Resolution | 1920 x 1080 |
| Lens | 2.8 mm, 3.6 mm, 6 mm |
| Minimum Illumination | 0.0005 Lux @ (F1.0, AGC ON), 0 Lux with Light |
| Shutter Speed | 1/25 s to 1/50, 000 s |
| Operating Temperature | -40 °C to 60 °C (-40 °F to 140 °F) |
| Angle Adjustment | Pan: 0° to 360°, Tilt: 0° to 360°, Rotation: 0° to 360° |