EasyManua.ls Logo

HIKVISION Pyronix MCNANO-WE User Manual

HIKVISION Pyronix MCNANO-WE
2 pages
To Next Page IconTo Next Page
Page #1 background imageLoading...
Page #1 background image
EN
Slim Wireless Magnetic Contact
Partcode: MCNANO-WE
Document SAP: 102025482-01
EN50131-2-6:2008
EN50131-5-3:2017
PD6662:2017
Security Grade (SG) 2
Environmental Class (EC) II
+44(0)333 444 1280 (UK) customer.support@pyronix.com www.pyronix.com Pyronix Limited, Pyronix House, Braithwell Way, Hellaby, Rotherham, S66 8QY, UK
1
2
3
1. Dimensions and weight
2. Opening/closing the casing and axing the device
The device can be mounted on typical building materials such as wood, PVC, brick
or metal etc. It is important that two screws are used on the larger housing
containing the main PCB in order for the tamper protection to function as designed.
If you encounter any problems with dierent surfaces, please contact
customer.support@pyronix.com
3. The Printed Circuit Board (PCB)
4. Learning procedure
i. Prepare the system for pairing with the device.
- Please refer to control panel instructions.
ii. Remove the piece of polyester lm that is separating the battery from the
battery contacts.
ii. Press and hold the ‘learn button’ on the device for at least 5 seconds and then
release.
- The three LEDs will cycle through on the device whilst the button is held.
iii. On releasing the learn button, the device attempts to pair with the system and
will indicate via the LEDs whether it has been successful or failed.
- The green LED will illuminate to indicate the device has successfully paired
with the system and has adequate signal.
- If the the device fails to pair with the system, the red LED will illuminate.
5. Testing the device
Once learnt to the system, the device will be in a ‘magnet positioning mode’ for 10
minutes, after which the green and red LEDs will extinguish and be disabled. This 10
minute timer can be initiated again by releasing the tamper switch or performing
wireless diagnostics on the device. Whilst in test mode, if the device detects the
magnet, the green LED will illuminate. If the device does not detect the magnet, the
red LED will be illuminated.
After the ‘magnet positioning mode’, the blue LED will light up for 1 hour when the
device is triggered and will extinguish after this period.
6. Using the adhesive strip
If using the adhesive strip to ax the device, the tamper in the main device
and the magnet must be screwed securely if the device is to remain grade 2
compliant.
Programming the device
Once learnt to the system, the zone needs to be programmed so that the
system reacts as intended when the device is triggered.
Please note: Refer to the installation or programming guides provided
with the control panel for advice.
A. Tamper switch
B. Learn button
C. Reed switch
D. LEDs
E. Battery contacts
29mm 14mm10mm 10mm
69mm 69mm
21g 19g
A
B
C
D
E
Specications
-
+
+
-
Question and Answer IconNeed help?

Do you have a question about the HIKVISION Pyronix MCNANO-WE and is the answer not in the manual?

HIKVISION Pyronix MCNANO-WE Specifications

General IconGeneral
Wireless RangeUp to 300m in open space
Battery LifeUp to 3 years
Operating Temperature-10°C to +55°C
Dimensions85mm x 50mm x 42mm
Weight120g (including battery)
Frequency868MHz
Tamper ProtectionYes
TypeWireless
Power SupplyCR123A lithium battery
EncryptionAES 128-bit

Summary

Device Dimensions and Installation

Opening and Closing the Casing

Instructions for opening the device casing and affixing it to building materials, emphasizing tamper protection.

Printed Circuit Board Components

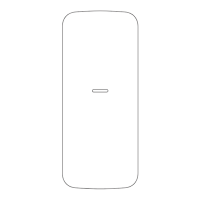
Identifies key components on the Printed Circuit Board (PCB) including tamper switch, learn button, and LEDs.

Learning Procedure

Step-by-step guide for pairing the device with the system, including battery activation and LED feedback.

Device Testing

Procedure for testing the device's magnet detection and LED indicators, including magnet positioning mode.

Adhesive Strip Usage

Guidance on using the adhesive strip for device mounting, ensuring tamper compliance when using screws.

Device Programming

Instructions on programming the device's zone after it has been learned by the control panel.

Product Specifications and Performance

Device Specifications

Details on casing, colour, LED colours, transmission frequency, and transmission method.

Dimensions and Weight

Provides the physical dimensions and weight for both the device and the magnet.

Battery Information

Details on battery type, voltage, capacity, expected life, and low voltage threshold.

Magnet Performance

Presents data on magnet detection distances in air and on iron for various axes of operation.

Product and Battery Disposal

Information on proper disposal of the product and battery in accordance with local regulations.

Warranty and Compliance

Outlines the warranty conditions, product compliance, and links to further documentation.

Related product manuals