EasyManua.ls Logo

Hilti HDM 500 - User Manual

Hilti HDM 500
1 page
Print Icon
Loading...
HDM 500
Manual
Dispenser
How to change adhesive cartridges in your new
HDM 500 Manual Dispenser:
1. Press the release button and maintain pressure on it. Pull the piston rods all the way back.
2. Remove the foil pack holder from the tool by tilting it slightly and applying light pressure from below.
3. Push a new foil pack into the holder as far as it will go. Screw on a new mixing nozzle.
4. Re-insert the foil pack holder in the tool.
5. Apply light pressure until it clicks into place.
1 2 3
4 5
3
How to change the cartridge holder in your new
HDM 500 Manual Dispenser:
1. Press the release button and maintain pressure on it. Pull the piston rods all the way back.
2. Remove the foil pack holder from the tool by tilting it slightly and applying light pressure from below. Grip the foil pack
holder by the large cylinder. Keep the release button at the rear end of the foil pack holder pressed in.
3. Disengage the foil pack holder from the rear locating lug.
4. Pull the eye on the foil pack holder off the front locating lug and remove the foil pack holder from the tool. Fit the eye of the
new foil pack holder onto the locating lug at the front end of the tool.
5. Guide the rear of the foil pack holder under the rear locating lug until it engages in place.
Note: Read and follow the instructions packaged with the adhesive before handling or using the adhesive.
4 5
21
Hilti. Outperform. Outlast.
Hilti, Inc. (U.S.) 1-800-879-8000 www.us.hilti.comen español 1-800-879-5000 • Hilti (Canada) Corp. 1-800-363-4458 www.hilti.ca
Question and Answer IconNeed help?

Do you have a question about the Hilti HDM 500 and is the answer not in the manual?

Overview

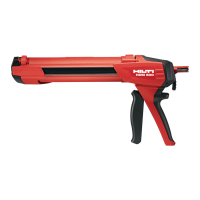
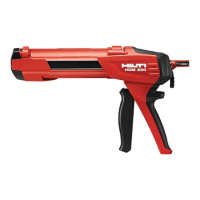
The Hilti HDM 500 Manual Dispenser is a robust tool designed for the precise application of adhesive cartridges and can also accommodate different cartridge holders. This manual provides clear, step-by-step instructions for both changing adhesive cartridges and replacing the cartridge holder, ensuring efficient and safe operation.

Function Description

The primary function of the Hilti HDM 500 Manual Dispenser is to facilitate the controlled dispensing of adhesive materials from cartridges. It is engineered to provide consistent pressure, allowing for smooth and even application of adhesives in various construction and repair tasks. The manual nature of the dispenser gives the user direct control over the flow rate, which is crucial for intricate work or when dealing with different adhesive viscosities. The design incorporates a piston rod mechanism that pushes the adhesive out of the cartridge, and a release button that allows the user to retract the piston rods, enabling quick and easy cartridge changes. The tool is designed to work with specific adhesive cartridges and, importantly, can be adapted to different cartridge types by changing the cartridge holder, making it a versatile solution for a range of adhesive applications.

Usage Features

The Hilti HDM 500 Manual Dispenser is designed with user-friendliness and efficiency in mind, offering several key usage features:

Changing Adhesive Cartridges:

The process for changing adhesive cartridges is straightforward, ensuring minimal downtime during work.

  1. Preparation for Cartridge Removal: To begin, the user must press and hold the release button located on the dispenser. While maintaining pressure on this button, the piston rods are pulled all the way back. This action retracts the dispensing mechanism, creating space for the cartridge to be removed or inserted. The release button is a critical safety and operational feature, preventing accidental dispensing and facilitating smooth transitions between cartridges.
  2. Removing the Foil Pack Holder: Once the piston rods are retracted, the foil pack holder, which contains the adhesive cartridge, can be removed from the tool. This is achieved by tilting the holder slightly and applying light pressure from below. This specific maneuver ensures that the holder disengages correctly from its locking mechanism within the tool, preventing damage to either the holder or the dispenser itself.
  3. Inserting a New Foil Pack: With the old cartridge removed, a new foil pack (adhesive cartridge) is pushed into the holder. It's important to push the new pack in as far as it will go to ensure a secure fit and proper alignment with the dispensing mechanism. Following this, a new mixing nozzle is screwed onto the end of the cartridge. The mixing nozzle is essential for ensuring the adhesive components are properly combined before application, which is vital for the adhesive's performance.
  4. Re-inserting the Foil Pack Holder: After the new foil pack and nozzle are in place, the entire foil pack holder is re-inserted into the tool. This step requires careful alignment to ensure the holder locks securely into position.
  5. Engaging the Dispenser: Finally, light pressure is applied to the dispenser's trigger or handle until an audible "click" is heard. This click indicates that the foil pack holder is fully engaged and locked into place, signifying that the dispenser is ready for use. This positive feedback mechanism assures the user that the tool is properly assembled and safe to operate.

Changing the Cartridge Holder:

The ability to change the cartridge holder enhances the versatility of the HDM 500, allowing it to accommodate different types or sizes of adhesive cartridges. The steps are similar to changing an adhesive cartridge but focus on the holder itself:

  1. Preparation for Holder Removal: Similar to changing an adhesive cartridge, the process begins by pressing and maintaining pressure on the release button while pulling the piston rods all the way back. This prepares the tool for the removal of the cartridge holder.
  2. Removing the Foil Pack Holder: The foil pack holder is removed from the tool by tilting it slightly and applying light pressure from below. During this step, the user should grip the foil pack holder by its large cylinder and keep the release button at the rear end of the foil pack holder pressed in. This ensures that the holder is properly disengaged from the tool's internal mechanisms.
  3. Disengaging from Rear Locating Lug: The foil pack holder is then disengaged from the rear locating lug. This is a specific point of attachment that secures the holder within the dispenser.
  4. Removing and Fitting New Holder: The eye on the foil pack holder is pulled off the front locating lug, and the foil pack holder is completely removed from the tool. To install a new cartridge holder, the eye of the new foil pack holder is fitted onto the locating lug at the front end of the tool. This ensures proper alignment and a secure connection.
  5. Guiding and Engaging the New Holder: The rear of the new foil pack holder is then guided under the rear locating lug until it engages in place. This final step secures the new cartridge holder, making the dispenser ready to accommodate a different type of adhesive cartridge.

Maintenance Features

While the manual primarily focuses on operational procedures, the design implicitly suggests certain maintenance practices:

  • Cleanliness: The instructions for changing cartridges and holders emphasize precise fitting and engagement. This implies that keeping the tool clean, especially the areas where the foil pack holder and cartridge engage, is crucial for smooth operation and longevity. Residue from adhesives or debris could hinder proper seating and engagement, potentially affecting performance or causing damage.
  • Proper Handling: The repeated instruction to "press the release button and maintain pressure" and to "apply light pressure until it clicks into place" highlights the importance of following correct procedures to avoid forcing components. This gentle yet firm approach in handling ensures that the mechanical parts are not strained or damaged, contributing to the tool's overall durability.
  • Adhesive-Specific Instructions: The note at the end, "Read and follow the instructions packaged with the adhesive before handling or using the adhesive," is a critical maintenance and safety feature. It underscores that the proper use and care of the adhesive itself are integral to the dispenser's effective operation and longevity. Different adhesives may have specific requirements for storage, temperature, or cleaning, which indirectly impact the dispenser's performance and maintenance needs. For instance, some adhesives might require immediate cleaning of the nozzle or dispenser components after use to prevent hardening and blockage.
  • Component Replacement: The ability to change the cartridge holder suggests that individual components of the dispenser are designed to be replaceable or adaptable. This modularity is a form of maintenance, allowing users to extend the life of the main dispenser unit by replacing worn or incompatible parts rather than the entire tool.

In summary, the Hilti HDM 500 Manual Dispenser is a versatile and user-friendly tool for adhesive application. Its design prioritizes ease of use for changing cartridges and holders, while implicitly encouraging good handling practices and adherence to adhesive-specific guidelines to ensure its long-term performance and reliability.

Hilti HDM 500 Specifications

General IconGeneral
TypeManual dispenser
Mixing Ratio1:1
MaterialSteel, Plastic
Base materialsConcrete
Material compositionAluminum, Steel
Piston rodSteel
Dispensing Volume500 ml

Related product manuals