EasyManua.ls Logo

Hisense AW1221DR3W - User Manual

Hisense AW1221DR3W
19 pages
Print Icon
To Next Page IconTo Next Page
Loading...
AW1221DR3W
AW2521CW3W
AW1821CW3W
AW1521CW1W
Model:
Question and Answer IconNeed help?

Do you have a question about the Hisense AW1221DR3W and is the answer not in the manual?

Summary

Air Conditioner Safety

Important Safety Instructions

Key safety precautions to reduce fire, electrical shock, or injury risks.

Disposing of the Unit

Guidelines for safely recycling or disposing of the air conditioner and packaging.

Risk of Fire or Explosion

Warnings about flammable refrigerant and safety precautions.

Installation Requirements

Electrical Requirements

Details on voltage, fuse, and circuit breaker requirements for installation.

Recommended Grounding Method

Explains the mandatory grounding method for the air conditioner.

Power Supply Cord

Information on the unit's power supply cord and testing procedure.

Tools and Parts

Tools Needed for Installation

Lists the tools required for installation.

Included Parts List

Lists all the parts included in the package.

Unpacking the Air Conditioner

Instructions for safely removing the air conditioner from its packaging.

Location Requirements

Installation Preparations

Important preparatory steps and notes for installers and consumers.

Window Installation Guidelines

Guidelines and dimensions for installing the unit in a standard double-hung window.

Installation Instructions

Prepare for Installation

Steps to prepare the unit for installation, including removing panels.

Remove Unit from Cabinet

Instructions for carefully removing the main unit from its shipping cabinet.

Install Mounting Rails

Steps to attach the top angle rail and side baffles for window mounting.

Window Unit Installation

Assemble Window Filler Panels

Instructions for assembling the side filler panels for window installation.

Secure Unit in Window

Steps for positioning and securing the air conditioner unit within the window frame.

Install Support Brackets

Mounting Support Brackets

Detailed steps for installing the support brackets to secure the unit.

Attach Filler Panels to Top Rail

Instructions for extending filler panels and attaching the top angle rail.

Window Frame Attachment

Attach EVA Foam Seals

How to apply EVA foam for better insulation and to minimize air leaks.

Install Sash Seals and Locks

Steps for installing seals and safety locks for window sash.

Final Unit Installation

Install Unit into Cabinet

Instructions for installing the unit into the cabinet.

Attach Front Panel and Filter

Steps for attaching the front panel, grille, and filter.

Starting Your Air Conditioner

Select Operating Mode

How to select different operating modes like Cool, Dry, Eco, Heat, or Fan.

Set Temperature

Instructions for adjusting the desired temperature using the control panel.

Adjust Fan Speed

How to select fan speeds (High, Med, Low) for desired airflow.

Control Panel Indicators

Timer, Sleep, Filter Lights

Explains the LED indicators for Timer, Sleep, and Filter functions.

WiFi Connectivity

Information on WiFi connectivity and setup for connected models.

WiFi Connection Process

Steps to connect the air conditioner to a WiFi network.

Using the Remote Control

Remote Temperature Control

How to adjust temperature using the remote control's up/down buttons.

Dimmer and Sleep Modes

How to use the dimmer function and activate sleep mode for automatic adjustments.

Remote Fan and Mode Selection

How to select fan speeds and operating modes via remote.

Air Conditioner Operations

Timer Function Setup

How to set a delayed on/off timer for the air conditioner.

Filter Reset and Airflow Control

Information on resetting the filter indicator and adjusting air direction.

Exhaust Vent and Normal Sounds

How to use the exhaust vent and what normal operating sounds to expect.

Air Conditioner Care and Maintenance

Cleaning Air Filter and Front Panel

Instructions for cleaning the air filter and the unit's front panel.

Paint Repair and Annual Checkup

Advice on touching up paint and scheduling annual professional maintenance.

Troubleshooting Guide

Unit Not Operating

Solutions for when the air conditioner fails to turn on or function.

Power and Circuit Issues

Troubleshooting steps for power problems like blown fuses or tripped breakers.

Unit Runs Excessively

Explains reasons why the unit might run longer than expected.

Cooling Performance Problems

Troubleshooting for units that cycle frequently or do not cool effectively.

Water Drips from Cabinet

Overview

This document provides comprehensive instructions for the Hisense air conditioner models AW1221DR3W, AW1521CW1W, AW1821CW3W, and AW2521CW3W, covering safety, installation, operation, and maintenance.

Function Description

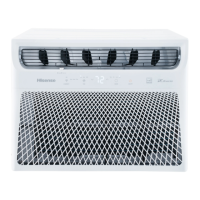
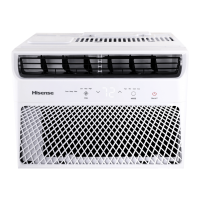
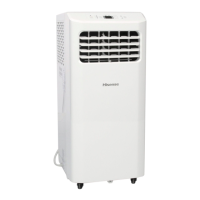
The Hisense air conditioner is designed to cool and, for some models, heat a room, providing a comfortable indoor environment. It functions by drawing in room air, processing it, and then releasing conditioned air back into the room. The unit is equipped with a power supply cord that contains advanced electronics to sense leakage current, disconnecting power in a fraction of a second if a fault is detected. This ensures electrical safety during operation. The air conditioner can be installed in a standard double-hung window, and specific instructions are provided for various window types, including those with storm windows. The unit's design allows for the installation of side curtain panels to seal the window opening, or it can be installed without them for narrower windows.

Usage Features

The air conditioner offers several modes and settings to customize your comfort:

  • Power On/Off: The unit is turned on and off using the power button. When first plugged in, the display will show the current set temperature and operate in ECO control.
  • Modes: Users can select from various modes by pressing the MODE button repeatedly until the desired indicator light glows.
    • Fan Only Mode: This mode circulates air without cooling or heating. Users can select High, Med, or Low fan speeds.
    • Dry Mode: Designed to dehumidify the room, the air conditioner automatically selects the temperature, and the fan runs at a Low speed only. This mode should not be used for cooling.
    • Cool Mode: This is the primary cooling function.
    • ECO Mode: This energy-saving mode cools the room and conserves energy. In ECO mode, the fan continues to run for a period after the compressor shuts off, cycling on and off at intervals until the room temperature rises above the set temperature, at which point cooling resumes. The fan will run at a low speed when the compressor is off in ECO mode.
    • Heat Mode: (Available on heating models) This mode provides heating for the room.
  • Temperature Control: The temperature can be adjusted using the UP (Λ) and DOWN (V) buttons. The temperature range is typically 61°F (16°C) to 86°F (30°C). The display can be switched between Fahrenheit (°F) and Celsius (°C) by pressing both the MODE and DOWN (V) buttons simultaneously for 5 seconds.
  • Fan Speed: In Cool, Fan, or Power Saver modes, users can select High, Med, or Low fan speeds for maximum cooling, normal cooling, or quieter cooling, respectively. In Dry mode, the fan speed cannot be adjusted.
  • Timer Function: A 1 to 24-hour delay on/off operation can be set using the TIMER button on the remote control. The LED display on the control panel will flash, allowing users to adjust the delay time with the arrow buttons. Pressing TIMER again confirms the setting, and pressing it once more cancels the timer.
  • Sleep Control: In Cooling, Dry, and ECO modes, the set temperature will gradually increase by 4°F (2°C) over 2 hours and continue at that temperature until auto shut-off. In Heating mode, the set temperature will decrease by 4°F (2°C) over 2 hours. To activate, select a mode, fan speed, and temperature, then press SLEEP. The control panel lights will dim after 10 seconds. The mode and temperature can still be adjusted, but the fan speed is automatically set to LOW. Sleep control can be turned off by pressing SLEEP again or by waiting 8 hours for automatic shut-off.
  • Dimmer Function: The DIMMER button on the remote control turns off the control panel display. Any new control inputs will return the display to normal.
  • Air Direction: The vertical level vane allows users to direct airflow right or left. The entire cartridge can be used to direct air up, down, or straight ahead.
  • Exhaust Air Vent: A control allows users to open the exhaust air vent to draw stale or smoky air from the room or push it in to close the vent for maximum continuous cooling. This function operates only when the Fan Speed control is active.
  • Remote Control: The unit comes with a remote control for convenient operation, powered by a CR2025 battery. Users are advised to replace the battery every 6 months or when power is lost.
  • WIFI Control: For connected models, WIFI control is available. Pressing the CONNECT button for 5 seconds initiates a flashing LED, indicating it's searching for a router. Once connected, the LED remains on.

Maintenance Features

Regular maintenance ensures optimal performance and longevity of the air conditioner:

  • Air Filter Cleaning: The air filter is removable and should be checked every 2 weeks for cleaning. A clean filter is crucial for efficient cooling and operation. To clean, turn off the unit, open the front panel, grasp the filter by the center, and pull it out. It can be cleaned with a vacuum cleaner or, if very dirty, washed with warm water and mild detergent. The filter must be completely air-dried before reinstallation. Do not wash in a dishwasher or use chemical cleaners. The unit should not be operated without the filter in place. After cleaning and replacing the filter, press the POWER button or FILTER button on the remote to reset the filter light. The filter indicator light remains on for 180 hours or until the Clean Filter button is pressed.
  • Front Panel Cleaning: The front panel should be cleaned with a soft, damp cloth after turning off the air conditioner. It must be air-dried completely before reassembly.
  • Repairing Paint Damage: It is recommended to check for paint damage once or twice a year, especially in areas prone to rust (e.g., near oceans). Any damage should be touched up with a good grade enamel paint.
  • Annual Maintenance: To ensure steady, top performance, an annual checkup by a local authorized dealer is recommended. The cost of this inspection is the owner's responsibility.
  • Disposal of the Unit: Before disposing of the device, battery cells must be removed and recycled safely. If pipes are removed incorrectly, refrigerant may escape, causing injury and environmental damage. Packaging materials should be recycled responsibly. The air conditioner should never be stored or shipped upside down or sideways to prevent compressor damage. Disposal must comply with Federal and Local Regulations, as flammable refrigerants require special procedures. Contact local authorities for environmentally safe disposal. The appliance should be stored to prevent mechanical damage.

Hisense AW1221DR3W Specifications

General IconGeneral
Voltage115V
Dimensions (WxHxD)19.0 x 14.5 x 21.4 inches
Weight63.9 lbs
Control TypeElectronic
Fan Speeds3
Cooling Capacity12000 BTU
RefrigerantR32
FeaturesSleep Mode
Operating ModesCool, Fan, Auto, Dry

Related product manuals