EasyManua.ls Logo

Hisense HAS949BSC User Manual

Hisense HAS949BSC
20 pages
To Next Page IconTo Next Page
Page #1 background imageLoading...
Page #1 background image
EN
INSTALLATION MANUAL
DE
MONTAGEANLEITUNG
DK
INSTALLATIONSVEJLEDNING
FR
MANUEL D’INSTALLATION
PL
INSTRUKCJA INSTALACJI
CZ
INSTALAČNÍ PŘÍRUČKA
IT
MANUALE DI INSTALLAZIONE
SL
NAVODILA ZA VGRADNJO
HR
PRIRUČNIK ZA INSTALACIJU
HAS949BSC
INSTALLATION MANUAL
INSTALLATIONSANLEITUNG
MANUEL D’INSTALLATION
INSTALLATIE-INSTRUCTIES
MANUAL DE INSTALACIÓN
LIVRO DE INSTRUÇÕES PARA INSTALAÇÃO
LIBRETTO DI INSTALLAZIONE
INSTALLATIONSHANDBOK
INSTALLASJONSVEILEDNING
ASENNUSOHJEET
INSTALLATIONSVEJLEDNING
PAIGALDUSJUHEND
ÜZEMBE HELYEZÉSI ÚTMUTA
MANUAL DE INSTALARE
INSTRUKCJA INSTALACJI
NAVODILO ZA NAMESTITEV
UDHËZUES PËR INSTALIMIN
EN
DE
FR
NL
ES
PT
IT
SV
NO
FI
DA
RU
EE
LV
LT
UK
HU
CZ
SK
RO
PL
HR
SI
GR
TR
BG
KK
MK
AL
SR
AR
Question and Answer IconNeed help?

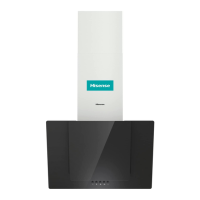
Do you have a question about the Hisense HAS949BSC and is the answer not in the manual?

Hisense HAS949BSC Specifications

General IconGeneral
BrandHisense
ModelHAS949BSC
CategoryVentilation Hood
LanguageEnglish

Summary

General Safety Warnings

Pre-Installation Safety Advisory

Multilingual warnings advising to read safety information in the user manual before installation.

Installation Site Requirements

Cabinet Clearance and Placement

Diagrams illustrating required minimum clearances and placement within kitchen cabinets for proper installation.

Appliance Cut-Out Specifications

Hob Recess Dimensions

Detailed measurements for creating the correct cut-out in the countertop for hob installation.

Step-by-Step Installation

Initial Assembly Steps (1-2)

Covers the first two installation steps, showing initial component attachment and preparation.

Main Unit Assembly (3-4)

Details steps 3 and 4, focusing on attaching the main body and ducting components.

Further Assembly Steps (5-6)

Covers steps 5 and 6, continuing the main assembly and placement of parts.

Ducting Connection (7a-7b)

Illustrates steps 7a and 7b for connecting the ducting system, including vertical and horizontal options.

Detailed Step 7 Assembly

Provides a detailed breakdown of step 7, including parts and assembly sequence for ducting.

Electrical Connection Prep (Step 8)

Details step 8, focusing on preparing for the electrical connection and associated safety checks.

Electrical Connection Details

Wiring for Power Types

Explains mono-phase, bi-phase, and three-phase connections with wiring diagrams and color codes.

Final Installation Procedures

Step 9: Water and Cleaning

Illustrates the final step involving water connection and initial cleaning procedures.

Related product manuals