35
DP65
PRT SURFACE SIDE
4-POLE BEAM
SHAPE CORRECTION
MAGNET
2-POLE BEAM
ALIGNMENT
MAGNET
ZERO FIELD
SPACER (NO
ADJUSTMENT)
(3) Make the dot at the screen center a true circle
using the 4-pole magnet as shown below.
(4) Also adjust the Red and Blue PRT beam shapes
according to the steps (1) to (3).
(5) After the adjustment has been completed, return
R, G and B static VRs to the just focus point.
(6) After the BEAM FORM is completed, fix the
BEAM FORM magnet with white paint.
TRUE CIRCLE SPECIFICATION
TRUE CIRCLE DEGREE: a/b
SPECIFICATION: 1.0-1.1
b
a
2.7 Beam form adjustment
Adjustment preparation
(1) Raster Position should have been completed.
(2) The raster tilt and centering should have been
completed.
(3) Set video conditions to factory preset.
(4) Input the dot signal.
(5) Set Aspect to 4:3 Standard Mode.
Adjustment procedure
(1) Green PRT beam shape adjustment. Short-
circuit TS (2p EH) sub-mini connectors on Red
and Blue CPT P.W.B.s to project only the Green
beam.
(2) Turn the green static focus VR, on the Focus
Pack, fully clockwise. (Blooming)
ADJUSTMENT
BACK TO ADJUSTMENTS
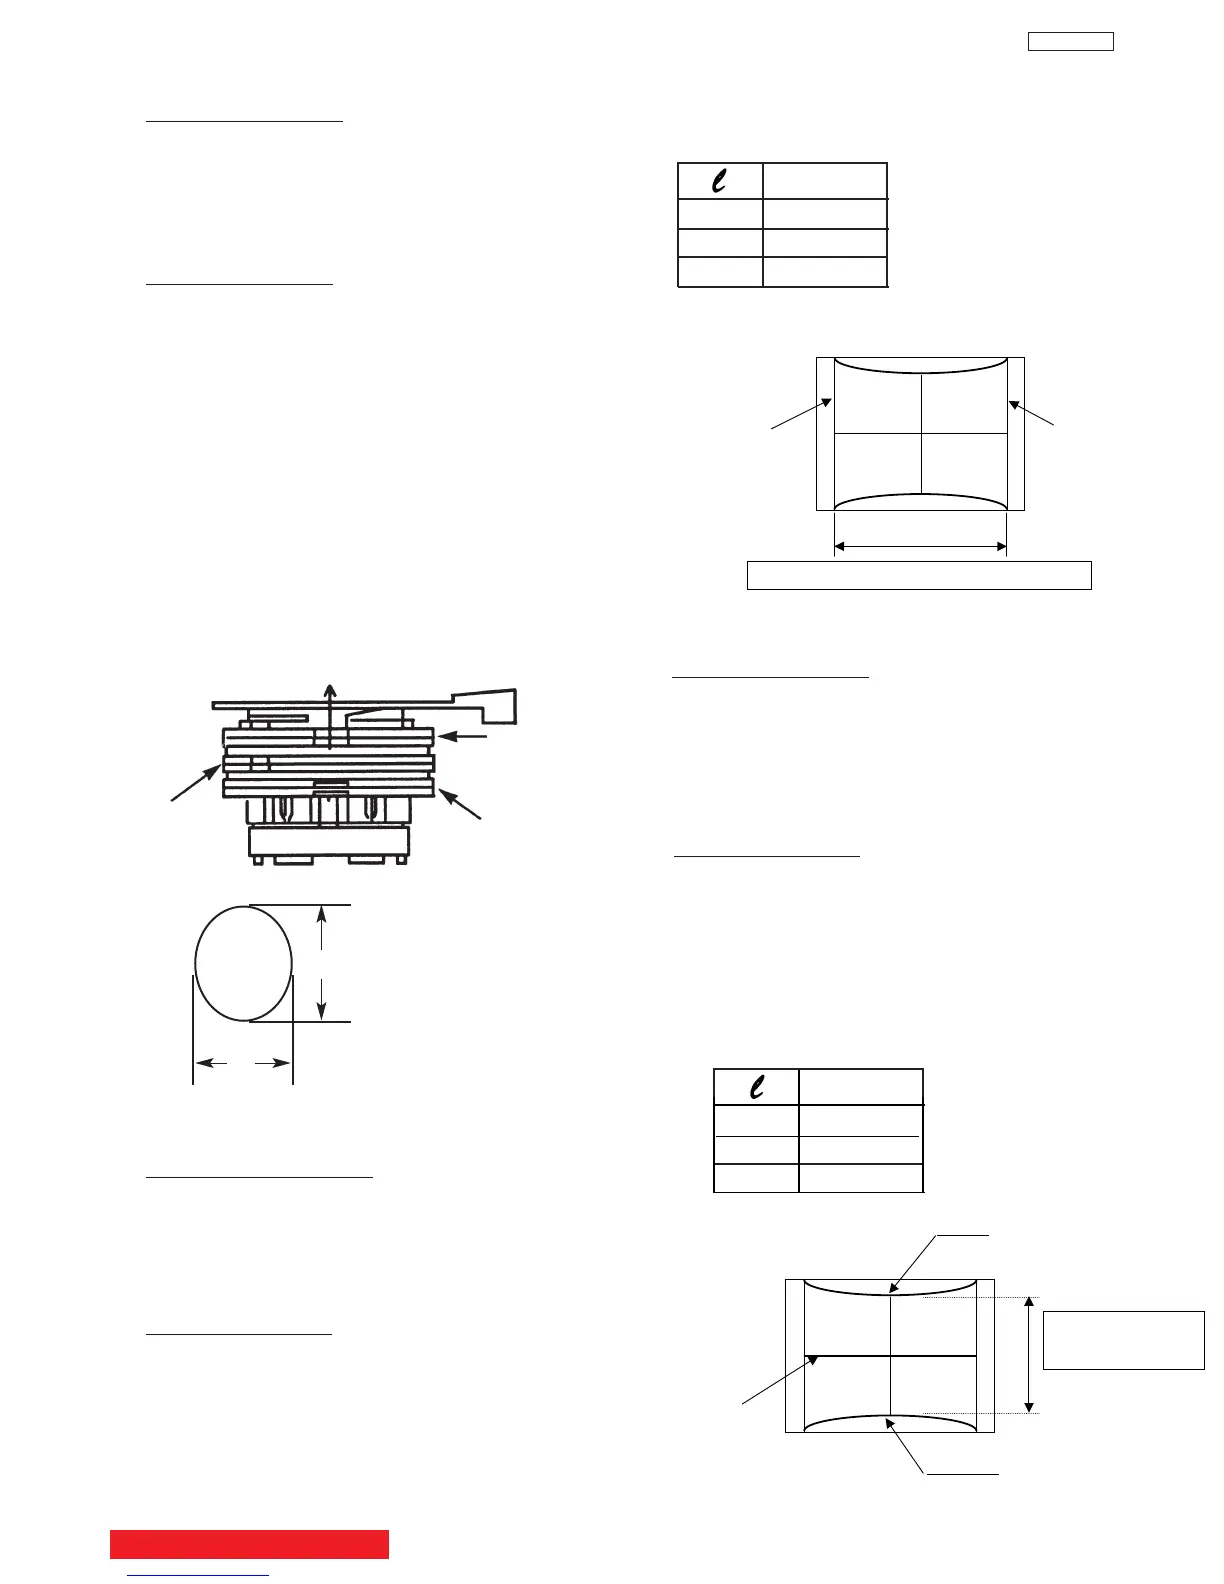
2.8 HORIZONTAL SIZE ADJUSTMENT
Adjustment preparation
(1) Receive any NTSC signal.
(2) VIDEO control should be set Factory Preset
condition.
(3) BEAM FORM adjustment should be finished.
Adjustment procedure
(1) Press Service Only button on the SIGNAL PWB
then press the [MUTE] key on R/C at the same
time. Uncorrected crosshatch is displayed.
(2
) Adjust H size as follows , using R711 (Horizon-
tal Size VR).
(4) The Convergence should not be corrected.
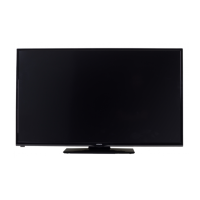
VERTICAL SIZE ADJUSTMENT
H. Size
Specification
51” 1070
57” 1195
Tolerance:+/-5mm unit : mm
Green DCU crosshatch (with conv. Data is clear)
Right end of Green color
vertical line.
Between the vertical lines at the left and right end.
L=
Left end of Green color
vertical line.
2.9
Adjustment preparation
(1) Receive any NTSC signal.
(2) VIDEO control should be set Factory Preset
condition.
(3) Horizontal Size adjustment should be finished.
Adjustment procedure
(1) Press Service Only button on the SIGNAL PWB
then press the [MUTE] key on R/C at the same
time. Uncorrected crosshatch is displayed.
(2) Adjust V size as follows , using R607 (Vertical
Size VR).
(4) The Convergence should not be corrected.
Tolerance:+/-5mm
unit : mm
Green DCU crosshatch
(With Conv. data cleared.)
L=
between the horizontal
line at the top and
bottom
Top end of Green color horizontal line.
Bottom end
of Green color horizontal line.
Center line
65” 1365
(3) After adjustment press the "SERVICE ONLY" SW
to exit from the Digital Convergence crosshatch.
V. Size
Specification
51” 560
57” 625
65” 710
(3) After adjustment press the "SERVICE ONLY" SW
to exit from the Digital Convergence crosshatch.