EasyManua.ls Logo

Hitachi C8FSE - 8-1/2" Sliding Compound Miter Saw User Manual

Hitachi C8FSE - 8-1/2" Sliding Compound Miter Saw
96 pages
To Next Page IconTo Next Page
Page #1 background imageLoading...
Page #1 background image
SAFETY INSTRUCTIONS AND INSTRUCTION MANUAL
WARNING
IMPROPER OR UNSAFE use of this power tool can result in death or serious bodily injury!
This manual contains important information about product safety. Please read and understand
this manual BEFORE operating the power tool. Please keep this manual available for other
users and owners before they use the power tool. This manual should be stored in safe place.
INSTRUCTIONS DE SECURITE ET MODE D’EMPLOI
AVERTISSEMENT
Une utilisation INCORRECTE OU DANGEREUSE de cet outil motorisé peut entraîner la mort ou de
sérieuses blessures corporelles!
Ce mode d’emploi contient d’importantes informations à propos de la sécurité de ce produit.
Prière de lire et de comprendre ce mode d’emploi AVANT d’utiliser l’outil motorisé. Garder ce
mode d’emploi à la disponibilité des autres utilisateurs et propriétaires avant qu’ils utilisent
l’outil motorisé. Ce mode d’emploi doit être conservé dans un en
droit sûr.
INSTRUCCIONES DE SEGURIDAD Y MANUAL DE INSTRUCCIONES
ADVERTENCIA
¡La utilización INAPROPIADA O PELIGROSA de esta herramienta eléctrica puede resultar en lesiones
de gravedad o la muerte!
Este manual contiene información importante sobre la seguridad del producto. Lea y comprenda este
manual ANTES de utilizar la herramienta eléctrica. Guarde este manual para que puedan leerlo otras
personas antes de utilizar la herramienta eléctrica. Este manual debe ser guardado en un lugar seguro.
DOUBLE INSULATION
DOUBLE ISOLATION
AISLAMIENTO DOBLE
Model
Slide Compound Miter Saw
Modèle
Scie à onglets coulissante
Modelo
Ingletadora telescopica
C 8FSHE
C 8FSE
(Laser Marker and Light Equipment)
(Marqueur laser et lumière)
(Equipo con marcador láser y luz)
00Cover_C8FSHE_US 4/8/08, 17:541

Table of Contents

Question and Answer IconNeed help?

Do you have a question about the Hitachi C8FSE - 8-1/2" Sliding Compound Miter Saw and is the answer not in the manual?
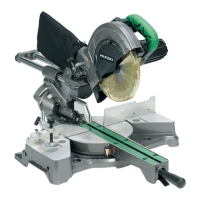
Hitachi C8FSE - 8-1/2" Sliding Compound Miter Saw Specifications

General IconGeneral
No-Load Speed5, 500 RPM
No Load Speed5, 500 RPM
Sliding FunctionYes
Dust CollectionYes
Blade Size8-1/2 inches
Bevel Capacity45° Left and Right
Miter Capacity52° Left and Right
Arbor Size5/8 inches
Bevel Angle Range0 - 45 degrees
Miter Angle Range0 - 52 degrees
Motor Power15 Amp

Summary

SAFETY INSTRUCTIONS

IMPORTANT SAFETY INFORMATION

General safety advice and the importance of reading the manual before use.

MEANINGS OF SIGNAL WORDS

Explanation of WARNING, CAUTION, and NOTE symbols used in the manual.

GENERAL SAFETY RULES FOR ALL POWER TOOLS

Comprehensive list of safety rules to follow when operating any power tool.

SPECIFIC SAFETY RULES FOR THIS POWER TOOL (DO'S)

Essential 'do' practices for safe operation of this specific tool.

SPECIFIC SAFETY RULES FOR THIS POWER TOOL (DON'TS)

Essential 'don't' practices to avoid unsafe operation of this specific tool.

OPERATING WARNINGS FOR SLIDE COMPOUND MITER SAW

Critical safety warnings specific to operating the slide compound miter saw.

REPLACEMENT PARTS

OPERATIONAL GUIDELINES

USE PROPER EXTENSION CORD

Guidance on selecting and using appropriate extension cords for safe operation.

DOUBLE INSULATION FOR SAFER OPERATION

Explanation of the double insulation system and precautions for maintaining it.

OPERATION AND MAINTENANCE

NAME OF PARTS

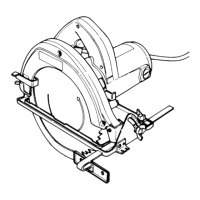
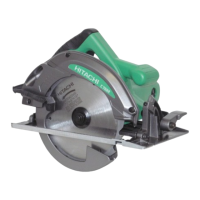
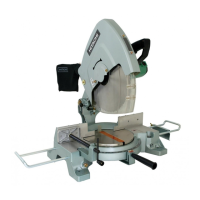
Identification and illustration of all components of the power tool.

SPECIFICATIONS

ACCESSORIES AND APPLICATIONS

STANDARD ACCESSORIES

List and illustration of accessories included with the power tool.

OPTIONAL ACCESSORIES

List of optional accessories available for purchase to enhance tool functionality.

APPLICATIONS

Common uses and materials for the slide compound miter saw.

PREPARATION BEFORE OPERATION

INSTALLATION

Instructions for securely mounting the power tool to a workbench.

INSTALLING THE SIDE HANDLE

Guide for attaching the side handle for better control and stability.

BEFORE USING THE TOOL

POWER SOURCE AND SWITCH CHECK

Verifying correct power connection and ensuring the trigger switch is off.

SAW BLADE AND GUARD INSPECTION

Checking the saw blade for damage and the lower guard for proper function.

SPINDLE LOCK AND BLADE POSITION CHECK

Confirming spindle lock position and saw blade's lower limit for safe operation.

POWER CORD AND RECEPTACLE CHECK

Inspecting the power cord and receptacle for damage or proper fit.

TRIAL RUN AND BLADE STABILITY CHECK

Performing a trial run and inspecting the saw blade for stability and smooth rotation.

BEFORE CUTTING

POSITIONING THE TABLE INSERT

Adjusting table inserts for optimal cutting and minimal workpiece contact.

CHECKING SAW BLADE LOWER LIMIT POSITION

Verifying the saw blade's lower limit position before cutting.

ADJUSTING LOWER LIMIT FOR LARGE WORKPIECES

Setting the lower limit for the saw blade when cutting taller workpieces.

SUB FENCE USAGE AND SAFETY

Proper use of the sub fence, especially during left bevel cuts, to prevent injury.

ADJUSTING CUTTING ANGLES AND WORKPIECE PREPARATION

OBLIQUE ANGLE ADJUSTMENT

Adjusting bevel and miter angles using bolts and set pins.

SECURING THE WORKPIECE

Emphasizing the importance of clamping or using a vise for workpiece stability.

INSTALLING HOLDERS AND STOPPERS

Instructions for installing optional holders and stoppers for workpiece support.

LASER LINE ADJUSTMENT (Only Model C8FSHE)

LASER MARKER SAFETY PRECAUTIONS

Warnings and cautions related to the laser marker's operation and potential hazards.

ADJUSTING THE LASER LINE POSITION

Steps for aligning the laser line with the saw blade for accurate cuts.

CALIBRATING LASER LINE WITH CUT MARKINGS

Detailed procedure for aligning the laser line with workpiece markings for precise cutting.

PRACTICAL APPLICATIONS

SWITCH OPERATION AND SAFETY

How to operate the trigger switch and prevent unauthorized use.

USING THE VISE ASSEMBLY

Instructions for mounting and using the standard vise assembly for securing workpieces.

CUTTING OPERATIONS

STANDARD CUTTING PROCEDURE

Step-by-step guide for performing cuts, including blade speed and handle pressure.

CUTTING NARROW WORKPIECES (PRESS CUTTING)

Technique for cutting narrow workpieces using a press cutting method.

CUTTING LARGE AND WIDE WORKPIECES (SLIDE CUTTING)

Procedures for cutting large and wide materials using slide and auxiliary board techniques.

BEVEL CUTTING PROCEDURES

Step-by-step guide for setting and performing bevel cuts on the workpiece.

MITER CUTTING PROCEDURES

How to set and perform miter cuts using the turntable and scale.

COMPOUND CUTTING PROCEDURES

Instructions for performing compound cuts (miter + bevel) safely and accurately.

SPECIALIZED CUTTING TECHNIQUES

CROWN MOLDING CUTTING PROCEDURES

Settings and methods for cutting 38° and 45° crown molding types.

CROWN MOLDING WITHOUT TILTING BLADE

Techniques for cutting crown molding using specialized accessories without tilting the blade.

GROOVE CUTTING PROCEDURES

How to cut grooves using the depth adjustment bolt and saw blade.

USING THE WORK LIGHT (Only Model C8FSHE)

Instructions for operating and adjusting the built-in work light.

MATERIAL HANDLING AND DUST COLLECTION

CUTTING DEFORMABLE MATERIALS

Tips for cutting materials like aluminum sash, including using wood plates and cutting oil.

USING THE DUST BAG

How to attach, use, and empty the dust bag for sawdust collection.

SAW BLADE MOUNTING AND DISMOUNTING

DISMOUNTING THE SAW BLADE

Procedures for safely removing the saw blade from the tool.

MAINTENANCE AND INSPECTION

SAW BLADE INSPECTION

Regular checks for saw blade wear or damage to ensure safety and performance.

CARBON BRUSHES AND MOTOR INSPECTION

Guidance on checking and replacing worn carbon brushes and handling the motor.

COMPONENT AND GUARD INSPECTION

Checking for loose screws, proper lower guard operation, and safe storage.

LUBRICATION AND CLEANING PROCEDURES

Recommended lubrication intervals and cleaning procedures for the tool.

SERVICE AND REPAIRS

Related product manuals