ENGLISH
2.2.1 Wall Mounted (Optional)
C A U T I O N
This device cannot built in neither installed without providing ventilation to the aluminium sink behind.
Place the support on a resistant wall.
&61(70DQDJHUFDQEHZDOOPRXQWHGE\XVLQJDQ\VWDQGDUG9(6$PPZDOOPRXQWHGVXSSRUWIRU/7;7DQG9(6$PPIRU
XT only. HITACHI offers the following wall mounted accessory, model code 7E512300.
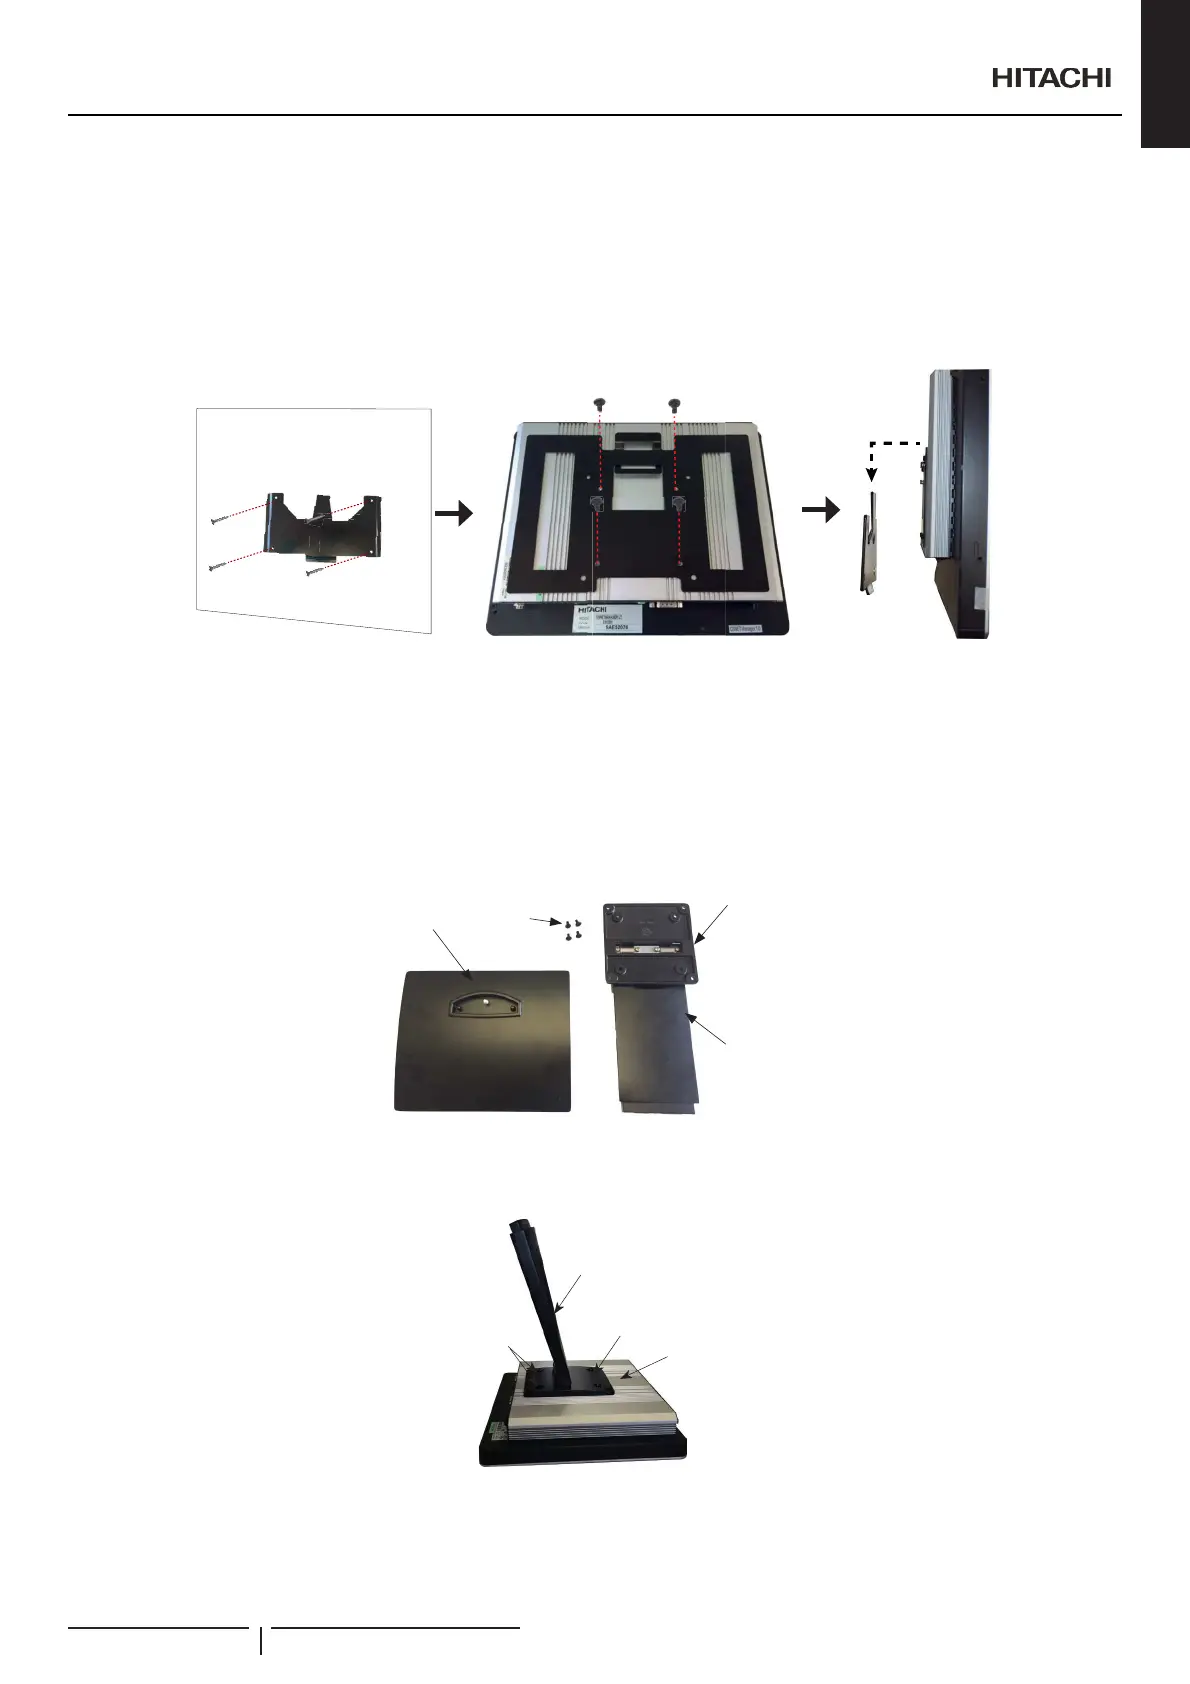
2.2.2 Stand Mounted (Optional)
C A U T I O N
This device cannot built in neither installed without providing ventilation to the aluminium sink behind.
&61(70DQDJHUFDQEHVWDQGPRXQWHGE\XVLQJDQ\VWDQGDUG9(6$PPVWDQGPRXQWHGVXSSRUWIRU/7;7DQG9(6$PP
IRU;7RQO\+,7$&+,RIIHUVWKHIROORZLQJVWDQGPRXQWHGDFFHVVRU\9(6$PRGHOFRGH(
The stand comes disassembled in 2 parts:
Base
Arm
Fixing screen
support
4 screws
1 3ODFHWKH¿[LQJVFUHHQVXSSRUWGHJUHHVZLWKUHVSHFWWRLWVDUP
2 Put the screen upside down and insert the 4 stand screws on the rear of the screen (the power source connector will be at the
bottom of the screen). There are 8 holes on the support, 4 for the LT screen and the other 4 for the XT screen.
Screen
Fixing screen
support
Screws
Arm
C A U T I O N
,QRUGHUWRDYRLGGDPDJHWRWKHVFUHHQSURWHFWLWEHIRUHVHWWLQJLWXSVLGHGRZQ
Installation
PMML0409A rev.1 - 10/201621
 Loading...