6.4.2 Layout tree
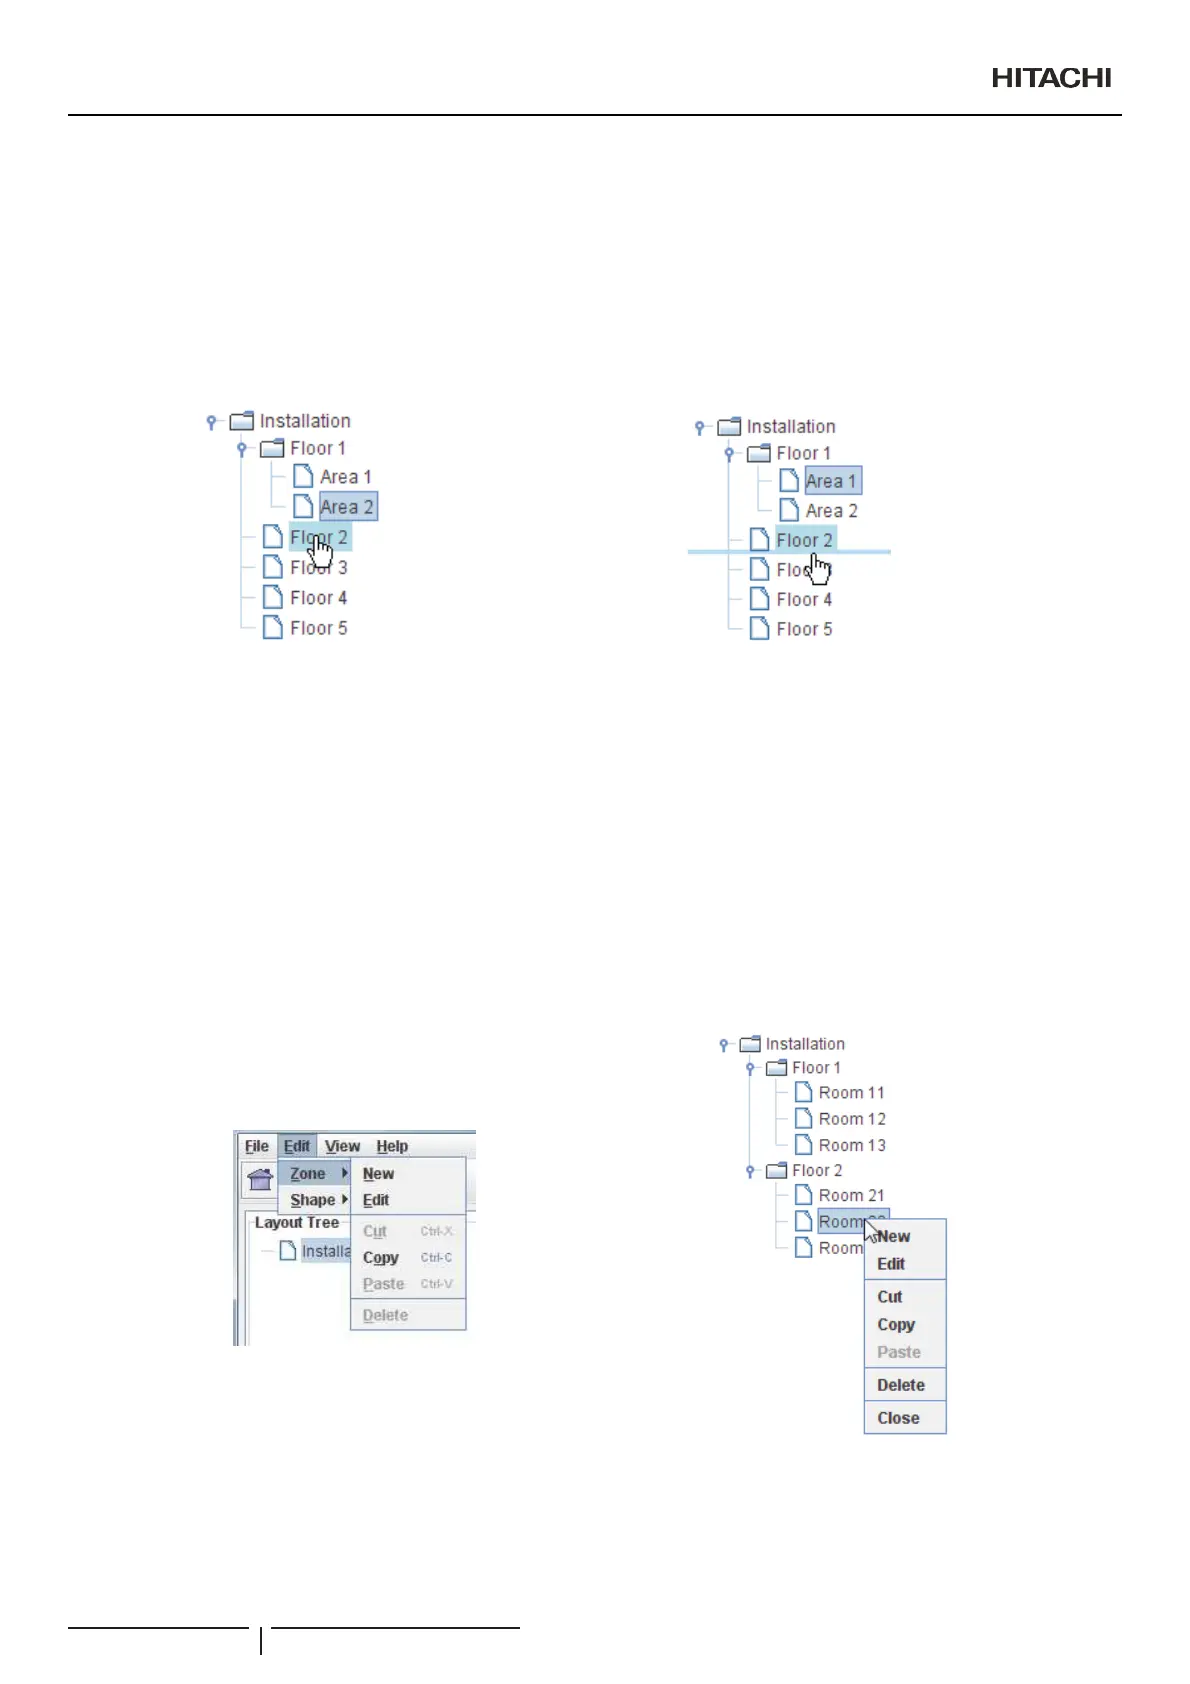
7KHOD\RXWWUHHVKRZV\RXWKHWRSRORJ\RI\RXULQVWDOODWLRQ,WLVKHOSIXOO\WR¿QGWKH]RQHVRI\RXULQVWDOODWLRQDQGLWLVHDV\DYHU\
good tool to organise your installation.
Using the tree you can select which zone you want to see on the display zone.
Dragging a zone to another one this will be moved as a child of destination zone.
To specify concrete order we move zone to bottom of destination zone, a line will appear. On release mouse button original zone will
go after destination zone.
6.4.3 Create zones
<RXFDQ¿QGZone in Edit menu. Zone options can also be found using the right button on a zone inside the installation tree.
A zone is a slide where we can add all shapes that we want. On a zone we can choose a background image and edit this.
Zone has different options:
New: create new zone. This zone will be child of selected zone on tree.
Edit: modify selected zone.
Cut: copy to clipboard selected zone. When we paste this zone will disappear from original parent.
Copy: clone the zone to allow you to paste where you want.
Paste: copy the zone stored on clipboard as a child of the selected zone. Remember that root zone is not allowed to be deleted.
Delete: delete current zone. When you choose this option a dialogue will appear where you can choose between delete all
children from selected zone or move children to parent of the selected zone.
Creation of Building Layout
PMML0409A rev.1 - 10/201690
 Loading...