-14-
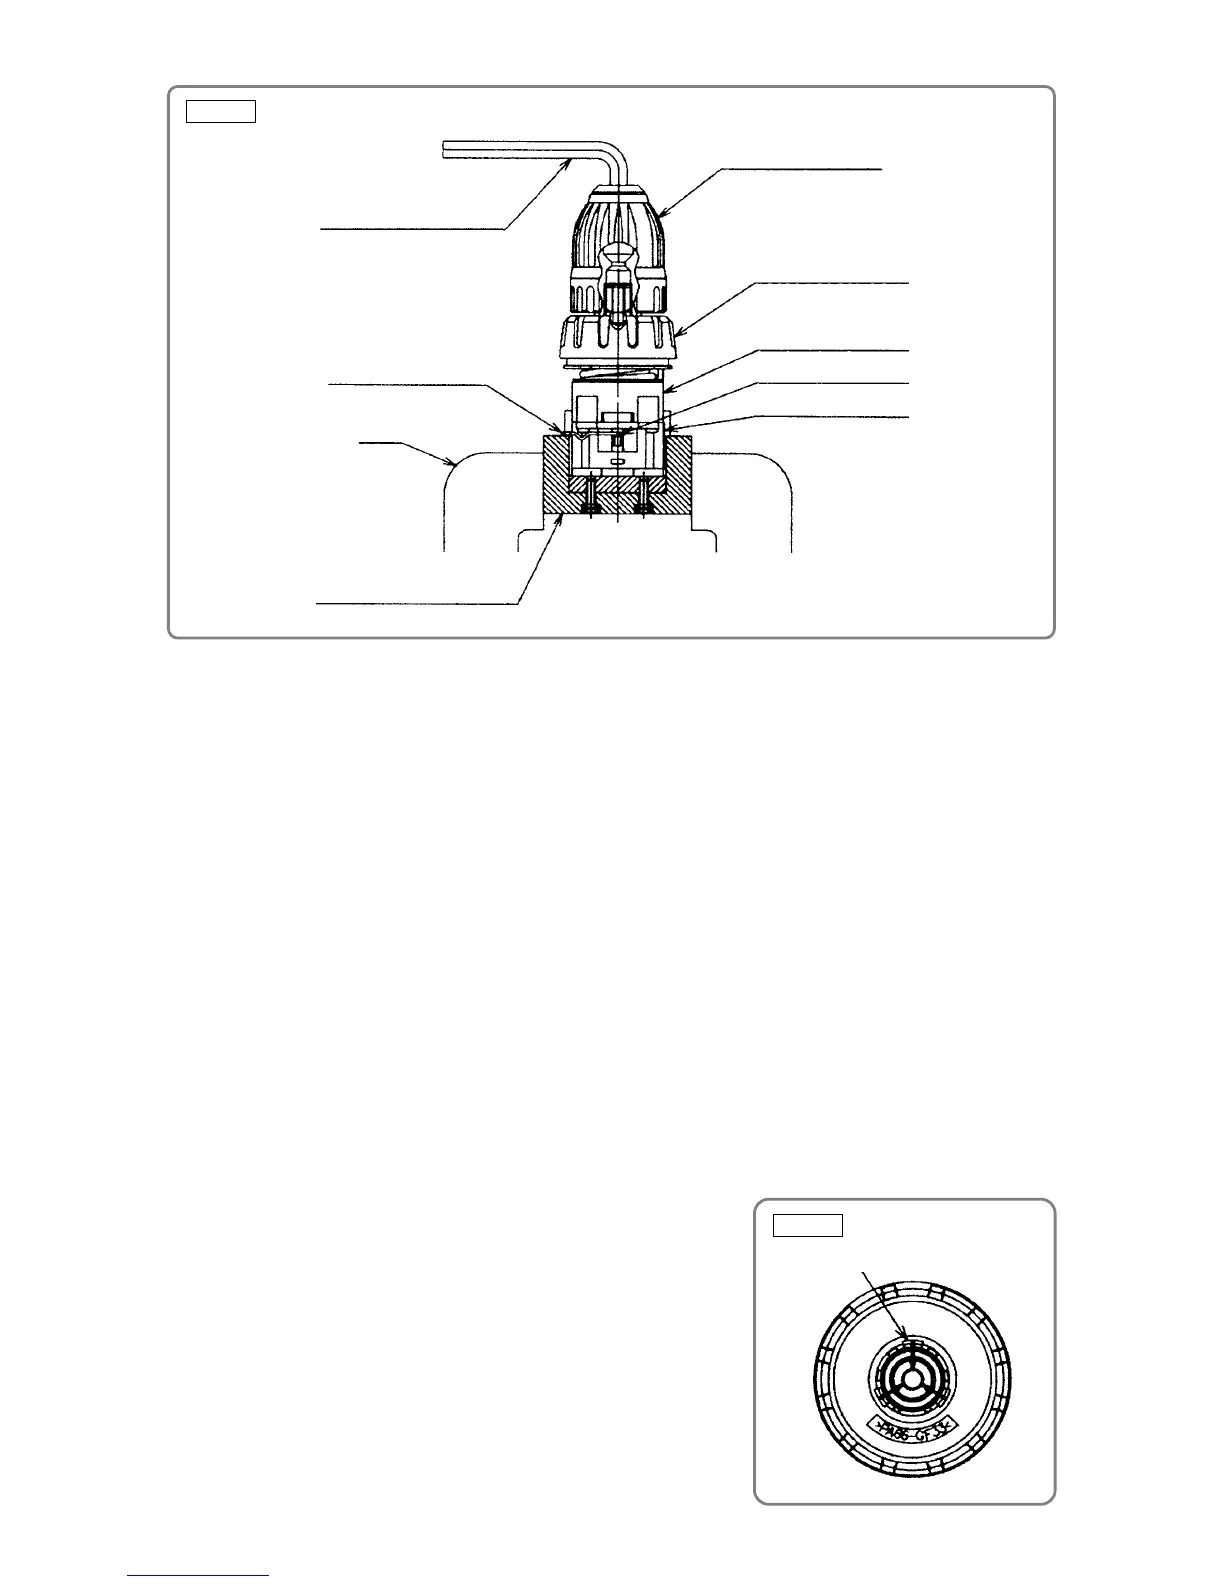
Hexagonal bar wrench
Vise
Special repair tool (J-342)
Shift Arm [16]
Drill Chuck [2]
Clutch Dial [4]
Front Case [9]
Slide Ring Gear (B) [19]
Rear Case [14]
Fig. 1
4. Disassembly of the gear unit
Remove the Shift Arm [16] from the Rear Case [14], and then turn Washer (B) [23] mounted in the Rear
Case [14] counterclockwise to remove. Take out the First Ring Gear [22], Planet Gear (A) Set [21] (3 pcs.),
Pinion (B) [20], Planet Gear (B) Set [18] (3 pcs.), Pinion (C) [17] and Slide Ring Gear (B) [19] in that order.
Then remove the Screw Set D3 x 12 [15] (4 pcs.) connecting the Front Case [9] and Rear Case [14].
Finally, remove Washer (A) [13], Planet Gear (C) Set [12] (3 pcs.), Ring Gear [11], and six Steel Ball D5
[10] from the Front Case [9] in that order. Be careful not to lose the six Steel Ball D5 [10] in this operation.
5. Disassembly of the drive unit
(a) Remove the Clutch Dial [4] from the Front Case [9].
NOTE: Do not remove the Nut [6] from the Front Case [9] in this step.
(b) Remove the Shift Knob [38] from the Shift Arm [16], remove the Screw Set D3 x 12 [15] (2 pcs.) from
the Rear Case [14], and then remove the Shift Arm [16] from the Gear Box Ass’y [3]. Do not deform the
Shift Arm [16] by applying excessive force.
(c) Turn the Motor Spacer [24] counterclockwise (as viewed from the rear of the armature), Pinion (C) [17],
and Pinion (B) [20] until you hear a click. Remove the Motor Spacer [24] from the Rear Case [14]. The
parts are now separated into the armature unit and the gear unit.
(d) Push the top of the Click Spring [5] and remove it from the Front Case [9] if it needs to be replaced.
NOTE: Do not reuse the removed Click Spring [5].
6. Disassembly of the clutch unit
(a) After pressing up the hook of the Front Case [9] with a small
flat-blade screwdriver, you can directly remove the Clutch Dial
[4] and Click Spring [5] . (See Fig. 2.)
(b) Turn the Nut [6] counterclockwise and remove it from the Front
Case [9], then remove the Spring [7] and Washer (D) [8] from
the Front Case [9].
NOTE: Do not disassemble the Front Case [9].
Fig. 2
Hook (3pcs.)



 To Next Page