RDY
AC IN
ALM
POWER LOCATE ALARM
IN OUT
CONSOLE
RDY
AC IN
ALM
POWER LOCATE ALARM
IN OUT
CONSOLE
RDY
AC IN
ALM
POWER LOCATE ALARM
IN OUT
CONSOLE
RDY
AC IN
ALM
POWER LOCATE ALARM
IN OUT
CONSOLE
RDY
AC IN
ALM
POWER LOCATE ALARM
IN OUT
CONSOLE
RDY
AC IN
ALM
POWER LOCATE ALARM
IN OUT
CONSOLE
RDY
AC IN
ALM
POWER LOCATE ALARM
IN OUT
CONSOLE
RDY
AC IN
ALM
POWER LOCATE ALARM
IN OUT
CONSOLE
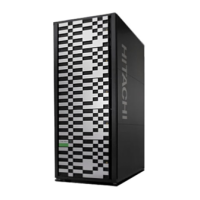
Power Up the System
3
SVP (rear)
SVP
(front)
RDY
AC IN
ALM
POWER LOCATE ALARM
IN OUT
CONSOLE
RDY
AC IN
ALM
POWER LOCATE ALARM
IN OUT
CONSOLE
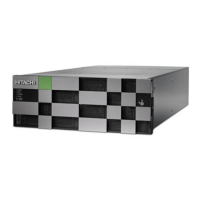
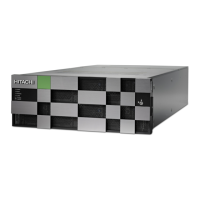
Drive Tray (rear)
Controller (rear)
Connect the Hardware
2
1. Connect expansion ports to
drive trays.
Cables should lock into place.
Verify they do not pull out
without using the tab.
1. Power off all power
distribution units (PDUs).
2. Plug in power to the SVP.
3. Connect the power cables to the rear panels on the
controllers and drive trays. For redundancy, connect the
power cables to feeds from separate power sources.
Confirm that the POWER LED on the front panel is amber.
4. Power up the PDUs.
5. Power up the SVP before powering up the controllers.
6. Attach the front bezel to the front of the controllers and
each drive tray, and then lock using the supplied key.
7. Press and hold the POWER ON/OFF switch on the
controllers for about 3 seconds. The POWER LED will
change from amber to green.
8. Wait for the READY LED to turn
on (approximately 16 minutes).
Ports are color-coded for reference.
SVP
Controller
1
Controller
2
Drive
Trays
Optional NAS
modules
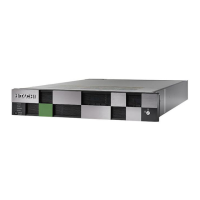
Controller (front)
POWER
READY
WARNING
ALARM
POWER
ON/OFF
NOTE
Cabling shown is for illustration purposes only.
For best practices, run the cables to facilitate
future component replacement.
NOTE
If possible, use a UPS.
Tab
SAS cable
Connect to
management
console PC
Connect to
network
switch
Connect to
user LAN port on
Controller 1
LAN2LAN1
SVP
LAN4 LAN3
Connect to
user LAN port on
Controller 2
2. Make SVP connections.
The SVP is available as:
• A physical device supplied by HDS that runs Windows
Embedded Standard 7 (see the installation below).
• A software application that operates on a VMware ESXi host,
Linux KVM host, customer-supplied server hardware, or
Windows Hyper-V Server 2012 R Virtual Machine (VM).
As a software application, the SVP runs a customer-supplied
version of Windows 7 Professional x64 Service Pack 1,
Windows 10 Professional, Windows 10 Enterprise, Windows
Server 2012, or Windows Server 2012 R2.