Do you have a question about the Hitachi GPM1NB10 and is the answer not in the manual?
This document describes the Multi OS DVD Writer, a versatile external optical disc drive designed for reading and writing various DVD and CD formats. It is intended for private use in dry indoor areas and offers compatibility with both Windows and Mac operating systems.
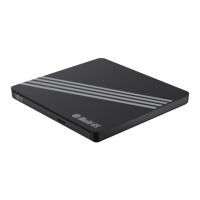
The Multi OS DVD Writer serves as an external optical disc drive (ODD) that connects to a computer or A/V device via a USB-A power/data cable. Its primary function is to enable the reading and writing of DVD and CD discs. This includes playing back audio/video content, installing software, and burning data to discs. The device supports a wide range of disc types, including DVD ROM, DVD R, DVD RW, DVD RAM, DVD+R, DVD+RW, CD ROM, CD ROM XA, CD I, Video CD, CD Extra, CD Text, Photo CD, and standard CD DA. It is also capable of viewing/playback content directly on a TV when connected in ODD mode, without requiring additional software.
To operate the device, a computer running Windows 10 or higher or macOS 10.12 or higher is required, along with a 1 GHz or faster processor and 4 GB of RAM or higher. The device connects via a USB 2.0 port (backward compatible with USB 1.1). For optimal performance, it is recommended to connect the USB-A power/data cable to two USB-A ports on the computer, as a single port might not supply sufficient power. The device is designed to be operated in a horizontal position only. Drivers for the device are automatically installed by the operating system (Windows 10, 8, 7, Vista, and Mac OS X) upon plugging in. The product will only show up as a drive on the computer once a disc is inserted.
To insert a disc, press the open compartment button (D) to open the disc compartment (F). Place the disc in the center of the compartment with the label side facing up, then push the compartment until it clicks into place. The indicator (E) will flash green as the drive reads the disc. The disc compartment accommodates 3-inch (8 cm) and 4.7-inch (12 cm) discs. To eject a disc, first stop any playback. Press the open compartment button (D) to open the compartment, remove the disc, and then push the compartment back until it clicks into place. The indicator will flash green once.
In emergency situations where the drive fails to eject a disc, an emergency eject hole (C) is provided. This method should only be used to retrieve a disc if the drive malfunctions and should not be used excessively, as it may cause damage to the product. Before performing an emergency eject, ensure the power supply is shut down.
The product includes a disc (G) containing audio/video playback, video/image editing, and disc writing software for Windows® operating systems. Mac® software must be installed or purchased separately. After connecting the drive, insert the software disc (G) and follow the on-screen instructions to install the desired software. The disc also contains a copy of the user manual and a Quick Start Guide.
Windows®: To burn a disc, place a blank compatible disc into the compartment (F) and close it. A notification will appear on the screen, allowing you to select "Burn files to disc." A pop-up window will then prompt you to input a disc title and select the "With a CD/DVD player" burning option. After clicking "Next," the disc drive folder will open in File Explorer, where you can copy and paste or drag files/folders to be burned. To initiate the burning process, click the "Manage" tab, then "Drive Tools" on the File Explorer ribbon, and finally "Finish burning." Set the disc title and recording speed in the subsequent pop-up window, then click "Next." After the writing process is complete, click "Finish." Note that DVD movie titles cannot be recorded due to copyright protection. For maximum record and burn speed, it is recommended to copy contents to the computer's hard drive first rather than directly writing from another source disc or external drive.
Mac®: Place a blank compatible disc into the compartment (F) and close it. When a pop-up window appears, set the action to "Open Finder" and click "OK." Finder will open the blank disc drive folder, where you can copy and paste or drag files/folders to be burned. To write the added files, click the "File" tab on the toolbar ribbon, then click "Burn 'Disc name'" or "Burn" on the top right side of Finder. In the pop-up window, set the disc name and burn speed, then click "Burn" to start the writing process. The pop-up window will close automatically after writing.
Windows®: Place the desired disc into the compartment (F) and close it. Open the disc drive using File Explorer, then double-click the song you wish to play. The Windows Media Player app or your default music player will open and play the song. Mac®: Place the desired disc into the compartment (F) and close it. Open the disc drive using Finder, then double-click the song you wish to play. The Music app or your default music player will open and play the song.
The product's region code can be changed up to 5 times using software decoder. After the fifth change, the product will lock onto the last region code and cannot be changed again.
Before cleaning, always unplug the product. To clean the product, wipe it with a soft, slightly damp cloth, then wipe it dry. Avoid using corrosive detergents, wire brushes, abrasive scourers, metal, or sharp utensils, as these can damage the product.
Do not insert foreign objects into the disc compartment, as this can damage the internal mechanics. The optical lens reads information from compact discs using a laser. If the product is moved from a cold environment to a warm room, condensation may build up on the optical lens, affecting playback quality. In such cases, allow the product to adjust to room temperature for approximately one hour before use. If the issue persists, consult a professional.
To protect discs from dust and scratches, always store them in their cases when not in use and keep them away from direct sunlight and heat sources. To maintain content quality, occasionally wipe discs with a soft cloth from the center to the outer edge (not in a circular motion). Do not use petrol or other solvents for cleaning. Always hold discs by their edges. Burning a disc is a sensitive data transmission process, easily affected by mechanical disturbances. Never clean the product with a commercially available CD/DVD cleaning set, as this can cause damage. Recordable and rewritable discs are more sensitive than commercially available discs; use only solvent-free, non-abrasive markers when writing on them. Do not stick labels on discs. Avoid using worn, damaged, cracked, warped, or poor-quality discs, as they can affect the product and potentially shatter. Do not play non-standard shaped discs, such as heart-shaped or business card-shaped discs.
Store the product in its original packaging in a dry area, away from children and pets.
| power input | 5 V 1.6 A |
|---|---|
| protection class | III |
| supported disc size 1 | 3" (8 cm) |
|---|---|
| supported disc size 2 | 4.7" (12 cm) |
| operating temperature | +41 to +104 °F (+5 to +40 °C) |
|---|---|
| operating relative humidity | 15% to 80% (non-condensing) |
| altitude | 0 to 6561' (2000 m) |
| storage temperature | -40 to +140 °F (-40 to +60 °C) |
|---|---|
| storage relative humidity | 5% to 90% (non-condensing) |
| DVD write speed | 8x DVD±R |
|---|---|
| DVD DL write speed | 6x DVD±R DL |
| DVD-RAM write speed | 5x DVD-RAM |
| CD write speed | 24x CD-RW |
| net weight | Approx. 0.44 lbs (200 g) |
|---|---|
| dimensions | Approx. 5.7 x 0.6 x 5.4" (14.4 x 1.4 x 13.7 cm) |