Do you have a question about the Hitachi HB-B100 and is the answer not in the manual?
Basic safety precautions to follow when using electrical appliances.
Home bakery offers sizes for small, medium, and large loaves.
Digital timer allows setting bread readiness time from 4 to 13 hours.
Details four recipes: Basic Bread, Rapid Bread, Mix Bread, and Dough.
Option to set crust color to light, medium, or dark.
Blocks other settings to prevent accidental changes during operation.
The most important ingredient for bread rise, does not need preliminary fermentation.
Bread flour is desirable for high protein content; gluten forms for better rise.
Controls yeast action, helps firm dough, and prevents over rising.
Enhances yeast, flavor, and promotes crust browning and soft bread.
Adds flavor and makes bread softer and glossier.
Enhances gloss and flavor, making bread richer and softer.
Key ingredient for forming gluten and a major factor in bread success.
Details time for each stage: Pre-knead, Rest, Knead, First rise, Gas squeeze out, Second rise, Bake, Finish, Complete.
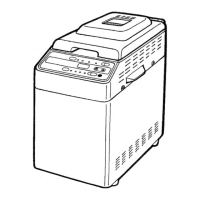
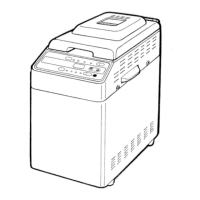
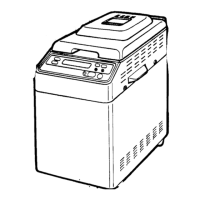
Identifies parts like Handle, Lid, Viewing Window, Control Panel, Bread Pan, Mixing Blade.
Lists accessories: measuring spoon, measuring cup, bread knife, and cook book.
How to select bread type (BREAD, RAPID, MIX, DOUGH) using the MENU button.
Adjusts browning degree via LIGHT, MEDIUM, or DARK settings.
Blocks other buttons to prevent accidental changes after starting.
Sets delay time from 4h 20m to 13h for BREAD setting only.
Initiates baking immediately or starts the preset delay timer.
Cancels operation, changes delay time, or powers down the unit.
Table of ingredients and precise measurements for Large, Medium, and Small loaves.
Instructions for removing the bread pan and installing the mixing blade correctly.
Placing water, ingredients except yeast, and dry yeast on top of flour.
Ensuring the bread pan is correctly inserted into the bread maker.
Closing the lid until it clicks audibly for proper operation.
Plugging the bread maker into the power outlet.
Pressing START, observing indicator lights and timer countdown.
Demonstrates setting the timer for a desired bread readiness time.
How to set timer using up/down arrows and starting the process.
Safely removing the hot bread pan after baking is complete.
Shaking the pan to loosen the bread and removing the mixing blade.
Unplugging the bread maker for safety after each use.
Ingredient quantities for BREAD RAPID for different loaf sizes.
Selecting the BREAD RAPID menu and pressing START.
Adding fruit during the KNEAD phase for raisin bread.
Selecting MIX BREAD menu and pressing START; adding raisins when prompted.
Refer to Cook Book for dough recipes; timer not usable for DOUGH.
Selecting DOUGH menu, pressing START, and monitoring stages.
Removing the bread pan and mixing blade after the process.
Using fresh ingredients and proper storage for flour and yeast.
Importance of precise measurements using scales or level spoonfuls.
Tips on enjoying bread and proper storage methods (refrigerator/freezer).
Interpreting '-E', '-H', '-L' displays when START is pressed.
Handling display flashing or 'BREAD' only indication due to power loss.
Warnings about placement near heat sources, sunlight, and children.
Ensuring proper wiring, cleanliness, and correct ingredients.
Do not cover maker or open lid during operation unless specified.
Warnings about hot surfaces during and after baking.
Do not deform or immerse bread pan in water.
Do not immerse the main unit in water to prevent shock or malfunction.
Cooling the unit and disconnecting power before maintenance.
Methods to loosen and detach the mixing blade, including using water.
Wiping with a damp cloth, avoiding immersion, and keeping the oven area clean.
Washing the shaft and seal packing of the bread pan.
Washing the fluorocarbon-treated mixing blade with a soft sponge.
Advice on not using metallic utensils to protect the fluorocarbon resin coating.
Ensuring the unit is cool and dry before storing, and closing the lid.
Discusses factors affecting bread height and shape, like temperature and ingredients.
Reasons for failure to rise: missing yeast, stale yeast, or incorrect installation.
Causes of odor: stale ingredients, too much yeast, or using BREAD RAPID setting.
Explains the structure difference from commercial bread due to the pan shape.
Air trapped during kneading and not expelled can cause a center hole.
Mixing blade is detachable; caution for hot blade removal.
Timer usable for 4h 20m to 13h; ingredients may spoil if timer exceeds limits.
Raisins added mid-kneading to preserve shape; timer not for MIX BREAD.
Timer not usable for DOUGH setting as dough may spoil.
Using half or double amounts; effects on mixing blade and bread swelling.
Using fresh milk with water deduction; not recommended with timer due to spoilage.
Noise is from motor/ventilator starting kneading at night for next morning's bread.
Momentary interruptions (under 10 min) may not affect operation; use LOCK function.
Bread cools, ventilator runs 30 min to prevent sogginess.
Adjust crust color using BREAD COLOR button before BAKE stage.
Use less dry yeast and/or sugar if bread rises too high.
Fruit bread not suitable for RAPID setting due to reduced rising time.
Checks for operation, smoke, sides collapse, top inflated, bread too short.
Troubleshooting issues related to flour, yeast, sugar, and water quantities.
Checks for mixing blade, power outage, OFF button press, lid open.
Issues related to whole wheat, self-rising flour, wrong yeast, or old ingredients.
Problems from slicing too soon or choosing dark setting.
Steps to resolve issues like floured top, under-baked, coarse, over-baked, or sticky bread.
Details power supply, consumption, dimensions, weight, timer, cord, and thermal fuse.
Instructions for seeking repair from the store if abnormality occurs.
| Model | HB-B100 |
|---|---|
| Type | Bread Maker |
| Timer | 13-hour delay timer |
| Color | White |
| Features | Delay timer |