9 CONTACT INFORMATION REGISTRATION
Contact information can be registered from “Contact Information”.
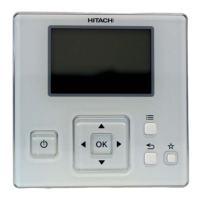
1 Press and hold “ ” (menu) and “ ” (return) simultaneously for
at least 3 seconds during the normal mode (when unit is not
operated). The test run menu will be displayed.
Contact Information 1
OK
?
'
1
q
€
<
+
2
w
a
>
*
3
e
s
z
;
4
r
d
x
.
5
t
f
c
?
6
y
g
v
←→
-
7
u
h
b
/
8
i
:
9
o
k
m
j
n
l
,
=
0
p
ABC
abc
Sym.1
Sym.2
SPAC
DEL FIN.
ENT. FIN.SEL. Letter
2 Select “Contact Information” from the test run menu and press
“OK”. The contact information 1 will be displayed.
3 Press “?” (help) to change font type.
4 Press “ ” to select letter.
5 Press “OK” to conrm the letter. (Max.: 28 letters)
6 Select “FIN.” and press “OK” (or simply press “ ” (menu)), (7)
will be displayed.
7 Repeat (3)~(5) to register contact information 2.
Select “FIN.” and press “OK”, the conrmation screen will
be displayed. (Also, press “ ” (menu) and the conrmation
screen will be displayed).
OK
Save changes?
Yes No
ENT
TN.SEL.
Electric Corp.
8 Select “Yes” and press “OK”. The test run menu will be
displayed after the setting is conrmed. If “No” is pressed, the
screen will return to (3).
10 CHECK MENU
Each “Check Menu” item and its function are explained in the
following table.
Check menu item Function
Check 1
Sensor condition of air conditioner will be
monitored and indicated.
Check 2
Sensor data of air conditioner prior to alarm
occurrence will be indicated.
Alarm history
display
T
Previous alarm record (date, time, alarm code)
will be indicated.
Model display
Model name and manufacturing number will be
indicated.
IU/OU PCB check The result of PCB check will indicated.
Self checking
Checking of remote control switch will be carried
out.
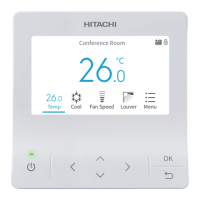
Indication of Check Menu
A/C
COOL
HIGH
LOUV.ADJ
Meeting Room
MODE SPEED LOUV. TEMP
FLTR
Motion Sensor is activated
OK
Press and hold “ ” (menu) and “?” (help)
simultaneously for 3 seconds during the
normal mode.
T: To Erase Alarm History.
Press “OK” when the abnormality record is indicated. After that,
the conrmation screen will be displayed.
Select “Yes” and press “OK” so that the alarm record will be
deleted.
ENGLISH
CONTACT INFORMATION REGISTRATION
PMML0404A rev.1.1 - 06/2022
19
 Loading...