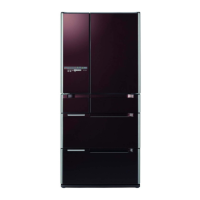
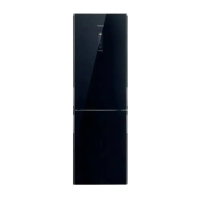
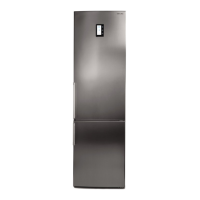
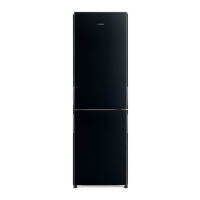
This document describes the Hitachi R-B6800S, R-B6800H, R-B6800M, R-B6800N, R-B6200S, R-B6200H, R-B6200M, and R-B6200N refrigerator-freezer models, designed for household use in Singapore, Hong Kong, Malaysia, Vietnam, and Indonesia.
General Features
Wide Vacuum Compartment
The refrigerator features a "Wide Vacuum Compartment" designed to preserve food nutrition and freshness through vacuum technology.
Function Description:
The Hitachi proprietary vacuum preservation system uses a vacuum pump to create a vacuum state within the compartment, thereby lowering oxygen levels. This reduced atmospheric pressure also helps release antioxidant vitamins, further preventing food oxidation and color changes. The compartment operates at approximately 0.8 atmospheres, which is considered a vacuum relative to standard atmospheric pressure.
Usage Features:
The "Intelligent Vacuum Preservation" system utilizes sensors to detect the presence and amount of vegetables or food stored. It normally maintains an ice-temperature state (-1°C). When vegetables are detected, the system automatically switches to a "+1°C" "Automatic" mode. It detects CO2 emitted during vegetable respiration, which is absorbed by the vacuum pump, and adjusts the temperature zone accordingly. An aluminum tray and storage amount sensors accelerate cooling. Users can manually select "Vacuum Compartment -1°C" or "Vacuum Compartment +1°C" depending on the food type. This compartment can also be used for thawing or food preparation.
Maintenance Features:
To open the vacuum compartment, first open the left and right refrigerator doors. Hold the handle from the bottom, lift it to release the lock, and pull the handle forward. A "hissing" sound indicates vacuum release. To close, push the handle all the way in and press down to lock it. Ensure the handle is fully pressed to activate the vacuum function. If the handle feels heavy, use your palm to push it. Always close and lock the vacuum compartment door before closing the main refrigerator door to prevent damage to the double pocket, vacuum compartment, or food.
The vacuum pump activates when the refrigerator door is closed and the vacuum compartment is locked. In "AUTO" mode, the vacuum pump operates intermittently for CO2 detection. Sound and vibrations during pump activation are normal. It takes about 4 minutes to achieve a full vacuum.
For maintenance, remove food from the vacuum compartment. Gently pull out the vacuum case (with the door) by lifting its edge. Wipe the vacuum packing, the inside of the vacuum case, and the packing support with a soft cloth dampened with lukewarm water. To clean the vacuum packing, grasp the tab on the upper right, carefully remove it, rinse with water using a soft sponge, wipe dry, and allow to air dry naturally. Do not use detergents or anything other than lukewarm water, as this may damage or deform the packing, affecting the vacuum seal. Ensure the tab aligns with the notch when reassembling.
If the "AUTO" / "SUBZERO" / "CHILLER" indicator lamps flash, the vacuum function may not be operating normally. This can be caused by food packaging or dirt caught in the vacuum packing or vacuum release valve. Moisture from juicy foods can cause dew condensation or frost; wipe with a dry cloth if this occurs. Spilled liquids should be wiped immediately to prevent freezing. If the vacuum state cannot be maintained due to damage or deformation, replace the vacuum packing (Part numbers: R-B6700 311 for R-B6800S/H/M/N models, R-A6200 321 for R-B6200S/H/M/N models).
More Energy Saving Features
Function Description:
The refrigerator incorporates "Frost Recycle Cooling," which efficiently uses the low temperature of frost to cool the refrigerator compartment without relying on the compressor. This method significantly saves energy compared to conventional cooling. Previously, frost on the radiator was melted by a heater and discharged, reducing cooling efficiency. Frost Recycle Cooling stops compressor operation and utilizes the coldness of frost to cool the Refrigerator and Vegetable Compartments.
Each compartment (Refrigerator, Freezer, Vegetable) is independently cooled. Flaps control the flow of cooled air to maintain separate temperatures. Moisture from frost on the radiator prevents food desiccation in the Refrigerator and Vegetable Compartments.
Usage Features:
An "Energy Saving Mode" is available to further reduce energy consumption. When activated, this mode increases the temperature setting for each compartment and reduces the compressor's rotation speed. Note that in this mode, cooling capacity is reduced, which may cause items like ice cream to soften or cooling to feel less effective.
When "ENERGY SAVING" is selected, the temperature settings for all compartments are adjusted to a weaker cooling level. If the refrigerator door is left open for more than 30 seconds, the LED light in the Refrigerator Compartment dims to save power.
The "ENERGY SAVING" mode is disabled if the compartment setting is switched to "FREEZER" or "REFRIGERATOR." It also has no effect if the temperature is set to "MIN."
The control panel features a glass touch interface. To change settings, touch the relevant area.
Control Panel Indicators:
- Button Lock: Prevents accidental operation.
- Water: Lights up automatically when the water tank level is low.
- Ice Maker: Selects "NORMAL" (ice making), "QUICK" (fast ice making), or "OFF" (stop ice making). Also has a "Cleaning" function for the ice tray and water supply pipes.
- Auto Door: Sets the electric drawer to "Start" or "Stop."
- Eco Operation Indicator Lamp: Lights up during frost recycle cooling, indicating reduced power consumption. Can also be turned off.
Temperature Adjustment:
The temperature for each compartment can be set. The default "MID." position is recommended for general use.
Cooling Mode Selection:
Adjusts the cooling effect for each compartment. Options include "FREEZER" (quick freeze), "REFRIGERATOR" (quick chill), and "ENERGY SAVING."
Vacuum Compartment Settings:
Allows selection of "AUTO," "SUBZERO," or "CHILLER" based on food type. When all lights are off, it can be used as an ice-temperature compartment.
After operations, indicator lamps turn off after approximately 2 minutes to save power, except for "FREEZER," "REFRIGERATOR," "ENERGY SAVING," "QUICK," and "WATER," and the "eco" operation indicator lamp. To confirm settings, open the door or touch any button.
Refrigerator Compartment
Technical Specifications:
Temperature range: Approximately 2°C to 6°C. The door pocket temperature may be slightly higher.
Function Description:
The refrigerator compartment features 4-level adjustable shelves, fixed storage shelves, a rotating partition, adjustable door pockets (2 levels), a fixed shelf, a temperature sensor, LED lighting, and a vacuum compartment.
Usage Features:
- Temperature Adjustment: Press the "REFRIGERATOR" button to cycle through temperature settings (MAX, MID, MIN). "MID." is the recommended default. Adjusting the refrigerator temperature also affects the vacuum compartment temperature.
- Quick Chill: Place food in the "Quick Chill" area (front of the cold air outlet) and press the "REFRIGERATOR" button for 3 seconds to activate "Quick Chill" mode. This mode automatically ends after about 45 minutes. Watery foods and canned drinks should be kept away from the back of the compartment to prevent freezing or cracking.
- Egg Case: Can store 10 eggs. The egg case can be flipped over to hold smaller items on the back shelf.
- Adjustable Shelves: Shelves can be moved up or down in 4 levels or flipped over. To remove, slightly lift and pull forward. To install, ensure the shelf is horizontal and slides into place without detachment.
- Adjustable Door Pockets: Door pockets can be adjusted to different heights. A "Tube Stand" can be used to hold small items vertically. Do not hang items outside the door pocket to prevent damage when closing the door.
- Opening/Closing Door: If both left and right doors are opened simultaneously, it may be difficult to close them. Close one door first, then the other. Ensure the vacuum case and multi-use egg case are properly placed before closing the door to prevent damage. Frequent opening/closing or high humidity may cause mist or frost around the cold air outlet; wipe any spills immediately.
Maintenance Features:
Clean the interior and exterior of the refrigerator. For the interior, wipe with a soft cloth dampened with lukewarm water. For the exterior, wipe with a soft cloth.
To remove shelves, lift slightly and pull forward. To remove door pockets, tap the bottom left/right and lift.
Freezer Compartment
Technical Specifications:
Upper and Lower Freezer Compartment temperature range: Approximately -20°C to -18°C.
Low Temperature Freezer temperature range: Approximately -23°C to -20°C.
Function Description:
The freezer compartment is divided into upper and lower sections, with a dedicated "Low Temperature Freezer" for preserving food at even lower temperatures. It includes slimline slide cases, slide cases, and tall storage compartments.
Usage Features:
- Upper Freezer: Designed for quick freezing with an aluminum tray. It is recommended to use this tray for storing food in sealed bags or containers.
- Lower Freezer: Features 3-layer storage for ample space. Suitable for long-term storage of frozen foods and ice cream. Includes slimline slide cases, slide cases, and tall storage compartments.
- Temperature Adjustment: Press the "FREEZER" button to cycle through temperature settings (MAX, MID, MIN). "MID." is the recommended default.
- Quick Freezing: Place warm food on the aluminum tray in the upper freezer. Press the "FREEZER" button for 3 seconds to activate "Quick Freezing" mode. This mode automatically ends after about 120 minutes.
- Storage Height: Ensure food does not protrude beyond the storage height limit of each compartment. Allow clearance between items. Overfilling can cause food to get stuck, doors not to close properly, reduced cooling efficiency, and inability to make ice.
- Low Temperature Freezer: Provides lower temperature storage than usual.
Maintenance Features:
To remove the slimline slide case and slide case, pull the door fully open, then pull out the cases. To remove the lower freezer case, lift it upwards.
Ice Compartment (Automatic Ice Maker)
Technical Specifications:
Normal ice making time: 110-140 minutes for 12 cubes.
Quick ice making time: 70-80 minutes for 12 cubes.
Normal storage capacity: 120 cubes.
Quick ice making storage capacity: 150 cubes.
Function Description:
The ice compartment features an automatic ice maker with a water supply container, ice case, and ice scoop.
Usage Features:
- Ice Making: Press the "ICE MAKER" button to select "NORMAL."
- Stop Ice Making: Press the "ICE MAKER" button to select "OFF."
- Quick Ice Making: Press the "ICE MAKER" button to select "QUICK" to reduce ice making time. This mode automatically resets to "NORMAL" after about 7 hours.
- Water Supply Indicator: The "WATER" indicator lamp lights up when the water supply container is low. Replenish with potable water. Ensure the water supply container is properly inserted.
- Ice Storage: The automatic ice maker detects the amount of stored ice and stops making ice when the specified level is reached. It restarts when the ice level drops. The "Limit line of stored ice amount" indicates the maximum capacity when ice is leveled.
- Water Quality: Use potable water. Change water and clean the container at least once a week. Mineral water may produce white powder (mineral deposits), which is harmless. Do not use juice, sports drinks, carbonated drinks, or tea, as they may cause malfunction or deformation.
Maintenance Features:
- Water Supply Container: Clean weekly (for tap water) or every 3 days (for mineral water, well water, filtered water, boiled water). Remove the sealing gasket from the lid and wash with a soft sponge.
- Water Filter: Replace every 3-4 years. Part number: RJK-30100.
- Ice Tray: Clean once a year. To clean, set the ice maker to "OFF," then open the ice compartment door. Pull the lever to remove the ice tray frame, then remove the ice tray. Rinse with running water. Do not use brushes or abrasive powders. Reassemble by inserting the ice tray, closing the cover, and pushing the frame until it clicks. Set the ice maker to "NORMAL" to resume operation.
- Ice Maker Cleaning: For first-time use or after a week of non-use, perform "Ice Maker Cleaning." This involves placing a clean towel at the bottom of the ice case, then pressing and holding the "ICE MAKER" button for 5 seconds with all doors closed. The process takes about 3 minutes, with flashing lights and beeping. After cleaning, remove the towel and any remaining ice.
Auto Door Compartment (Lower Freezer and Vegetable Compartment)
Function Description:
The lower freezer and vegetable compartments feature an "Auto Door" function, allowing them to open automatically.
Usage Features:
- Opening: Press the "Auto Door" switch with your hand.
- Closing: Hold the handle to close the compartment (not electrically operated).
- Enabling/Disabling: Press and hold the "FREEZER" button for 3 seconds to enable (1 beep) or disable (2 beeps) the Auto Door function. This setting must be changed with all doors closed.
- Simultaneous Opening: The lower freezer and vegetable compartments cannot be opened electrically at the same time. Only the compartment whose switch is pressed first will open. If one is open, the auto door function for the other will not work.
- Power Failure: Opening/closing may not be smooth during a power failure.
Maintenance Features:
Clean the auto door unit if food or liquid falls onto it. Unplug the refrigerator, remove the upper/lower/tall storage cases, remove any dropped food, and wipe spills with a soft cloth. Do not splash water on or disassemble the auto door unit. Do not peel off stickers.
Vegetable Compartment
Technical Specifications:
Temperature range: Approximately 3°C to 7°C.
Function Description:
The vegetable compartment features spacious upper and lower cases for storing vegetables, fruits, and drinks.
Usage Features:
- Storage: Stored vegetables are not exposed to cold air directly. Vegetables stay crisp and fresh with their own moisture. It is recommended to wrap vegetables in plastic film to prevent drying.
- Temperature Adjustment: Press the "VEGETABLE" button to cycle through temperature settings (MAX, MID, MIN). "MID." is the recommended default.
- Storage Height: Ensure food does not protrude beyond the storage height limit. Allow clearance between items. Overfilling can cause food to get stuck, doors not to close properly, reduced cooling efficiency, and inability to make ice.
Maintenance Features:
Clean the interior and exterior of the refrigerator. To remove the spacious upper case, pull the door fully open, then lift the case upwards. To remove the lower case, lift the front part of the door, pull it further, and incline it. To install, insert the pins on the inner sides into the square holes on the frame and place the edge of the case on the frame.
Safety Suggestions
General Safety:
- This refrigerator uses flammable refrigerant (R600a: Isobutane).
- Installation: Ensure proper grounding (earth connection screw) to prevent electric shock. Do not install in damp or wet locations. Provide adequate ventilation clearance (at least 5cm above, 1cm left/right) around the refrigerator to prevent refrigerant accumulation in case of leakage, which could cause ignition or explosion. Secure the refrigerator to prevent tipping, especially during earthquakes.
- Power and Power Cable: Do not exceed the rated current of the outlet or wiring. Use a dedicated 15A or higher outlet. Do not damage, bend, twist, pull, or place heavy objects on the power cord. If damaged, contact the manufacturer or service center for replacement. Insert the plug firmly with the cord pointing downwards. Do not unplug with wet hands.
- Children: Supervise children to prevent them from playing with the appliance.
- Disposal: When discarding, remove the door packing to prevent children from getting trapped inside. Consult your dealer or recycling center for proper disposal.
During Normal Use:
- Water/Liquids: Do not splash water on or inside the refrigerator. Do not place water containers on top. Spilled water can cause electric shock or fire.
- Flammable Materials: Do not store flammable items (benzine, ether, LP gas, thinner, adhesives) or use flammable sprays near the refrigerator. Sparks from electrical contacts could cause ignition or explosion.
- Food Storage: Do not have food items protruding from shelves. Do not store glass bottles in the freezer compartment (they may break). Do not touch frozen food with wet hands (risk of frostbite). Do not eat strange-smelling or discolored food.
- Door Operation: Do not hold the top of the doors when closing (risk of pinched fingers). Be careful not to catch fingers when opening multiple doors or when others are using the refrigerator.
- Movement: Do not use the wheels on easily scratched floors; use a protective mat. Use the carrying handles when moving; two or more people should carry it with the door facing upward. Do not hang it with a crane.
- Maintenance: Unplug the power plug before maintenance. Clean dust from the power plug frequently.
- Automatic Ice Maker: Do not touch the machinery components when the ice trays are rotating.
- Auto Door Compartment: Do not press the auto door switch with your knee. Do not place bottles near the auto door compartment. Do not hold the top, bottom, or side of the door to close it (risk of pinched fingers). Do not bring your foot too close to the refrigerator when pressing the auto door switch.
Preparation Before Use
Installation:
- Place on a solid, level floor. If using on carpet, tatami, or plastic flooring, place a 1cm thick board underneath to prevent deformation or discoloration.
- Avoid direct sunlight and high temperatures.
- Ensure good ventilation to prevent reduced cooling efficiency, increased electricity consumption, discoloration, and rust.
- Maintain sufficient clearance around the refrigerator for heat dissipation (at least 5cm above, 1cm left/right). The center part of the side may be slightly larger.
- Place the back against a wall. If vibration or wall dirt is a concern, leave a small gap.
Door Balance Adjustment:
- If the refrigerator is uneven or the floor is soft, the doors may be slightly misaligned.
- Adjust the balance by rotating the adjustment feet at the bottom front of the refrigerator using the provided tool and adjustment pads. Clean the floor before placing pads.
- Adjust the feet until the doors are level.
Power Plug and Grounding:
- Plug into a dedicated 220-240V, 15A or higher outlet.
- If the installation area is damp, consult your dealer for grounding or leakage circuit breaker installation. An optional 2.5m grounding wire (NW-60R6 052) is available.
Initial Cooling:
- Initial cooling may take 4 to 24 hours, depending on ambient temperature and food load.
- For automatic ice making, initial ice production may take over 24 hours after the refrigerator is fully cooled.
- Perform "Ice Maker Cleaning" (page 25) before first use of the automatic ice maker.
Moving (Relocation):
- Remove all food and ice. Empty the water tank and ice tray.
- Secure doors with tape to prevent accidental opening.
- Place protective mats or cloths on the floor to prevent scratches and absorb any residual water.
- Tilt the refrigerator backward to drain any remaining water.
- When moving, hold the carrying handles. Use 2-4 people.
- Install according to the "Preparation Before Use" instructions.
- Do not remove the stickers on the back or the plastic parts/labels on the bottom side.
- If installed in areas with sulfurous gas (e.g., hot springs), consult your dealer for anti-rust treatment of piping. Gas-related malfunctions are not covered by warranty.