This document serves as an instruction manual for Hitachi Split Type Air Conditioners, specifically models RAS-70YHA4 / RAC-70YHA4 and RAS-80YHA4 / RAC-80YHA4. It provides comprehensive information on the device's functions, operation, maintenance, and safety precautions.
Safety Precautions
The manual emphasizes safety with distinct "Warning" and "Caution" sections. "Warning" indicates potential for death or serious injury if instructions are not followed, while "Caution" highlights risks of serious consequences if not properly observed. Key safety points include:
- Installation: Do not reconstruct the unit yourself; always use a sales agent or qualified technician. Ensure proper earthing, avoiding water/gas pipes or lightning conductors. Install a circuit breaker. Do not install near flammable gas. Ensure smooth drain hose water flow. Avoid installing in machine shops or kitchens where oil vapor can damage the unit.
- Shifting/Maintenance: Stop operation and turn off the circuit breaker if abnormal situations (e.g., burning smell) occur. Contact an agent for maintenance or removal/reinstallation. Damaged supply cords must be replaced by authorized service centers.
- Operation: Avoid extended direct airflow. Do not insert fingers or objects into air outlets/inlets. Turn off the breaker before cleaning. Do not use conductors as fuse wire. Disconnect during thunderstorms. Keep spray cans and combustibles at least one meter away from air outlets.
- General Cautions: Operate only under manufacturer specifications. Do not operate with wet hands. Avoid directing cool air at household heating apparatus. Ensure the outdoor mounting frame is stable. Do not splash water on the unit. Do not use aerosols or hair sprays near the indoor unit. Switch off the unit and circuit breaker during cleaning or extended non-use. Do not climb on the outdoor unit or place objects on it. Do not place water containers on the indoor unit. Avoid placing plants directly under airflow. Avoid operating with open doors/windows at high humidity for extended periods to prevent condensation. The preset room temperature may not be achieved if the room's heat amount exceeds the unit's cooling capability. Children aged 8 and above, or persons with reduced capabilities, must be supervised.
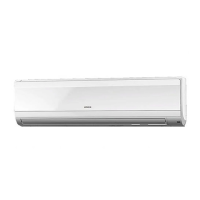
Names and Functions of Each Part
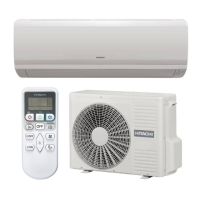
Indoor Unit:
- Pre-filter: Prevents dust from entering (refer page 20).
- Front panel: The main cover.
- Indoor unit indicators: Lights indicating operating conditions (refer page 5).
- Horizontal deflector / Vertical deflector (Air Outlet): Controls airflow direction (refer page 15).
- Remote controller: Sends operation signals to the indoor unit (refer page 6).
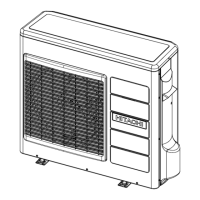
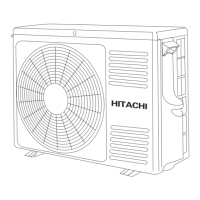
Outdoor Unit:
- Drain pipe: Drains condensed water.
- Connecting cord and insulation pipe for piping: Connects indoor and outdoor units.
- Air inlet (Back, Left side): Where air enters the outdoor unit.
- Air outlet: Where air exits the outdoor unit.
- Caution: During heating, drain or defrosted water flows from the outdoor unit. Do not close the drain outlet in chilly areas to prevent freezing.
Model Name and Dimensions
| Model |
Width (mm) |
Height (mm) |
Depth (mm) |
| RAS-70YHA4, RAS-80YHA4 |
1100 |
300 |
250 |
| RAC-70YHA4, RAC-80YHA4 |
850 |
800 |
298 |
Indoor Unit Indicators
- OPERATION LAMP: Lights during operation. Flashes during preheating (2-3 minutes after startup) and defrosting (5-10 minutes every hour when frost forms on the outdoor unit heat exchanger).
- TIMER LAMP: Lights when the timer is active.
- Temporary Switch: Used to start/stop the unit if the remote controller is not working. Pressing it initiates automatic operation. If power is turned off and on, operation restarts in automatic mode.
Remote Controller
- Function: Controls the indoor unit. Signal range is about 7 meters, potentially shorter with inverter lamps. Can be wall-mounted. Handle with care; dropping or wetting can compromise signal transmission. After battery replacement, the unit may take ~10 seconds to respond.
- Transmission Sign: Blinks when a signal is sent.
- START/STOP Button: Starts/stops operation.
- FUNCTION Selector: Selects operating mode (AUTO, COOL, HEAT, DEHUMIDIFY, FAN).
- TEMPERATURE Button: Adjusts room temperature.
- FAN SPEED Button: Selects fan speed (for cooling/heating).
- POWERFUL Button: Initiates powerful operation.
- AUTO SWING (Horizontal) Button: Controls horizontal air deflector angle.
- AUTO SWING (Vertical) Button: Controls vertical air deflector angle.
- ECO Button: Sets ECO mode.
- SLEEP Button: Sets sleep timer.
- OFF TIMER Button: Selects turn OFF time.
- ON TIMER Button: Selects turn ON time.
- RESET Button: Resets settings.
Various Functions
- Auto Restart Control: If power fails, operation automatically restarts with previous settings when power resumes. Not available with Timer or Sleep Timer modes.
- Automatic Operation: The device automatically determines HEAT or COOL mode based on room temperature. Mode will not change if connected to a multi-type outdoor unit. Users can manually change the mode if the auto-selected mode is unsatisfactory. Fan speed and temperature can be set.
- Heating Operation: Use below 27°C outdoor temperature. Heating may not work above 27°C for protection. Operate above -15°C outdoor temperature for reliability. Fan speed options include AUTO, HI, MED, LOW, SILENT. Defrosting occurs every hour for 5-10 minutes when frost forms, with the operation lamp blinking. Maximum defrosting time is 20 minutes.
- Dehumidifying Operation: Use above 16°C room temperature. Dehumidifying does not work below 15°C. Target temperature is slightly lower than the set temperature (16°C for a 16°C setting). Operation stops if room temperature falls below target and restarts if it rises above. Preset room temperature may not be reached depending on room conditions.
- Cooling Operation: Use between -10°C and 46°C outdoor temperature. High indoor humidity (>80%) may cause dew on the air outlet grille. Fan speed options include AUTO, HI, MED, LOW, SILENT. Cooling does not start if the temperature setting is higher than the current room temperature.
- Fan Operation: Functions as an air circulator. Useful for drying the indoor unit at the end of summer. Fan speed options include AUTO, HI, MED, LOW, SILENT. In AUTO fan speed mode, speed adjusts based on discharged air temperature (heating) or to reach preset temperature (cooling).
- Timer Reservation: ON Timer and OFF Timer are available. Settings change in 1-hour intervals.
- Powerful Operation: Maximizes power during HEATING, DEHUMIDIFYING, COOLING, FAN, or AUTOMATIC operation. Displays "POWERFUL" on LCD. Ends after 20 minutes, then reverts to previous settings. Cancelled by ECO mode, or if the unit is already at max capacity or just before defrosting.
- ECO Operation: Energy-saving mode by adjusting set temperature and limiting maximum power consumption. Displays "ECO" on LCD. Cancelled by Powerful mode. Does not reduce power consumption if already low.
Adjusting the Air Deflectors
- Upward/Downward: Horizontal air deflector automatically sets to a suitable angle. Can be swung continuously or set to a desired angle using the "AUTO SWING (HORIZONTAL)" button. Stops in its current position if pressed again. Returns to a closed position when operation stops.
- Cooling/Dehumidifying: Adjusts between ~15° and ~60°.
- Heating: Adjusts between ~30° and ~45°.
- Caution: Do not keep the horizontal air deflector swinging for a long time during cooling to prevent dew formation.
- Left/Right: Vertical deflectors swing left and right using the "AUTO SWING (VERTICAL)" button. Stops in its current position if pressed again.
- Warning: Do not insert fingers or objects into air outlets/inlets. Switch off operation before cleaning or adjusting deflectors.
How to Exchange the Batteries in the Remote Controller
- Remove the cover and take out old batteries.
- Install new AAA batteries, matching polarity.
- Caution: Do not mix new and old batteries or different types. Remove batteries if not using the remote controller for 2-3 months. Use high-quality, high-performance AAA batteries to prevent short operating life and electrolyte leakage.
The Ideal Ways of Operation
- Suitable Room Temperature: Freezing temperatures are unhealthy and waste electricity.
- Install Curtain or Blinds: Reduces heat entering the room through windows.
- Ventilation: Open doors and windows occasionally for fresh air.
- Effective Usage of Timer: Use OFF/ON timer mode for comfortable room temperature, especially at night.
- Do Not Forget To Clean The Pre-Filter: Clean every 2 weeks to maintain air volume and cooling efficiency, saving energy.
- Please Adjust Suitable Temperature For Baby And Children: Pay attention to room temperature and airflow direction for vulnerable individuals.
- Air Conditioner and Heat Source: If room heat exceeds cooling capability (e.g., many people, heating equipment), the preset temperature may not be achieved.
- Not Operating For A Long Time: Switch off mains power. The indoor unit consumes ~3W in "OFF" mode if mains power is left "ON".
- When Lightning Occurs: Stop operation and remove the plug to protect the unit.
- Interference From Electrical Products: Place indoor unit and remote controller at least 1m away from electrical products (e.g., inverter-type fluorescent lamps, TVs) to avoid noise interference.
Attaching the Air Purifying Filters
- Open the front panel by holding both sides.
- Remove the Pre-filter by pushing upward to release claws.
- Attach air purifying filters to the frame by gently compressing and inserting them.
- Caution: Do not bend the filter. Do not smell directly from the filter.
- Attach the Pre-filters, ensuring "FRONT" faces forward. Push the front panel at three arrow points to close.
- Note: Cooling capacity may be slightly weakened with air purifying filters; set fan speed to "HIGH". Filters are not washable; use a vacuum to clean. Replace yearly (Type number: ). Do not use detergent.
Maintenance
- Caution: Cleaning and maintenance must be done by qualified service personnel. Stop operation and switch off power.
- Pre-filter: Clean every two weeks to save power and maintain performance.
- Open front panel, remove Pre-filter, and gently lift air purifying filters from frame.
- Vacuum dust from filters. Wipe with wet cloth if very dusty. Dry in shade.
- Re-insert air purifying filters, ensuring "FRONT" faces forward. Slot into original state. Push front panel at three arrow points to close.
- Note: Air purifying filter should be cleaned monthly or sooner if heavily loaded. Replace yearly.
- Caution: Do not operate without Pre-filter to prevent dust entry and faults.
- Cleaning of Front Panel:
- Remove front panel and wash with clean water and a soft sponge. Use neutral detergent if needed, then rinse thoroughly.
- If not removed, wipe with a soft dry cloth. Wipe remote controller with a soft dry cloth.
- Wipe water thoroughly from indicators/signal receiver to prevent trouble.
- Removing: Hold front panel with both hands. Push the right arm inward to release, then pull it out.
- Attaching: Move projections of left/right arms into flanges and insert into holes.
- Caution: Never use hot water (>40°C), benzine, gasoline, acid, thinner, or a brush, as they will damage plastic surfaces and coating.
Regular Inspection
Qualified service personnel should check the following points every half-yearly or yearly:
- Is the earth line disconnected or broken?
- Is the mounting frame seriously affected by rust, and is the outdoor unit tilted or unstable?
- Is the power line plug firmly plugged into the socket (no loose contact)?
After Sale Service and Warranty
When Asking for Service, Check the Following Points:
| Condition | Check the Following Points