EasyManua.ls Logo

Hitachi RAS-E10H2 - Routine Maintenance Procedures; ROUTINE MAINTENANCE PROCEDURES

Hitachi RAS-E10H2
96 pages
To Next Page IconTo Next Page
To Previous Page IconTo Previous Page
Loading...
– 16
MAINTENANCE
Cleaning
and
maintenance
m
ust
be
carr
ied
out
only
by
qualified
ser
vice
personal.
Bef
ore
cleaning,
stop oper
ation and s
witch off the po
wer supply
.
wer supply.wer supply
CA
UTION
1.
AIR FIL
TER
AIR FILTER AIR FIL
When
the
filter
indicator
lamp
comes
on,
be
sure
to
clean
the
filter
.
By
doing
so
,
the
po
wer
r
ates
are
saved.
In
case
the
air
filter
is
full
of
dust,
the
air
flow
will
decrease
and
the
cooling
capacity
will
be
reduced.
Fur
ther
,
noise
ma
y
occur
.
Be
sure
to
clean
the
filter
f
ollo
wing
the
procedure
belo
w.
PROCEDURE
1
Open the front panel carefully and remo
ve
the filter
.
2
V
acuum dust from the air filter using v
Vacuum dust from the air filter using vV
acuum cleaner
.
If
there
is
too
much
dust,
wash
the
filter
with
a
detergent
and r
inse it thoroughly
.
inse it thoroughly.inse it thoroughly
After that, dr
y it in the shade
.
3
Set
the
filter
with
“FRONT”
mark
facing
front,
and
slot them into the original state.
After
attaching
the
filters
,
push
the
front
panel
at
three
arro
w
por
tions
as
sho
wn
in
figure
and
close
it.
Do
not
w
ash
with
hot
water
at
more
than
40°C
.
The
filter
ma
y
shr
ink.
When
w
ashing
it,
shak
e
off
moisture
completely
and
dr
y
it
in
the
shade;
do
not
e
xpose
it
directly
to
the
sun.
The
filter
ma
y
shr
ink.
Don't
oper
ate
the
unit
without
filter
.
F
ault
ma
y
occur
if
y
ou
contin
ue
.
CA
UTION
17
2.
CLEANING OF FR
ONT P
ANEL
ONT PANELONT P
Remo
ve
the
front
panel
and
wash
with
clean
w
ater
.
W
ash it with a soft sponge
.
After
using
neutral
detergent,
wash
thoroughly
with
clean w
ater
.
When
front
panel
is
not
removed,
wipe
it
with
a
soft
dry
cloth.
Wipe
the
remote
controller
thoroughly
with
a soft dry cloth.
Wipe
the
w
ater
thoroughly
.
If
water
remains
at
indicators
or
signal
receiver
of
indoor unit, it causes trouble.
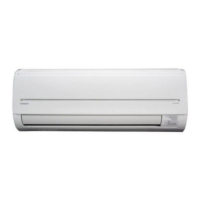
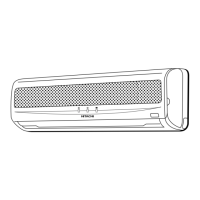
Method of removing the front panel.
Be
sure
to
hold
the
front
panel
with
both
hands
to
detach and attach it.
CA
UTION
Removing the F
ront P
anel
Attaching the F
ront P
anel
When
the
front
panel
is
fully
opened
with
both
hands
,
push
the
r
ight
ar
m
to
the
inside
to
release
it,
and
while
closing
the
front
panel
slightly
, put it out f
slightly, put it out fslightly
orw
ard.
M
ov
e
the
shafts
of
the
left
and
r
ight
ar
ms
into
the
steps
in
the
unit
and
securely
inser
t
them
into the holes
.
Shaft
Step
Hole
B
E
N
Z
I
N
E
T
H
I
N
N
E
R
A
C
I
D
Do
not
splash
or
direct
w
ater
to
the
body
of
the
unit
when
cleaning
it
as
this ma
y cause shor
this may cause shorthis ma
t circuit.
Never
use
hot
water
(above
40°C),
benzine,
gasoline,
acid,
thinner
or
a
brush, because they will damage the plastic surface and the coating.
3.
MAINTENANCE
AT
BEGINNING OF LONG OFF PERIOD
Run
the
unit
by
setting
the
operation
mode
to
(
F
AN)
FAN) F
and
the
f
an
speed
to
HI
f
or
about
half
a
da
y
on a fine da
y
on a fine dayon a fine da
, and dr
y, and dry
y the whole of the unit.
Switch
off
the
po
w
er
plug
or
tur
n
off
the
circuit
break
er
.
Air
Blow
CAPABILITIES
CAUTION
VARIOUS FUNCTIONS
TIMER PROGRAMMING/SLEEP TIMER OPERATION
WHEN ASKING FOR SERVICE, CHECK THE FOLLOWING POINTS.
- 12
-

Related product manuals