! CAUTION
• Do not install the indoor units in a ammable environment to avoid a
re or an explosion.
• Check to ensure that the ceiling slab is strong enough. If not strong
enough, the indoor unit may fall down on you.
• Do not install the indoor units in a machinery shop or kitchen where
vapor from oil or mist ows to the indoor units. The oil will deposit on
the heat exchanger, thereby reducing the indoor unit performance,
and may deform. In the worst case, the oil damages the plastic parts
of the indoor unit.
• To avoid any corrosive action to the heat exchangers, do not install
the indoor units in an acid or alkaline environment.
• When lifting or moving the indoor unit, use appropriate slings to avoid
damage and be careful not to damage the insulation material on units
surface.
2
.1 UNIT INSTALLATION
2.1.1 Factory-Sup
plied
Accessories
Accessory Qty. Purpose
Pattern Board
(Carton Board)
1
For adjusting space of
false ceiling opening
and position of the unit
Checking Scale 1
Washer with
Insulation (M10)
4
For unit installation
Washer (M10)
4
Drain Hose 1
For Drain Hose
Connection
Hose Clamp 1
Pipe insulation 1
For refrigerant
piping connection
Pipe insulation
1
Cord clamp
2
For fixing remote
control switch wiring,
louver sensor and
insulation of piping
Cord clamp 6
Insulation
(5Tx50x200)
1
For covering wiring
connection
Insulation
(5Tx270x270)
1
For covering drain
connection
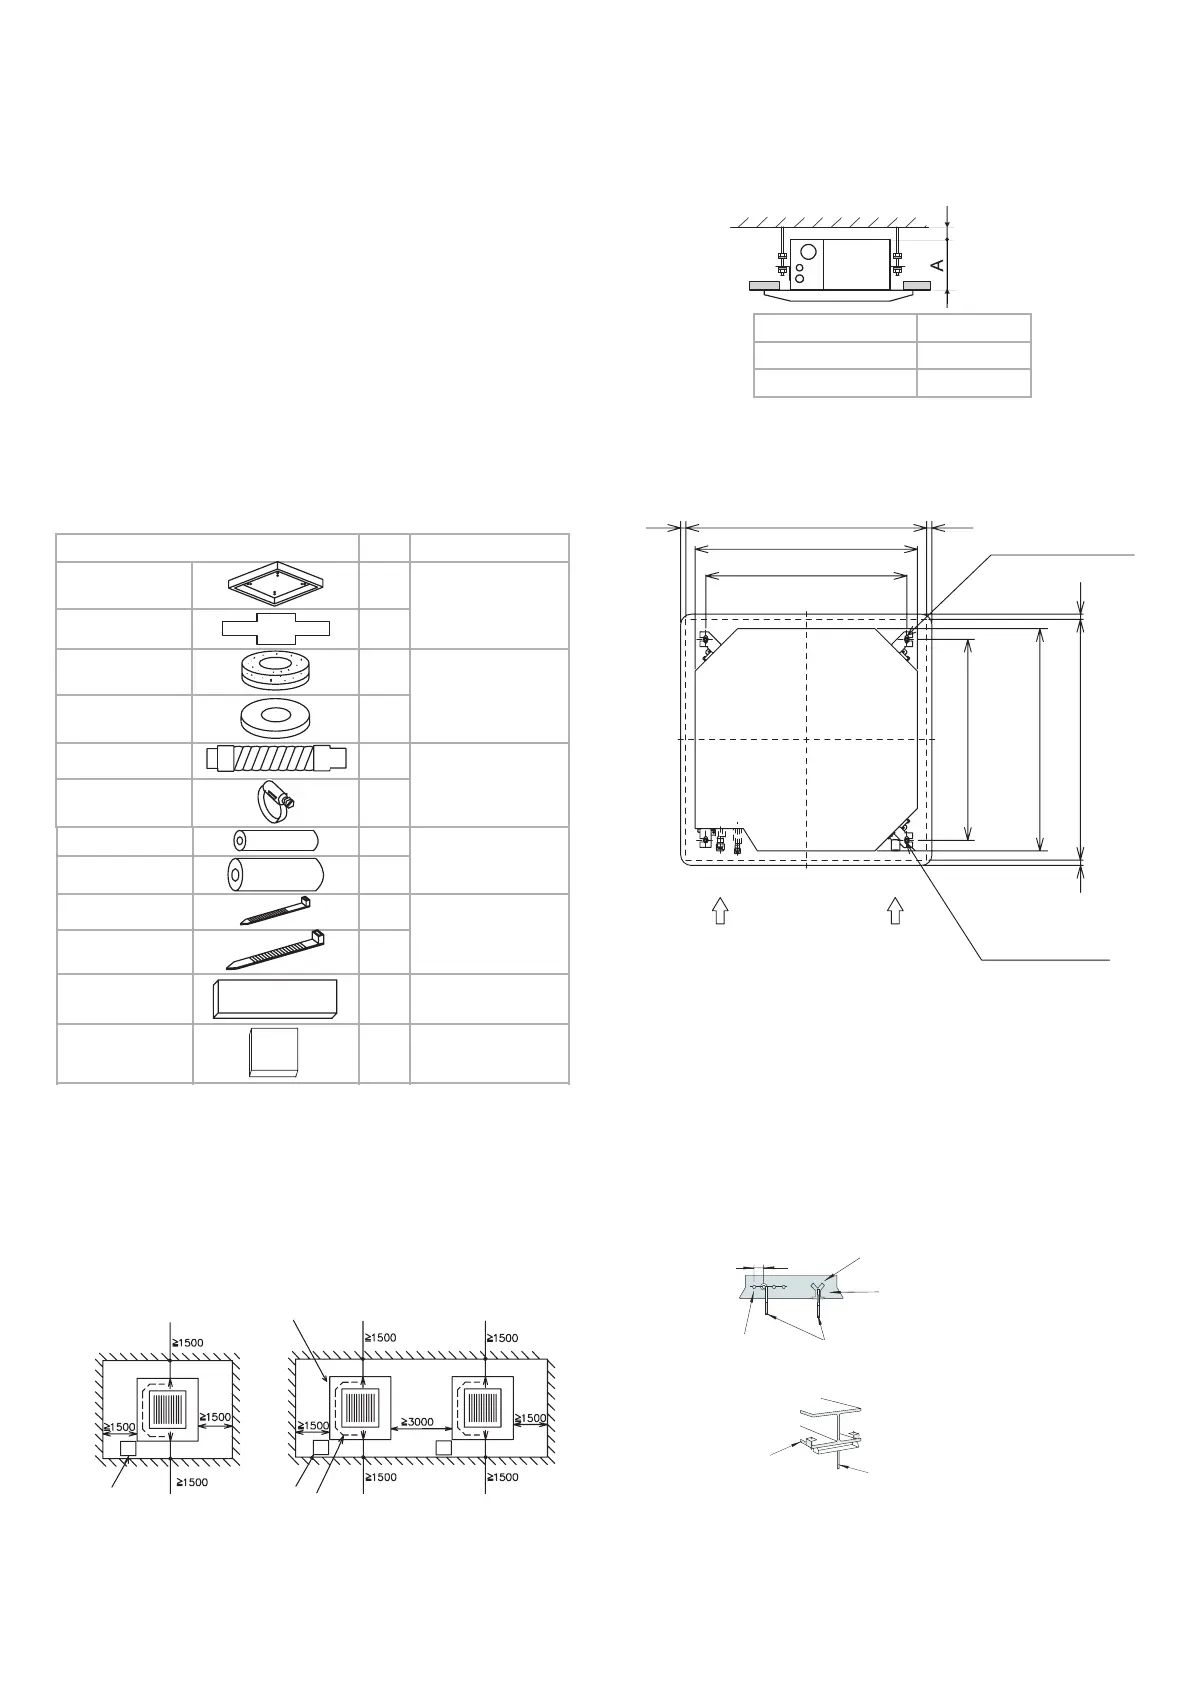
2.1.2 Initial Check
• Install the indoor unit with a proper clearance around it
paying careful attention of installation direction for the piping,
wiring and maintenance working space, as shown below.
• Provide a service access door near the unit piping
connection area on the ceiling.
(mm)
Service
Access Door
Service Access
Door
Piping
Connection
Drain Piping
Connection
• Check space between ceiling and false ceiling is enough as
indicated below.
•
Check the ceiling surface is flat for the air panel installation
work.
Clearance:
10-20mm
Unit High
In False
Ceiling
Unit HP A(mm)
RCI-1.0 to 2.5HP 238
RCI-3.0 to 6.0HP 288
Opening Of False Ceiling
• Cut out the area for the indoor unit in the false ceiling and
install suspension bolts, as shown below.
20 20
840
760
2020
760
Dimension of
opening 860 to 910
(Unit size)
(Dimension of
suspension bolts)
(mm)
4-12 x32
Holes
(for suspension bolt)
(Dimension of
suspension bolts)
840 (Unit size)
Dimension of
opening 860 to 910
Piping connection
side
Drain piping
connection side
4-Positions of
suspension bolts
(M10 or W3/8)
(Field-supplied)
•
Check to ensure that the ceiling is horizontally level,
otherwise water can not flow .
• Strengthen the opening parts of the false ceiling.
2.1.3 Installation
Mounting of Suspension Bolts
Mount suspension bolts using M10 (W3/8) as size, as shown.
For concrete slab:
150 to 160mm
Insert (100 to 150Kg)
Concrete
Steel
Anchor Bolt (W3/8 or M10)
For steel beam:
Suspension Bolt
(W3/8 or M10)
I-Beam
 Loading...