1. Remove the cover of the corner pocket (4 portions). Remove
pulling A part toward the arrow direction.
A
2. Pull down the U-shaped hook (at 2 positions) located at the
indoor unit side.
3. Mount the air panel temporarily. Fit the corner position of the
refrigerant pipe connection at the indoor unit and the position
stamped as “Ref. Pipe ”. Then, catch the C-shaped hinges (2
portions) onto the U-shaped hooks (2 portions).
4.
Fix the air panel to the fixing plate by factory supplied long
screws (M6 cross screws).
5. Tighten the long screws until touching the stopper to the
fixing plate. Check to ensure that the distance between the
fixing plate undersurface and the corner panel undersurface is
26mm.
Long screws (Q'ty 4)
C-shaped hinge
Stamp refrigerant
pipe
Refrigerant pipe
connections
Electrical box
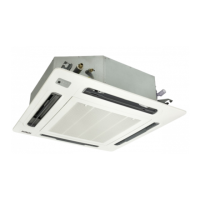
Indoor unit
Air panel
U-shaped hook
Fixing plate
6. When tightening the long screws to prevent air leakage and
to be no gap between the false ceiling surface and the indoor
unit, the inner circumference of the air panel (the position to
attach the air inlet grille) may be slightly deformed. However, it
is not abnormality.
26
12+50
False ceiling
Indoor unit
Fixing plate
(indoor unit)
Corner
Long screw
panel
! CAUTION
•
If tighten long screws insufficient, may cause something wrong as
below.
Air Leakage
Smudge
Dewing
•
If any gap has even though tighten long screws sufficient, readjust the
height of indoor unit.
No gap shall exist
•
It’s able to adjust the indoor unit height by using wrench from the
corner pocket.
Wrench
•
Too considerable adjustment of height cause dewing from drain-pan.
•
Do not turn the air louver by hand. If moved, the louver mechanism
would be damaged.
Installing
Air Panel
 Loading...