HITACHI
SR-2004
METER ADJUSTMENT
• Meter sensitivity adjustment a
1. Set the volume control to
(00)
position..
2.
Set the power switch to ON. (FUNCTION switch:
AUX)
3. Connect the
OSC
output to the AUX input. (Frequency: 1 kHz)
4. Connect the
AC
voltmeter to the speaker terminals.
5. Adjust the
OSC
output level and volume control
so
that the
output
voltage at the speaker terminals
is
28.3V
rms
with-
out
speaker connections.
Item
Measuring instrument
Adjust Deviation
of
needle
Meter adjustment
Oscillator
R584L,R
lOOW
AC
voltmeter
REGRAGE
DE
COMPTEUR
• Reglage de sensibilite de compteur
1.
RegIer la commande
de
volume sur la position
(00).
2. RegIer l'interrupteur general sur la position de marche "ON"
(Ie
selecteur de fonction sur AUX).
3. Raccorder la sortie
OSC
al'entree AUX (frequence: 1 kHz).
4. Brancher un voltmetre C.A. aux bornes
de
haut-parleurs.
5. Ajuster
Ie
niveau
de
sortie
OSC
et la commande
de
volume pour que la tension
de
sortie aux bornes de haut-parleurs
soit
de
28,3V efficaces sans que les haut-parleurs ne soient branches.
Designation
Appaeil
de
mesure
Reglage
Course
de
Iaiguille
Courant dewatte
Voltmetre acourant alternatif
R584L,R
100W
e
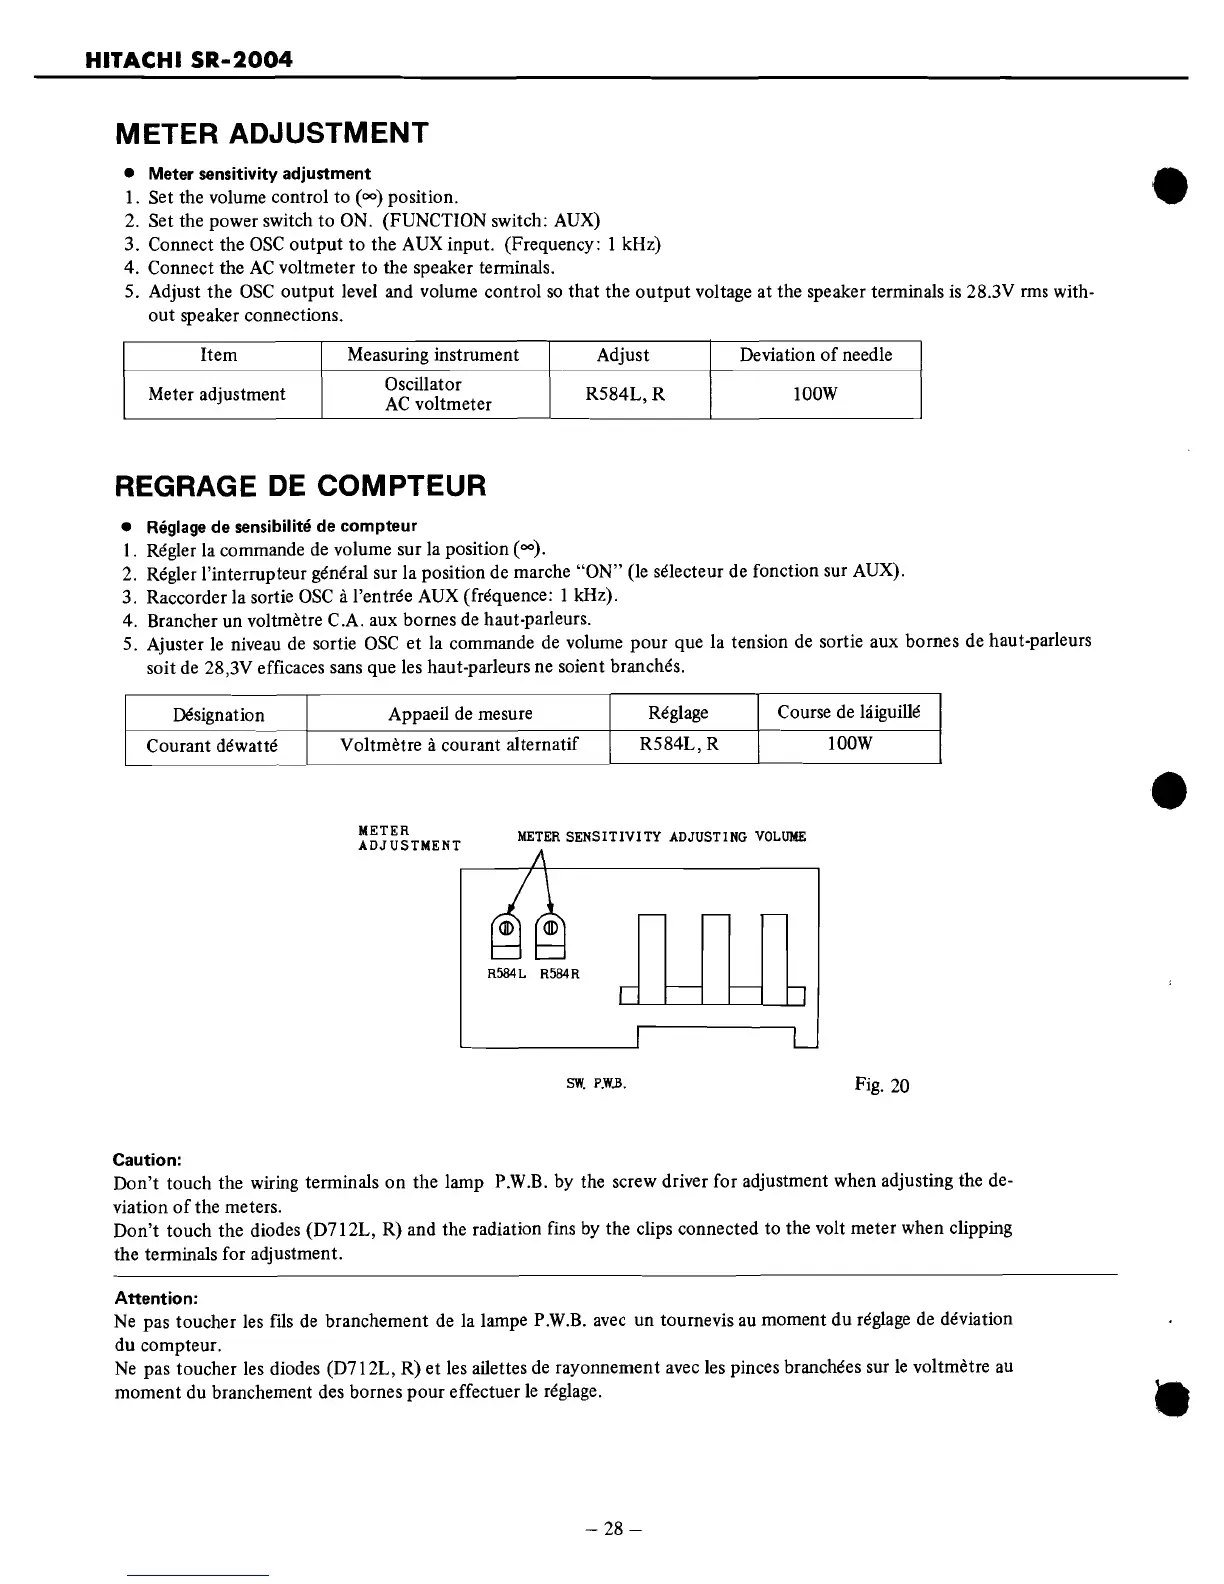
METER
ADJUSTMENT
METER
SENSITIVITY
ADJUSTING
VOLUME
R584L
R584R
sw.
p.W.B.
Fig.
20
Caution:
Don't touch the wiring terminals
on
the lamp
P.W.B.
by the screw driver for adjustment when adjusting the de-
viation
of
the meters.
Don't touch the diodes (D712L, R) and the radiation fins
by
the clips connected to the volt meter when clipping
the terminals for adjustment.
Attention:
Ne
pas toucher les fils
de
branchement
de
la lampe
P.W.B.
avec
un tournevis
au
moment du reglage
de
deviation
du compteur.
Ne
pas toucher les diodes (D712L, R)
et
les ailettes
de
rayonnement
avec
les pinces branchees sur
Ie
voltmetre
au
moment du branchement des bornes pour effectuer
Ie
reglage.
-
28-
-
 Loading...