9 10
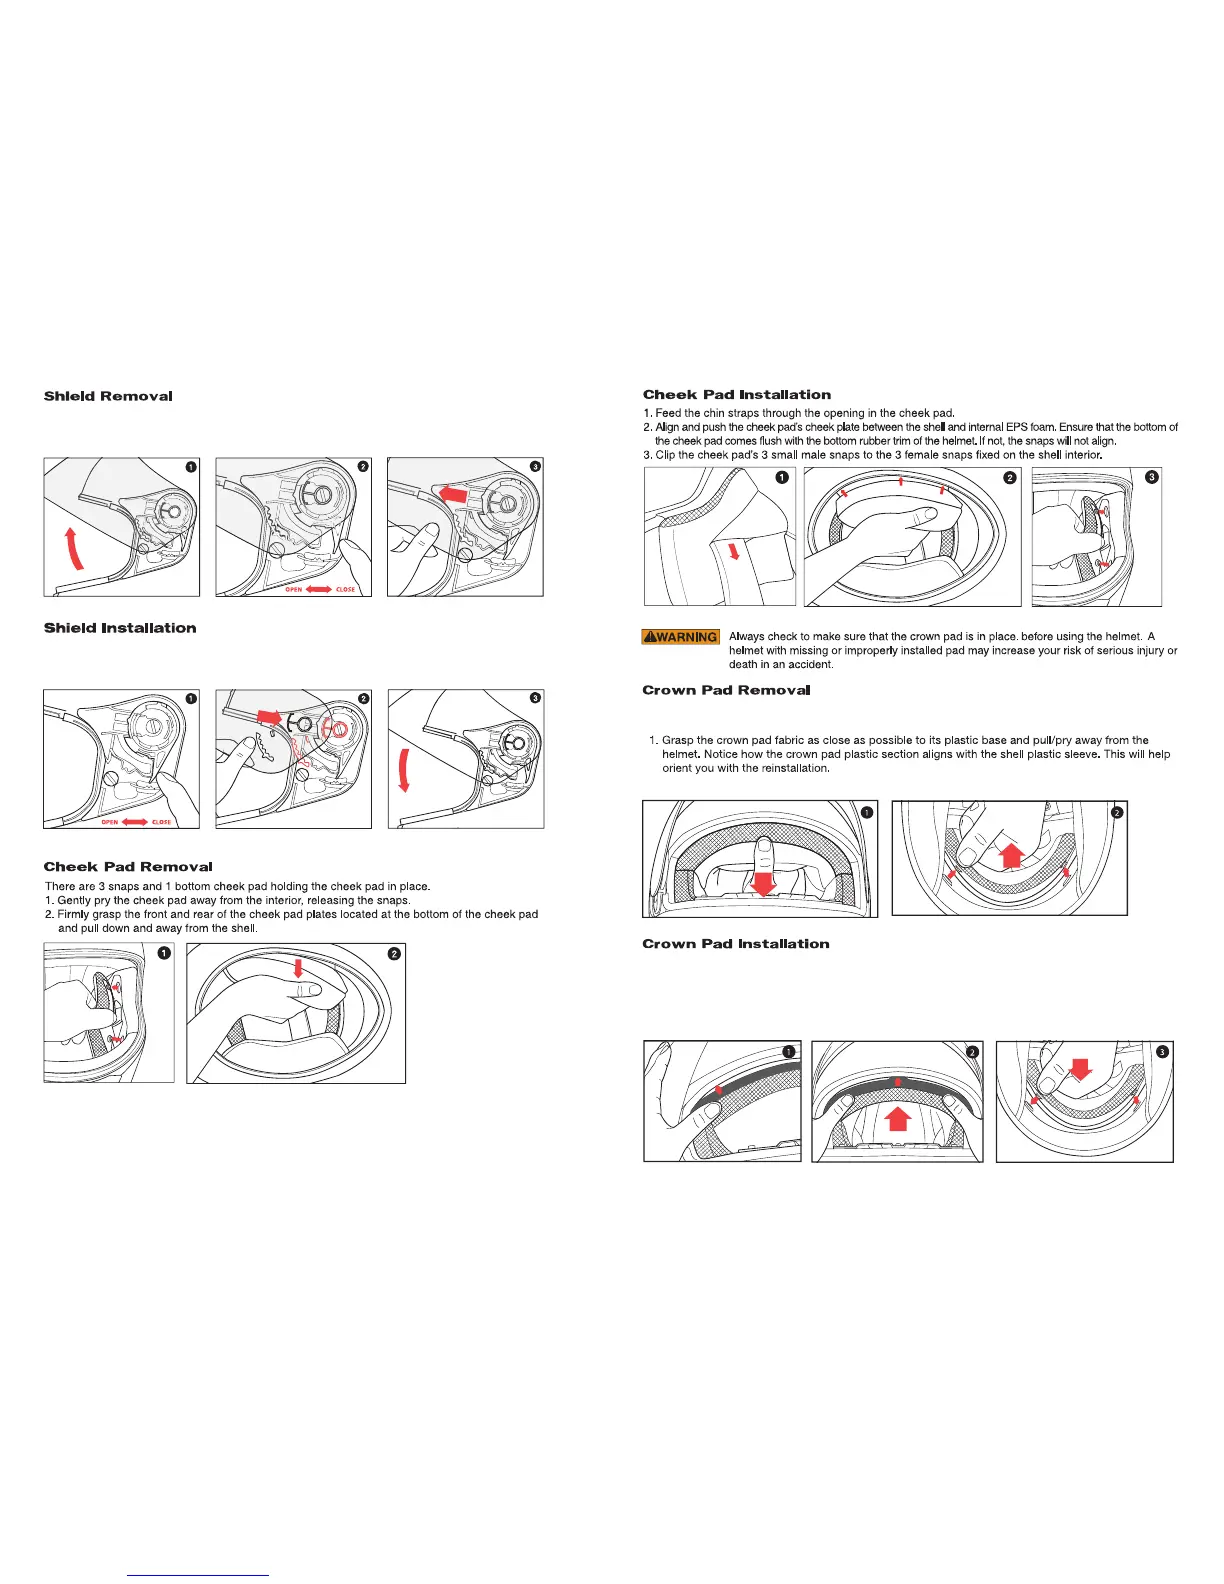
1. Open shield to the maximum open position.
2. Move the handle-locker to the open position.
3. Grasp the shield then pull it forward, free of the base-plate channel.
1. Ensure that the handle-locker is in the open position.
2. Align and push the shield guide into the plate-gear guide.
3. Ensure that the handle-locker is in the closed position.
1. Align the left or right end of the crown pad’s plastic sleeve with the shell. Force the crown pad’s
plastic sleeve in between the shell and EPS (one side at a time).
2. Align the center of the crown pad’s plastic sleeve with the shell. Force the crown pad’s plastic sleeve
in between the shell and EPS.
3. Align and snap the two rear snaps into place.
The crown pad area is composed of the crown pad, a rear plastic snap mount system, and a front pad
plate which is inserted between the shell and impact absorbent liner.
2. Gently pry the crown pad fabric away from the interior, releasing the snaps.
 Loading...