EasyManua.ls Logo

HJH office KIDDY GTI 2 User Manual

HJH office KIDDY GTI 2
2 pages
To Next Page IconTo Next Page
Page #1 background imageLoading...
Page #1 background image
KIDDY GTI 2
Aufbauanleitung
Assembly instructions
Aufbau
Drücken Sie je eine Stuhlrolle in die fünf
Öffnungen des Fußkreuzes.
Stecken Sie die Gasfeder mittig in das
Fußkreuz wie abgebildet. Stülpen Sie die
Abdeckung über die Gasfeder.
Schrauben Sie die Mechanik an den Sitz.
Befestigen Sie die Rückenlehne am flexib-
len Rückengelenk.
Montieren Sie die Rückenlehne an der
Mechanik. Setzen Sie die Teile wie gezeigt
im Bild zusammen. Stellen Sie den Knopf
fest.
Stecken Sie den Sitz auf die Gasfeder.
Assembly
Insert the five castors into designated
holes at the bottom of the 5-star base.
Insert the gaslift into the center of the
base. If present, remove the plastic pro-
tective cap from the gas lift. Put the cover
on the gaslift.
Mount the mechanism onto the seat.
Mount the backrest onto the flexible joint.
Mount the backrest onto the mechanism.
Assemble the knob as shown in the pic-
ture. Tighten the knob.
Put the seat onto the gaslift.
Praktischer Tipp!
So stellen Sie Ihren neuen
Bürostuhl richtig ein!
Sicherheitshinweis Gasfeder:
Gasfeder nie selbst zerlegen, einstechen oder
önen. Korpus steht unter Druck.
Caution Gaslift:
Never disassemble, puncture or open Gas spring.
Gas cylinder is under pressure.
Question and Answer IconNeed help?

Do you have a question about the HJH office KIDDY GTI 2 and is the answer not in the manual?

HJH office KIDDY GTI 2 Specifications

General IconGeneral
BrandHJH office
ModelKIDDY GTI 2
CategoryIndoor Furnishing
LanguageEnglish

Summary

Assembly Instructions

Install Castors

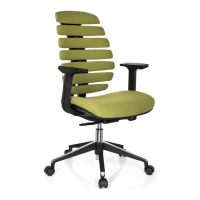
Insert five castors into designated holes at the bottom of the 5-star base.

Install Gaslift

Insert the gaslift into the center of the base and put the cover on the gaslift.

Mount Seat Mechanism

Mount the mechanism onto the seat.

Attach Backrest

Mount the backrest onto the flexible joint and then onto the mechanism.

Final Seat Placement

Put the seat onto the gaslift.

Assembly Notes and Safety

Helpful Tip for Setup

Provides guidance on how to properly adjust your new office chair.

Gaslift Safety Warning

Never disassemble, puncture, or open the gas spring as the cylinder is under pressure.

General Assembly Remarks

Initial Inspection and Tightening

Inspect all parts for damage and initially tighten screws just enough to hold, then firmly.

Castor Suitability

Manufacturer castors suit carpeted floors; hard floor castors are available separately.

Related product manuals