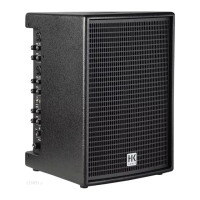
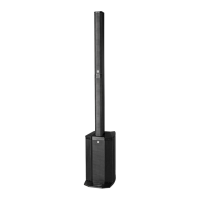
POLAR 12 1.0
4
Heads up: Feel free to set the system up without a spacer if you wish to
place it on a high stage, table or the like.
Caution! Do not transport or otherwise move an assembled POLAR
system. This could damage it, or if it tips, injure people or destroy
property.
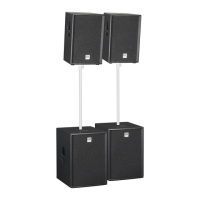
Stereo Setup
RL
If you wish to run two POLAR 12s in stereo, route the mixing console’s left
channel to the system on the left and its right channel to the system on
the right. Make sure the DSP settings for Mode, EQ, Delay, and so on are
identical for both systems. See chapter 3 for more on this.
Info: You can also operate a POLAR 10 and a POLAR 12 in stereo. Use the
two Sub
●
10 knobs and the respective DSP settings (system EQs; see
section 3.2 for more on this) to compensate for the di erences in the two
systems’ bass response.
Delay Line for Distributed Systems
POLAR’s Delay function lets you use it for a delay line. See section 3.2,
Delay, to learn more about this. All you have to do is measure the distance
between the main speaker and POLAR in meters, and enter that number to
"Delay" in the DSP menu. POLAR factors the main speaker’s delay into the
equation, automatically calculates the delay time, and renders the signal
with the proper delay.
2 Connectors and Control Features
Rear Panel
Mains
On
O
Power
100-240 V~
50-60 Hz
0.8 A @ 1/8
output power
T6.3AL 250 V
Caution: To reduce
the risk of electric
shock, grounding of the
center pin of this plug must
be maintained.
Serial No.
Caution: Risk of
electric shock!
Do not open!
Refer servicing
to qualified
service
personnel.
FCC ID: 2AWA3-POLAR
IC: 26052-POLAR
R
R 211-191202
1
2
●
1
Mains
Please use the factory-included power cable to connect this IEC mains
socket to a wall outlet.
Heads up: The built-in switching power unit features a wide-range input
that automatically adapts to AC voltages ranging from 100 V to 240 V at
50 or 60 Hz.
●
2
Power
This on/o button powers the system up and down. When you switch
POLAR on, it loads the most recently used DSP settings and will be ready
to operate within seconds when the four channels’ level indicators and the
Master volume setting appear in the display.
Channel 1 and Channel 2 (Line/Mic)
Channel 1 and 2’s feature sets are identical. These channels accept
microphones and line-level instruments such as keyboards.
●
3
Input
This balanced XLR / 1/4" (6.35 mm) combo jack accepts an XLR connector or
a balanced or unbalanced 1/4" (6.35 mm) jack plug.
Heads up: A balanced signal is always preferable because it is less
susceptible to HF and other interference.
●
4
Line/Mic
Adjust the preamplifi ers’ gain and impedance with this selector. Set it to
Line to connect a line-level device such as a mixing console, keyboard or the
like. Set it to Mic to connect a dynamic microphone.
●
5
Volume
Turn this knob to adjust the signal level. Twist it counterclockwise to the far
left to turn the volume all the way down and clockwise to the far right to
turn it all the way up.
 Loading...