This document serves as the user's manual for the HKC 18.5" LCD Monitor with LED Backlight, model N1812. It provides comprehensive instructions for setup, operation, and maintenance, ensuring users can maximize the monitor's performance and longevity.
Function Description
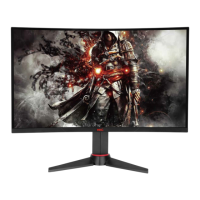
The HKC N1812 is an 18.5-inch LCD monitor equipped with LED backlighting, designed to deliver high-quality visual output for various computing needs. Its primary function is to display images and video from a connected computer or other compatible devices. The monitor is built to offer a clear and vibrant viewing experience, suitable for both general use and specific applications.
Usage Features
The monitor boasts several features aimed at enhancing user experience and ease of use:
- High-Quality Image Colors: The monitor supports 16.7 million colors, ensuring rich and accurate color reproduction for a visually engaging experience.
- Smart Image Screen Setting (OSD): The On-Screen Display (OSD) menu provides a simple layout and easy selection options for adjusting various image parameters. This allows users to fine-tune the display to their preferences.
- Smart Control Interfaces: The monitor incorporates user-friendly control interfaces, making it easy to navigate and adjust settings.
- Auto Function: For convenience, the monitor includes an auto-adjust function that optimizes settings when no specific adjustments are made, ensuring an ideal display automatically.
- Basic Setup:
- VGA and DVI Connectivity: The monitor supports both VGA (analog) and DVI (digital) signal inputs, offering flexibility in connecting to different graphic cards and devices. Users simply insert the VGA or DVI cable into the PC graphic card.
- Wide Power Voltage Range: The monitor is designed to operate within a wide power voltage range (AC 100-240V, 50/60Hz), making it adaptable to various power environments.
- Power Connection: Users connect the power cable to the monitor's power socket and then to a power source.
- Power On/Off: The monitor is switched on by pressing the power control on/off key, which is the first button from the bottom at the rear panel.
- Power Indicator Light:
- A blue (green) light indicates that the power is on.
- A blue (green) light also signifies that the signal is operating normally.
- A blue (green) flash indicates that there is no input signal, alerting the user to check connections.
- Screen Image Setups (Control Panel Buttons): The control panel at the rear of the monitor features five keys for adjusting settings via the OSD:
- Menu/Enter: Displays main choice menus.
- Down: Moves down or lowers options, also functions as a hotkey.
- Up: Moves up or raises options, also functions as a hotkey.
- Exit: Exits the main menu or performs auto-adjust when no menus are active.
- Power On/Off: Controls the monitor's power.
- Adjustment Settings: The OSD menu allows for detailed adjustments:
- Brightness/Contrast Ratio: Users can adjust display brightness and contrast ratio.
- ECO Mode: Offers different modes (Standard, Text, Game, Movie) to optimize display settings for various content types.
- Dynamic Contrast Ratio (DCR): Enables or disables DCR for enhanced contrast.
- Image Setting:
- Clock: Adjusts the picture clock to reduce vertical noise.
- Focus: Adjusts the picture phase to reduce horizontal noise.
- Horizontal/Vertical Position: Allows users to adjust the picture's horizontal and vertical positions.
- Image Ratio: For wide-screen models, it allows adjustment of the image aspect ratio (Wide screen or 4:3).
- Color Temperature: Provides options for Warm, Cold, or Custom color temperatures, with fine-tuning for red, green, and blue color components.
- OSD Setting:
- Horizontal/Vertical Position: Adjusts the OSD menu's position on the screen.
- Time Setting: Adjusts the OSD display time.
- Transparency: Adjusts OSD transparency.
- Language: Selects the OSD menu language from a range of options including English, French, German, Japanese, Korean, Traditional Chinese, and Simplified Chinese (Russian).
- Resetting:
- Image Auto Adjustment: Automatically adjusts horizontal/vertical position, focus, and clock of the image.
- Color Auto Adjustment: Adjusts white balance.
- Resetting: Restores to factory settings.
- Hotkey Selection: Allows users to assign hotkeys for frequently used functions like ECO+DCR, BRI+CON, ASP+ECO, and SOU+VOL (some hotkeys are model-specific).
- Input Selection: Allows manual selection between VGA (analog) and DVI (digital) signal inputs.
Maintenance Features
Proper maintenance is crucial for the monitor's longevity and performance. The manual provides clear guidelines:
- Cleaning the Monitor:
- Power Off: Always ensure the monitor power is switched off before cleaning.
- No Direct Spray: Do not spray any liquid directly onto the screen or the plastic panel.
- Screen Cleaning: Use clean, soft, non-fur materials. For stubborn dirt, a small amount of non-ammonia liquid and non-alcohol glass cleanser can be used.
- Plastic Panel Cleaning: Use a soft dry cloth. For unclean surfaces, a little non-ammonia liquid and non-alcohol non-abrasion cleanser can be applied.
- General Precautions:
- Unplug Before Cleaning: Unplug the monitor before cleaning with a slightly damp cloth.
- Dry Cloth for Screen: Wiping the screen with a dry cloth is recommended only when the power is off.
- Avoid Harsh Liquids: Do not use alcohol or ammonia-based liquids.
- Ventilation: The monitor has ventilation holes; do not cover or block them.
- Heat Sources: Avoid placing the monitor near electric heaters or in enclosed rooms without ventilation.
- No Insertions/Sprays: Do not insert any matter or spray any liquid into the monitor.
- Stable Placement: Position the monitor on a safe, stable surface to prevent damage or injury from falling.
- Unplug for Extended Periods: Unplug the monitor if it will not be used for a long time.
- Avoid Heavy Items: Do not place heavy items on the monitor or its electric cord.
- No Back Panel Opening: Do not open the monitor's back panel, as it contains high voltage current.
- Troubleshooting: The manual includes a troubleshooting section to address common issues:
- No Image on Screen: Check power button, brightness/contrast, power indicator (flashing indicates no input signal), and signal switch for notebooks/laptops.
- Non-focus Image: Verify proper insertion of the image signal cable.
- Flash Screen: Check for insufficient power, avoid magnetic fields from other devices, and use the "Exit" key for auto-adjust.
- Wrong or Unusual Colour: Check signal cord connection (loose plugs can cause bad connection) and try connecting to another PC for comparison.
- Whole Screen Appear Up and Down H-rolling Scan: Ensure input signal frequency is within 60-76Hz and re-tighten the signal cable.
This comprehensive guide ensures that users can effectively set up, operate, and maintain their HKC N1812 monitor, providing a reliable and enjoyable visual experience.