EasyManua.ls Logo

Hobby Biotherm II - User Manual

Hobby Biotherm II
20 pages
Go to English
Print Icon
To Next Page IconTo Next Page
Loading...
Dohse Aquaristik GmbH & Co. KG · Otto-Hahn-Str. 9 · 53501 Gelsdorf · Germany
Art.-Nr. / Item no. / Codize / Réf. / Art. nr. / Código: 10882
Bedienungsanleitung · Operating instruction
Manuale d‘uso · Mode d‘emploi
Handleiding · Manual de instrucciones
Digitaler Temperaturregler für Terrarien Digital temperature controller for terraria
Regolatore di temperatura digitale per terrari Régulateur de température numérique pour terraria
Digitale temperatuurregelaar voor terrariums Regulador de temperatura digital para terrarios
Biotherm II
A
m
p
h
i
b
i
a
n
s
R
e
p
t
i
l
e
s
T
u
r
t
l
e
s
I
n
v
e
r
t
e
b
r
a
t
e
s
Question and Answer IconNeed help?

Do you have a question about the Hobby Biotherm II and is the answer not in the manual?

Overview

The device in question is the Hobby Biotherm II Digital Temperature Controller for Terraria. It is designed to precisely regulate temperature in terrariums, aquariums, paludariums, greenhouses, or aviaries, ensuring a stable environment for various animals.

Function Description

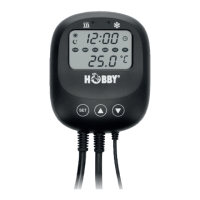
The Biotherm II is an advanced digital temperature controller that allows for separate control of heating and cooling elements. It features an innovative measuring and control system, enabling temperature adjustments in precise 0.1°C increments. The device also incorporates a real-time clock with one-second interval control, making it possible to program specific day and night temperature cycles.

A key safety feature is the automatic shutdown of both heating and cooling outputs during programming, preventing accidental operation. The device is equipped with an acoustic and optical alarm system that activates if the temperature deviates significantly from the set values, providing an immediate alert to potential issues. The display shows both the set and actual temperature values, and it is illuminated for easy readability, even in low light conditions. An LED activity indicator on the control unit visually confirms whether heating or cooling elements are actively regulating the temperature.

The waterproof temperature sensor utilizes a Quick-Connect connector for simple and secure installation. The main regulator unit includes two plug sockets, one for a heating device and one for a cooling device, each capable of handling up to 600W (resistive load). The total connected load for both sockets is a maximum of 1200W. The Biotherm II's "Smart-Chip" technology ensures stable and reliable temperature control, making it suitable for a wide range of applications requiring constant temperature management.

Important Technical Specifications

  • Operating Voltage: 100 – 240 V, 50/60 Hz
  • Connected Load per Socket: Max. 600 W (resistive load)
  • Total Connected Load (Regulator Unit): Max. 1200 W (resistive load)
  • Temperature Display Range: -30°C to +90°C
  • Temperature Control Range: 0.0°C to +60°C
  • Temperature Alarm Range: 0.0°C to +15°C (adjustable deviation from set temperature)
  • Temperature Display Resolution: ±0.1°C
  • Temperature Control Accuracy: ±0.1°C
  • Connection Cable Length (Control Unit to Regulator Unit): 1.5 m
  • Sensor Cable Length: 1.8 m
  • Power Cable Length: 1.4 m
  • Memory Function: Retains programmed values for temperature and time for up to two years in case of power outage (current time needs to be reset).
  • Switching Delay for Heating/Cooling: Adjustable from 0.1°C to 15.0°C.
  • Cooler Switch-on Delay: Adjustable from 0 to 10 minutes.
  • Temperature Unit: Selectable between Celsius (°C) and Fahrenheit (°F).

Usage Features

The Biotherm II offers intuitive programming through touch sensors on the control unit.

Setting the Current Time: To set the current time, press and hold the "SET" button for approximately 3 seconds until the clock symbol blinks on the display. Briefly press "SET" again to enter hour adjustment mode. Use the up/down arrow buttons to set the hour. Press "SET" again to confirm the hour and proceed to minute adjustment. Set the minutes using the arrow buttons. Hold "SET" for 3 seconds to save the time.

Setting Day and Night Start Times: For initial operation, both a day start time and a night start time must be programmed. It is recommended to align these times with the lighting duration of the terrarium.

  • Day Start Time: Press and hold "SET" for 3 seconds. Press the up arrow button once. The sun symbol will blink. Press "SET" again. The hour display will blink. Use the arrow buttons to set the desired day start time (only full hours are adjustable). Hold "SET" for 3 seconds to save.
  • Night Start Time: Press and hold "SET" for 3 seconds. Press the up arrow button twice. The moon symbol will blink. Press "SET" again. The hour display will blink. Use the arrow buttons to set the desired night start time (only full hours are adjustable). Hold "SET" for 3 seconds to save.

Setting the Set Temperature (Day and Night): The Biotherm II allows for separate day and night temperatures, which is beneficial for animals requiring a temperature drop at night. The adjustable range is 0.0°C to +60°C.

  • Day Set Temperature: Press and hold "SET" for 3 seconds. Press the up arrow button three times. The "TSV" symbol will blink. Press "SET" again. The temperature display will blink. Use the arrow buttons to set the desired day temperature. Hold "SET" for 3 seconds to save.
  • Night Set Temperature: Press and hold "SET" for 3 seconds. Press the up arrow button three times. The "TSV" symbol will blink. Press the up arrow button twice. The temperature display will blink. Use the arrow buttons to set the desired night temperature. Hold "SET" for 3 seconds to save. If day and night temperatures are set identically, the device will maintain that temperature for 24 hours.

Setting the Switching Delay for Heating and Cooling: This feature protects connected electronic devices by preventing rapid on/off cycling. The range is 0.1°C to 15.0°C.

  • Heating Switching Delay: Press and hold "SET" for 3 seconds. Press the up arrow button four times. The "HDV" symbol will blink. Press "SET" again. The temperature display will blink. Use the arrow buttons to set the desired delay. Hold "SET" for 3 seconds to save.
  • Cooling Switching Delay: Press and hold "SET" for 3 seconds. Press the up arrow button five times. The "CDV" symbol will blink. Press "SET" again. The temperature display will blink. Use the arrow buttons to set the desired delay. Hold "SET" for 3 seconds to save.
    • Example: If the temperature is 25°C and the switching delay is 3°C, heating activates below 22°C, and cooling activates above 28°C.

Setting the Alarm for Temperature Exceedance/Undershoot: An alarm can be set to activate if the temperature goes above or below a programmed threshold. The range is 0.0°C to +15°C.

  • Alarm Value: Press and hold "SET" for 3 seconds. Press the up arrow button three times. The "ADV" symbol will blink. Press "SET" again. The temperature display will blink. Use the arrow buttons to set the desired alarm value. Hold "SET" for 3 seconds to save.
    • Example: If the temperature is 25°C and the alarm range is ±3°C, an alarm will trigger below 22°C or above 28°C.

Setting the Cooler Switch-on Delay: This feature protects connected cooling devices. If the temperature rises slowly, the cooler starts immediately. If it rises quickly, the cooling function starts only after the set delay. The range is 0 to 10 minutes.

  • Cooler Switch-on Delay: Press and hold "SET" for 3 seconds. Press the up arrow button twice. The "CD" symbol will blink. Press "SET" again. The minute display will blink. Use the arrow buttons to set the desired delay. Hold "SET" for 3 seconds to save.

Setting the Temperature Unit: The display can show temperature in either Fahrenheit or Celsius.

  • Temperature Unit: Press and hold "SET" for 3 seconds. Press the up arrow button once. The "CF" symbol will blink. Press "SET" again. Use the arrow buttons to select the desired unit. Hold "SET" for 3 seconds to save.

Troubleshooting:

  • Display "---": Indicates a broken temperature sensor cable. Solution: Replace sensor (Item no.: 10883).
  • Display "HH": Indicates temperature above +90.0°C. Solution: Check and adjust sensor position.
  • Display "LL": Indicates temperature below -30.0°C. Solution: Check and adjust sensor position.
  • Memory Function: The device retains programmed values for up to two years in case of power failure, but the current time must be reset manually.
  • Acoustic Alarm: Can be silenced by pressing any button. The alarm will only sound again if the programmed set value is reached with a new deviation.

Maintenance Features

Cleaning and Maintenance: Always disconnect the device from the mains power supply before performing any cleaning or maintenance. Use a lint-free cloth, slightly dampened with water, to clean the product. Do NOT use harsh cleaning agents or solvents.

Drip Loop: Ensure a "drip loop" is formed with the power cable, especially when using an extension cord. This prevents water from running along the cable and reaching the electrical outlet. If the plug or socket gets wet, do not pull the plug. First, switch off the fuse or circuit breaker for the device, then pull out the power cable and check the socket for water.

Sensor Placement: Position the temperature sensor in the terrarium far enough away from heat sources to avoid inaccurate measurements.

Warranty: Dohse Aquaristik GmbH & Co. KG provides a 24-month warranty from the date of purchase. For warranty or repair, return the device to the dealer where it was purchased. The warranty card and terms are available on the manufacturer's website: www.hobby-terraristik.com.

Hobby Biotherm II Specifications

General IconGeneral
BrandHobby
ModelBiotherm II
CategoryController
LanguageEnglish