This document provides comprehensive assembly instructions and product information for the Hodedah HI 29-A Wardrobe. It outlines the steps required for assembly, lists all included parts and hardware, and offers important safety and maintenance guidelines.
Function Description:
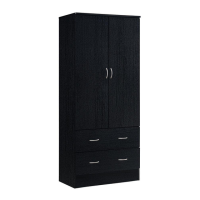
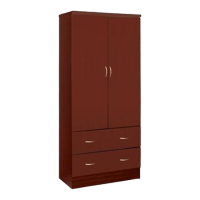
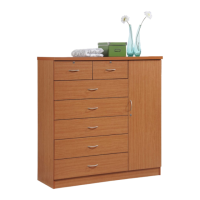
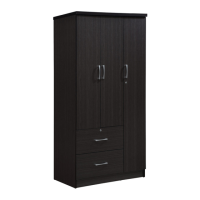
The Hodedah HI 29-A Wardrobe is a multi-functional storage unit designed to organize clothing and other personal items. It features a combination of hanging space, shelves, and drawers, making it suitable for various storage needs in bedrooms or other living spaces. The wardrobe's design aims to provide practical and accessible storage while maintaining a clean and organized aesthetic.
Important Technical Specifications:
The wardrobe is constructed from particle board or similar engineered wood, with specific dimensions for each component.
- Top Panel (1): 1 piece, 800x425x15mm. Forms the top surface of the main unit.
- Right Side Panel (2): 1 piece, 1800x400x15mm. Forms the right vertical side of the main unit.
- Left Side Panel (3): 1 piece, 1800x400x15mm. Forms the left vertical side of the main unit.
- Kick Panels (4, 6, 7): 3 pieces in total, varying dimensions (766x70x15mm, 766x100x15mm, 766x100x15mm). These panels provide structural support at the base of the wardrobe.
- Back Strengthening Panels (5): 2 pieces, 766x70x15mm. These panels reinforce the back structure of the wardrobe.
- Partition Panel (8): 1 piece, 766x400x15mm. Divides the internal space of the wardrobe, often creating separate compartments.
- Door Panels (9): 2 pieces, 1214x388x15mm. These are the main doors of the wardrobe, providing access to the hanging and shelving areas.
- Drawer Front Panels (10): 2 pieces, 780x238x15mm. The visible front faces of the drawers.
- Drawer Side Panels (11, 12): 4 pieces in total, 350x128x15mm each. Form the sides of the drawers.
- Drawer End Panels (13): 2 pieces, 709x128x15mm. Form the back of the drawers.
- Drawer Base Panels (14): 2 pieces, 718x344x2.5mm. The bottom surface of the drawers.
- Drawer Base Supporting Panels (15): 2 pieces, 335x50x15mm. Provide additional support for the drawer bases.
- Back Panels (16): 2 pieces, 1770x397x2.5mm. Form the back enclosure of the main wardrobe unit.
Hardware and Accessories:
- PVC Dowel (A): 27 pieces. Used for joining panels.
- Minifix (B): 6 sets. Cam lock fasteners for strong panel connections.
- Screw M4x45mm (C): 24 pieces. General purpose screws for panel assembly.
- Screw M3.5x16mm (D): 48 pieces. Smaller screws for various attachments, including drawer slides and hinges.
- Screw M3.5x21mm (E): 12 pieces. Used for specific attachments, such as handles.
- Nail (F): 40 pieces. Used for securing the back panels.
- Aluminium Pipe (G): 1 piece, 760 x 19mm. Functions as a hanging rod for clothes.
- Handle (H): 6 pieces. For opening doors and drawers.
- Drawer Slide - A (I): 2 sets, 350mm. For smooth operation of drawers.
- Hinges 5/8 (J): 4 pieces. For attaching the wardrobe doors.
- V-Bracket (K): 2 pieces. Supports the aluminium pipe.
- Sticker (L): 22 pieces. Used to cover screw heads for a cleaner finish.
- L-Leg (M): 4 pieces. Provides stability and elevates the wardrobe from the floor.
Usage Features:
- Assembly Process: The assembly process is broken down into several steps, starting with pre-assembly of dowels and drawer slides, followed by the main unit construction, door assembly, and drawer assembly.
- Pre-Assembly: Involves inserting PVC dowels into designated non-thru holes on various panels (2, 3, 4, 5, 6, 7, 8, 11, 12) using a hammer. Drawer slides (I) and V-brackets (K) are attached to panels 2 and 3 using screws (D).
- Step 1 (Main Unit Base): Panels 4, 5, 6, 7, and 8 are fixed onto Panel 2 using dowels and screws (C).
- Step 2 (Opposite Side Panel): Panel 3 is fixed onto panels 4, 5, 6, 7, and 8 using dowels and screws (C). L-legs (M) are attached to panels 2 and 3 using screws (D).
- Step 3 (Top Panel): Panel 1 is fixed onto panels 2, 3, and 4 using dowels and screws (C).
- Step 4 (Back Panels): Back panels (16) are secured to the main unit using nails (F). Screw heads are covered with stickers (L).
- Door Panel Assembly: Hinges (J) are inserted into door panels (9) and secured with screws (D). Handles (H) are attached to the inner side of door panels (9) with screws (E), and screw heads are covered with stickers (L). The aluminium pipe (G) is placed onto the V-brackets (K).
- Drawer Assembly: Minifix (B) fasteners are inserted into drawer front panels (10). Panel 14 (drawer base) is inserted into the drawer structure. Minifix (B) nuts are inserted into panels 11, 12, and 15. Panel 13 (drawer end) is fixed onto panels 11 and 12 using screws (C). Handles (H) are attached to drawer front panels (10) with screws (E), and screw heads are covered with stickers (L).
- Final Step (Drawer Insertion): The assembled drawers (10) are slid into the main unit, ensuring the white rollers align with the tracks of the drawer slides.
- Safety Information: The manual emphasizes that the product contains small components and should be kept away from small children. It also advises against using power tools for assembly, as they may strip or damage parts.
- Ease of Use: The instructions are presented in a step-by-step format with clear diagrams to guide the user through the assembly process. Parts are labeled or stamped on the raw edge for easy identification.
- Mobility: The manual advises moving the assembled furniture carefully with two people, lifting and carrying it to its new location, and never pushing, dragging, or pulling it, especially on carpet.
Maintenance Features:
- Warranty: Hodedah offers a one-year warranty from the date of original purchase, covering defects in material and workmanship. This warranty is limited to the repair or replacement of defective parts and does not include assembly labor.
- Warranty Exclusions: The warranty does not apply to products improperly assembled, subjected to misuse or abuse, or altered/repaired in any way.
- Obtaining Warranty Service: Purchasers must present the original bill of sale to obtain warranty service. Replaced components are warranted for the remainder of the original warranty period.
- Parts Replacement: If any part is missing or damaged, customers are encouraged to email customer service for free replacement parts.
- Contact Information: Hodedah provides contact details (phone and email) for assistance with assembly, identifying parts, product information, or ordering parts.
- General Care: While not explicitly detailed as "maintenance," the advice to move the furniture carefully suggests a need for gentle handling to prevent damage. The use of stickers to cover screw heads also contributes to the aesthetic maintenance of the product.
- Future Reference: Users are instructed to keep the instruction booklet for future reference, implying that it contains valuable information for ongoing care or potential reassembly.