I.code: 0029827-A
SLIDING JAW +4 INCH KIT
2
11
11
1
A
B
R
ISTRUZIONI DI MONTAGGIO DEL
KIT 4028590
FASE 1 Operazioni preliminari
PRIMA DELL’INSTALLAZIONE SCOLLEGARE LO
SMONTAGOMME DALL’ALIMENTAZIONE
ELETTRICA E PNEUMATICA
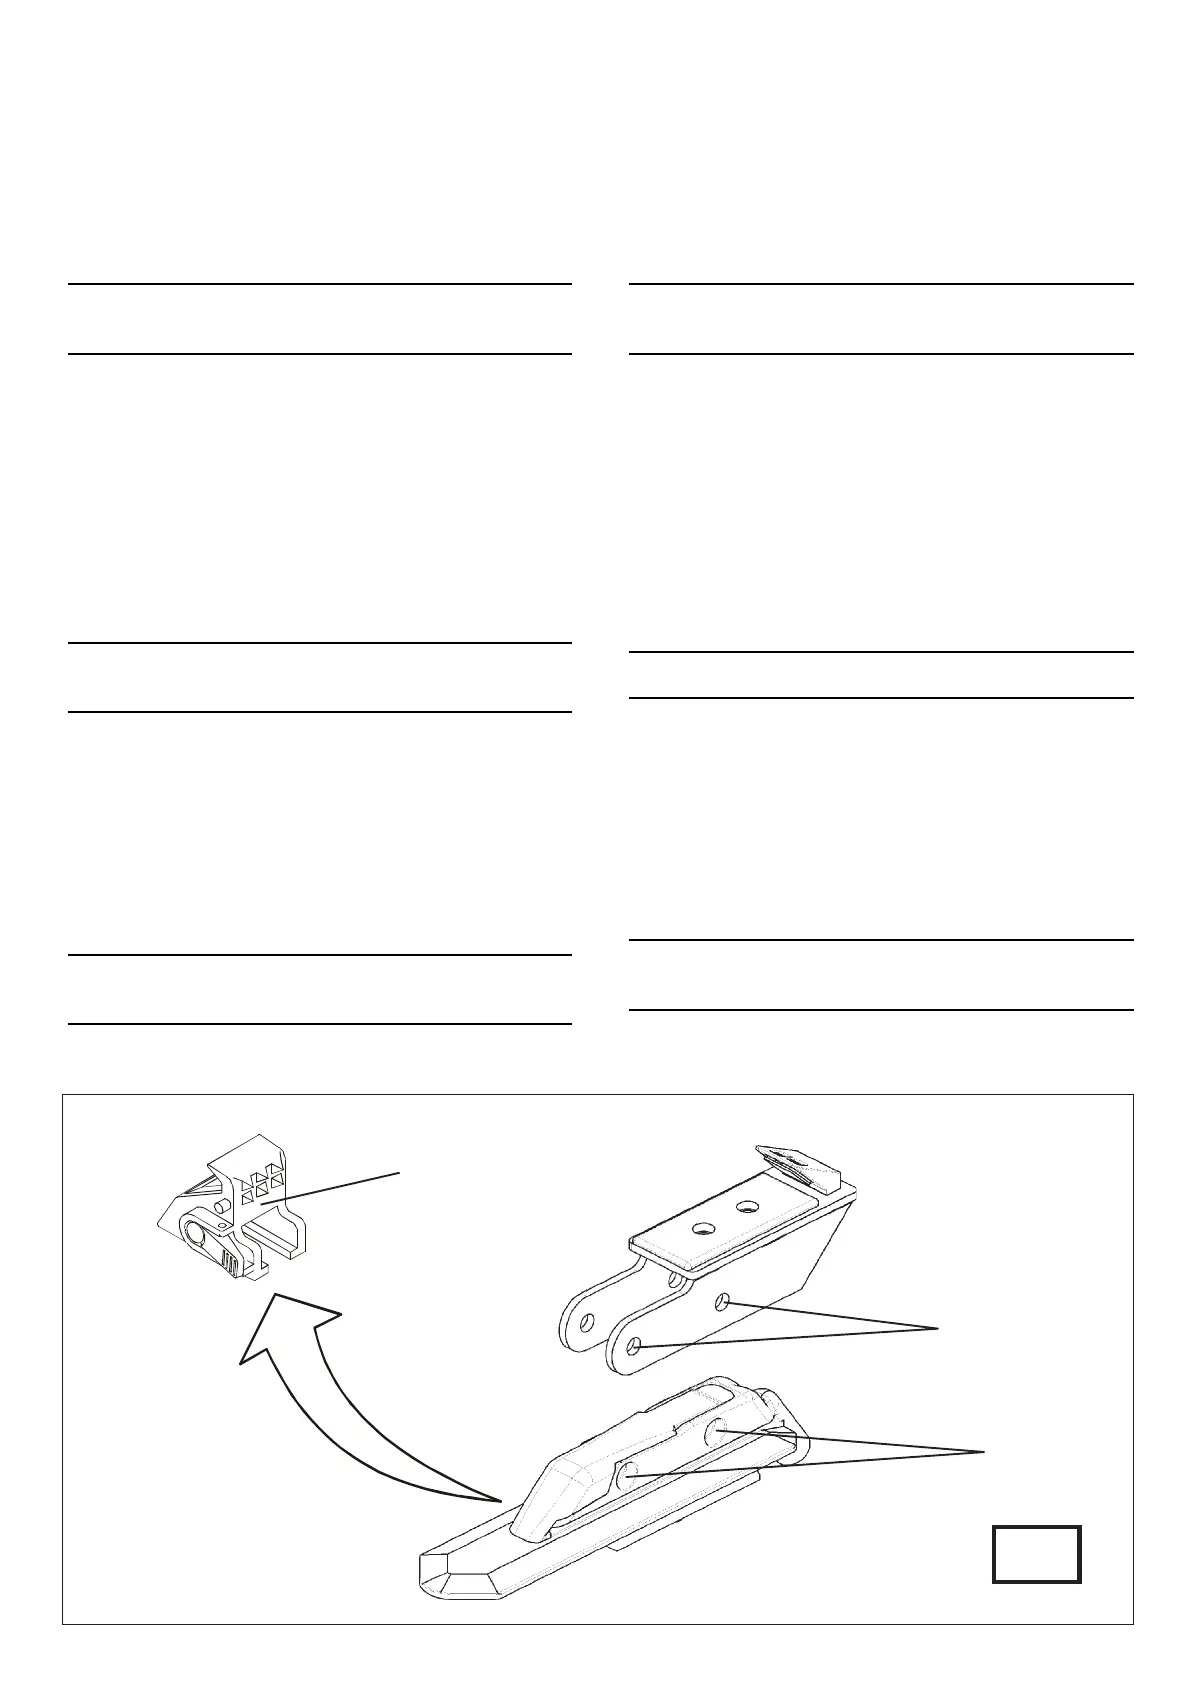
1) Rimuovere i morsetti standard (R Fig. 1), presenti
sull’autocentrante dello smontagomme.
FASE 2 Montaggio Morsetti +4”
2) Inserire i morsetti +4” forniti nel kit sugli scorrevli
dell’autocentrante ed allineare i fori laterali (A Fig. 1) con i
fori (B Fig. 1) degli scorrevoli.
ATTENZIONE: FISSARE GLI SCORREVOLI
UTILIZZANDO ENTRAMBE LE VITI NEI FORI
PREDISPOSTI.
3) Inserire le viti (C Fig. 2) nei fori laterali dei morsetti,
inserire poi le rondelle (D Fig. 2) e bloccare con i dadi (E
Fig. 2).
NOTA: Nel caso i fori (B Fig. 1) degli scorrevoli siano
ostruiti da impurità, ripulire inserendo più volte
MANUALMENTE una punta elicoidale di diametro 8mm.
ATTENZIONE: DOPO L’INSTALLAZIONE, I MORSETTI
DEBBONO TROVARSI EQUIDISTANTI DAL CENTRO
DELL’AUTOCENTRANTE.
INSTRUCTIONS FOR INSTALLATION
OF THE KIT 4028590/4028591
STEP 1 Preliminary operations
BEFORE INSTALLATION, DISCONNECT THE TYRE
CHANGER FROM THE ELECTRICITY AND
COMPRESSED AIR SUPPLIES
1) Remove the standard jaws (R Fig. 1), present on
the tyre changer turntable.
STEP 2 Installing the Kit
2) Insert the +4” jaws supplied in the kit on the turntable
sliding parts and align the side holes (A Fig. 1) with the
holes (B Fig. 1) in the sliding parts.
CAUTION: SECURE THE SLIDING PARTS WITH BOTH
SCREWS IN THE HOLES PREPARED.
3) Insert the screws (C Fig. 2) in the side holes in the
jaws, put the washers (D Fig. 2) on the opposite side and
secure with the nuts (E Fig. 2).
NOTE: If the holes (B Fig. 1) in the sliding parts are blocked
by dirt, clean them by MANUALLY inserting an 8 mm
diameter spiral bit in them several times.
CAUTION: AFTER INSTALLATION, THE JAWS MUST BE
EQUIDISTANT FROM THE CENTRE OF THE
TURNTABLE.
 Loading...