CHOOSING FILM
Much of your flexibility is in your film because a Holga has only 2 aperture set-
tings: sunny (f/11) and not so sunny (f/8). You can shoot under almost any light-
ing condition by choosing the right film and pushing/pulling it as necessary.
Black and white C-41 films like Ilford XP2 are a good choice because they have
excellent latitude.
On a sunny day, use an ISO 400 speed b&w or color negative film. A popular
choice is our Arista
®
Professional B&W 400. On overcast days go for even more
speed. Try Fuji NHGII 800. Ilford Delta 3200 works well late in the day or indoors.
Slide films are much less forgiving when push or pulled, but you can get great
results in the right situation. The multi speed Fujichrome RMS 100/1000 film is
a great choice. Short of that, Fuji Sensia or Provia, Kodak 100V, VS, or SW are
all options. Tungsten slide film, like Kodak EPT, has more latitude and suffers
less from reciprocity failure than daylight balanced film. Whether or not you
decide to filter-correct for daylight is up to you.
FORMAT
Out of the box, a Holga is set up for 6x4.5cm
(15 frames) format. But to get the most out of
Holga's (in)famous vignetting and edge distortion
features, switch it to 6x6cm (12 frames) format:
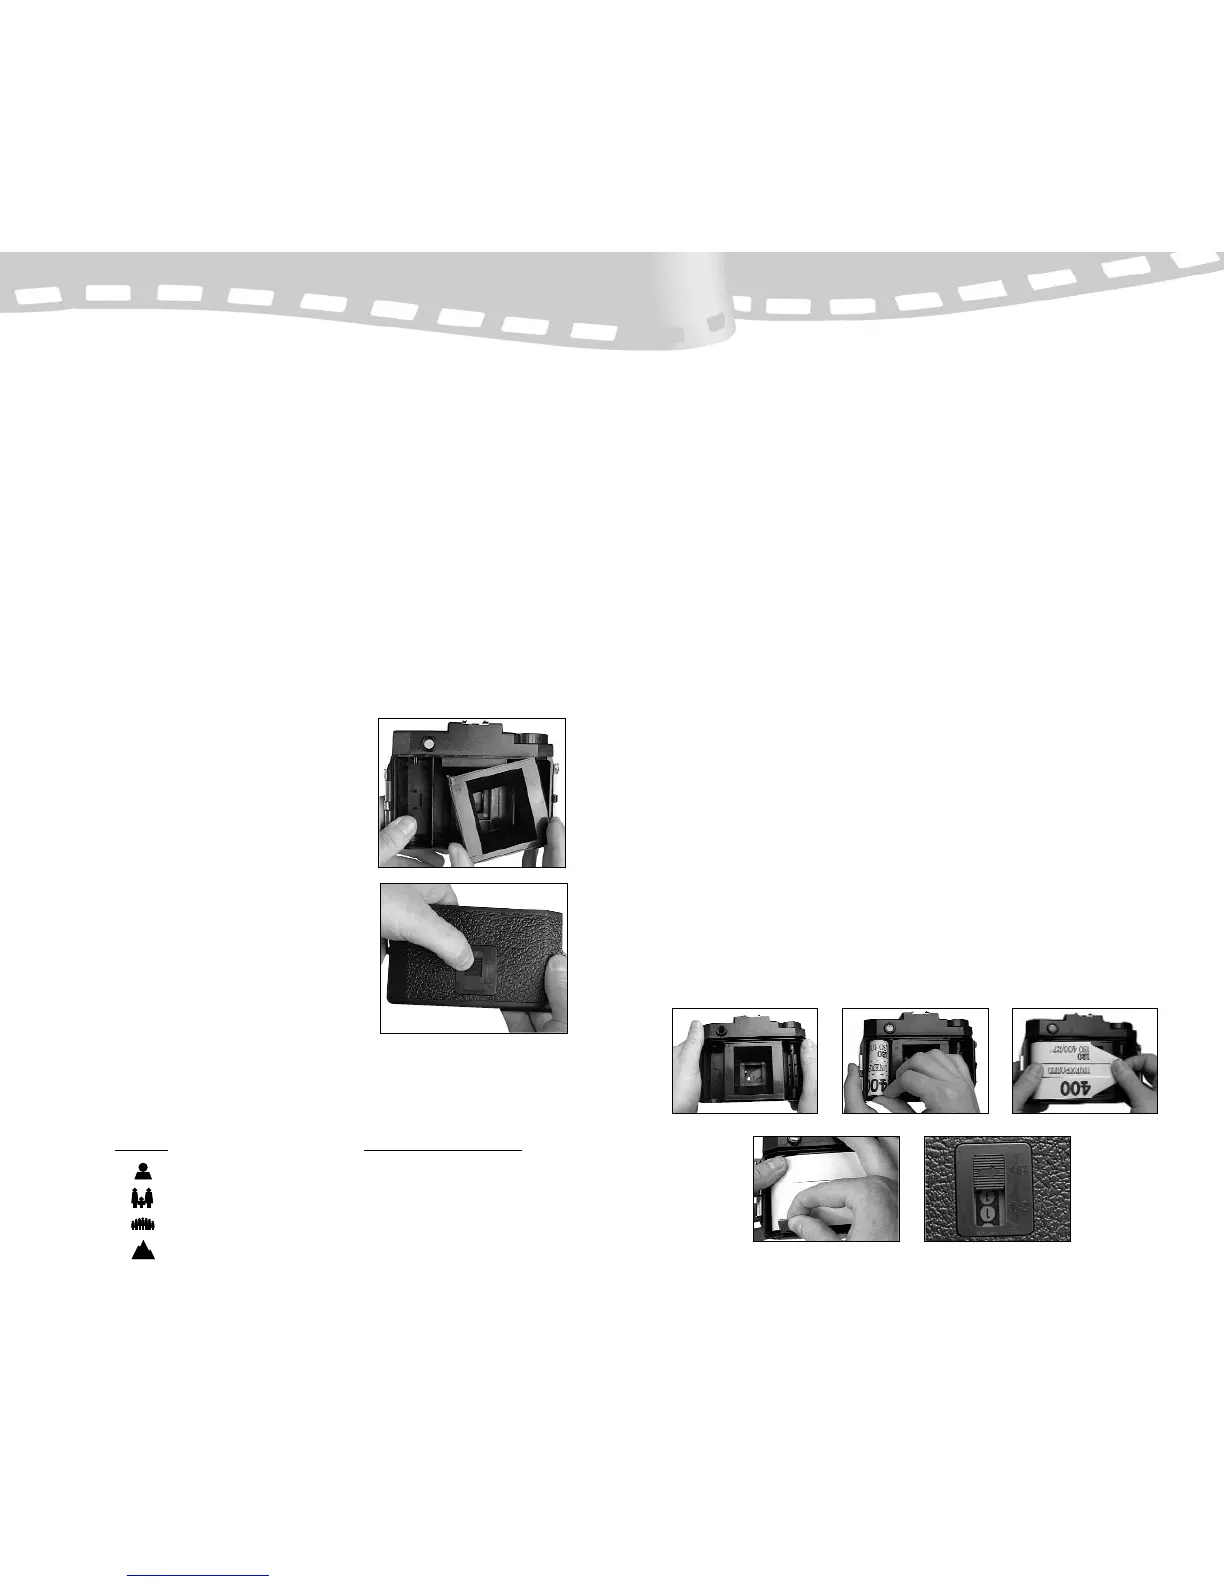
1. Remove the 6x4.5 mask
2. With firm downward pressure, move the
format arrow on the back from sixteen to
twelve. This could take some coaxing
and a screwdriver or other tool may help
the transition. Be careful not to damage
the red window.
FOCUSING A HOLGA
A Holga has four focus marks on the lens barrel. Simply rotate the barrel to the
setting that most closely corresponds to your situation. Feel free to use your
own setting that might fall between these icons.
Symbol
Approximate Distance
3 feet (1m)
9 feet (2m)
18 feet (6m)
30 feet (10m) to infinity
4
EXPOSURE TIPS
The lens on a Holga is fairly low contrast and tends to lose detail in the shadow
areas. For B&W negative film, the rule of thumb is to expose for the shadows
and develop for the highlights. Even color negative film can benefit from the
habit of over exposing slightly. With slide film it is best to meter as accurately
as possible.
LOADING
For best results, have ready a folded-up piece of thin cardboard (maybe an inch
(25mm) square). Part of a film box works well.
As with all film, it is best to load and unload it out of direct sunlight, preferably
in subdued light.
1. Remove the back by sliding down the metal clamps on either side of
the camera. Looking in the back side of the camera, new film is
loaded on the left side. Make sure the take up spool is on the right side.
2. Place the spool of film into the left side of the camera with the leading
edge pointing to the right. Break the seal securing the film.
3. With your left thumb resting lightly on the film, pull out the film leader
until you can insert the tapered edge into the take-up spool.
4. Spool the film with a couple of turns of the take-up knob. Keep your
thumb lightly on the film to prevent slack.
5. With your thumb still on the film, insert the piece of cardboard between
the bottom of the film spool and the camera.
6. Replace the camera back and slide the clips back into place.
7. Advance the film by turning the take-up knob until you see the number
1 appear in the red film counter window.
5
 Loading...