EasyManua.ls Logo

Holis JSE04-D10-OI01 - User Manual

Holis JSE04-D10-OI01
2 pages
Print Icon
To Next Page IconTo Next Page
Loading...
Figure 3: Micro SD card slot and reset button (continued)
Note: Remove the four screws on the camera cover (1) (Figure 1) to
access the buttons. Securely attach the cover when finished.
Table 3: Micro SD card slot and reset button
Number
Camera button description
1
Micro SD card slot
2
Reset button (Hold for more than 3 seconds)
Quick reference
Default IP: 192.168.1.168 (DHCP enabled).
Default Username / Password: admin / admin
Power: 12VDC or PoE
Use Internet Explorer 11 web browser.
Mounting the camera to a wall or ceiling
Ensure that the wall or ceiling is strong enough to withstand three times
the weight of the camera.
1. Place the mounting template on the surface that you want to attach
the camera.
2. On the surface drill four Ø 4.6mm holes and cut out a cable hole as
per the markings identified on the mounting template.
3. Securely place the four screw anchors into the four holes.
4. Remove the four screws on the camera cover (2) (Figure 1) to
remove the cover from the camera base (1) (Figure 1).
5. Place the camera cable through the cable hole on the mounting
surface.
OR
Use the cable side entry hole slot on the camera base.
Security
Quick Start Guide
(8200-1994-05_C0)
Tyco Holis JSE Economical 4MP Mini Dome Cameras
(Product Code: JSE04-D10-OI01 and JSE04-D30-OI03)
In the box
1 x Camera
1 x Quick Start Guide
4 x 4x25mm tapping screws
1 x Mounting template
4 x 6x25mm Plastic screw anchors
1 x Silicone plug
1 x L-Key Hexagonal wrench
1 x Regulatory Document
Installation tools
Screwdriver
Drill
L-Key Hexagonal wrench
Figure 1: Camera parts
Figure 1
Table 1: Camera part descriptions
Number
1
2
3
Figure 2: Cable connections
Figure 2
Table 2: Cable connection descriptions
Number
Cable connection description
1
Ethernet Connector and also supports PoE
2
Power Connector (12V DC @ 1A)
Figure 3: Micro SD card slot and reset button
Figure 3
Mounting the camera to a wall or ceiling (continued)
Note: If you are not using the cable side entry slot then ensure that
the cable side entry plug is inserted into the slot on the camera
base.
6. Hold the camera base (1) (Figure 1) up to the mounting template
and align the four holes on the camera base with the four holes on
the mounting surface.
7. Insert the four screws into the four holes on the camera base and
securely attach the camera to the mounting surface.
8. Hold the camera base cover up to the camera base and align the
four holes on the camera cover with the four holes on the camera
base.
9. Insert the screws into the four holes and securely attached the
camera cover to the camera base.
10. To power up the camera:
Connect a 12V DC power supply to the power connector on
the camera cable.
OR
Connect a shielded PoE cable to the ethernet / PoE slot on
the camera cable.
Question and Answer IconNeed help?

Do you have a question about the Holis JSE04-D10-OI01 and is the answer not in the manual?

Summary

Quick Reference

Mounting the Camera to a Wall or Ceiling

Warnings and Precautions

Overview

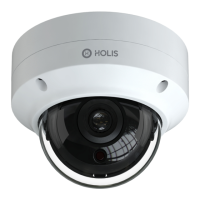
The Tyco Holis JSE Economical 4MP Mini Dome Camera is a versatile security device designed for reliable surveillance in various environments. This quick start guide provides essential information for installation, operation, and maintenance, ensuring optimal performance and longevity of the camera.

Function Description

The camera serves as a robust surveillance solution, capturing high-resolution 4MP video footage. It is designed for both indoor and outdoor use, capable of being mounted on walls or ceilings to provide a wide field of view. The camera's primary function is to monitor designated areas, offering peace of mind through continuous visual oversight. It supports Power over Ethernet (PoE), simplifying installation by allowing both power and data transmission through a single cable. Alternatively, it can be powered by a 12V DC power supply. The camera features a Micro SD card slot for local storage of footage, providing a backup or primary recording solution without the need for an external Network Video Recorder (NVR). A reset button is also integrated, allowing users to restore the camera to its factory default settings if needed.

Usage Features

The camera offers flexible installation options and user-friendly controls.

  • Mounting: The camera can be securely mounted on a wall or ceiling using the provided mounting template, screws, and screw anchors. It is crucial to ensure the mounting surface is strong enough to support three times the camera's weight. The design allows for two cable entry methods: through a drilled hole in the mounting surface or via a side entry slot on the camera base.
  • Adjustability: Once mounted, the camera offers extensive adjustability to cover the desired surveillance area. It features a pan range of 0-355°, a tilt range of 0-67°, and a rotation range of 0-355°. This wide range of motion allows for precise positioning and comprehensive coverage.
  • Connectivity: The camera is equipped with an Ethernet connector that supports PoE, enabling a streamlined installation with a single cable for both power and data. A separate power connector is also available for traditional 12V DC power supplies.
  • Remote Access: The camera can be accessed remotely via a web browser, with Internet Explorer 11 being the recommended choice. It has a default IP address of 192.168.1.168 (DHCP enabled) and default login credentials (username: admin, password: admin). This allows users to configure settings, view live footage, and manage recordings from a connected device.
  • Local Storage: The integrated Micro SD card slot provides convenient local storage for recorded video. This feature is particularly useful for standalone installations or as a redundancy measure for network-based recording systems.
  • Reset Functionality: A reset button is included, allowing users to easily restore the camera to its factory default settings. This can be helpful for troubleshooting or reconfiguring the device. To access the reset button and Micro SD card slot, the camera cover needs to be removed by unscrewing the four screws.

Maintenance Features

Maintaining the Tyco Holis camera is straightforward, focusing on ensuring its longevity and optimal performance.

  • Cleaning: Regular cleaning of the camera lens is recommended. Use a clean, soft cloth to gently wipe the lens, avoiding harsh chemicals or abrasive materials that could scratch the surface.
  • Environmental Considerations: The camera is designed to operate within a specific temperature range (-30°C to 60°C). It is important to avoid placing the camera in extremely hot, cold, dusty, or damp locations. Additionally, the camera should not be exposed to high electromagnetic radiation. Good ventilation is required to prevent heat accumulation, especially in enclosed spaces.
  • Protection from Elements: Ensure that no water or liquid intrudes into the camera. If the cable side entry slot is not used, the cable side entry plug must be inserted into the slot on the camera base to prevent moisture ingress.
  • Power and Voltage: Always use the camera within its specified voltage range (12V DC or PoE). Using an incorrect power supply can damage the device.
  • Physical Handling: Avoid dropping the camera or subjecting it to physical shock. When handling, be careful not to touch the camera lens directly with bare hands to prevent smudges or damage.
  • Troubleshooting: In case of any operational issues, users are advised to contact their dealer or the nearest service center. It is explicitly stated that users should not attempt to disassemble the camera themselves, as unauthorized repair or maintenance can void warranties and may lead to further damage.
  • Firmware Updates: While not explicitly detailed in this guide, it is generally good practice to keep the camera's firmware updated to ensure the latest features, security patches, and performance improvements.
  • Security: Regularly change the default username and password to enhance the security of the camera and prevent unauthorized access.

Holis JSE04-D10-OI01 Specifications

General IconGeneral
ModelJSE04-D10-OI01
CategorySecurity Camera
IR RangeUp to 30m (98ft)
Night VisionYes
Night Vision Range30m
WDRDigital WDR
Video CompressionH.265, H.264
Ingress ProtectionIP67
Weather ResistanceYes
StorageMicroSD card slot (up to 256 GB)
ConnectivityEthernet