EasyManua.ls Logo

Holmes Blizzard 32510134 - User Manual

Holmes Blizzard 32510134
2 pages
Print Icon
To Next Page IconTo Next Page
Loading...
FAN CLEANING
Always unplug the fan before cleaning or disassembling.
Be sure to use a soft cloth moistened with a mild soap solution.
Do not allow water to drip on or into the fan motor housing.
Do not use any of the following as a cleaner: gasoline, thinner,
benzene.
It is recommended to periodically clean this fan by lightly running
a vacuum cleaner nozzle over the fan grill to remove any dust or
dirt that may have accumulated inside or on the unit.
WARRANTY INFORMATION
CLEANING / STORAGE
PLEASE READ AND SAVE THESE IMPORTANT INSTRUCTIONS
Instruction Manual
Blizzard
®
Oscillation Table Fan
Item: 12081
Model: 32510134
Printed In China
1 YEAR LIMITED WARRANTY
This device has a limited warranty of 1 year from the
original date of purchase against workmanship and defects
in material. If under normal use, your product fails to
operate, please contact our customer service department at
info@getholmesfans.com. A refund or replacement will be
provided to you with proof of purchase. Star Elite Inc. may
deny claims of damage caused by misuse or modications
of this product.
Warranty Service
Contact our customer service at
getholmesfans.com/en/contact-us
or info@getholmesfans.com or 1-866-769-3166
(8:30 am - 5:00 pm EST) Monday-Friday.
Our team will be happy to assist.
www.getholmesfans.com
For inquiries regarding recycling and proper disposal
of this product, please contact your local waste
management facility.
CLEANING/MAINTENANCE INSTRUCTIONS
Follow these instructions to correctly and safely care for
this table fan.
REPLACEABLE FUSE
If the (2.5 Amp, 125 Volt) replaceable fuse blows, please visit
our website at www.getholmesfans.com for information on how
to order a new fuse. Follow the user servicing instructions to
replace the fuse on the plug.
User Servicing Instructions
1. Unplug the fan. Grasp plug and remove from the receptacle
or other outlet device. Do not unplug by pulling on cord.
2. Open fuse cover, located on the top of the plug, by using your
thumb or a flathead screwdriver to slide the cover down
towards the prongs.
NOTE: Ensure that fuse cover
is completely open before
attempting to remove fuse.
3. Remove fuse carefully by using
a small screwdriver to pry the
fuse out of the compartment
by the metal ends of the fuse.
(see Figure 3)
4. Place plug on a solid, flat
surface. Insert new 2.5 Amp, 125 Volt fuse into fuse
compartment and use a small screwdriver to secure the
metal ends of the fuse into the compartment.
CAUTION: Risk of fire. Replace fuse only with 2.5 Amp,
125 Volt fuse.
5. Slide fuse cover closed completely. If fuse cover is difficult to
close, make sure fuse is secured in place completely by
pressing down on metal ends of the fuse.
6. Risk of fire. Do not replace attachment plug. Contains a
safety device (fuse) that should not be removed. Discard
product if the attachment plug is damaged.
Figure 3
Fuse
Metal ends
Fuse cover
FAN STORAGE
This fan can be stored in the off-season in the original (or
appropriately sized) box. It is important to keep it in a safe,
dry location.
Distributed by Star Elite Inc., Montreal, Canada H3B 3X9
SEH021-092022
© 2022 Sunbeam Products, Inc. All rights reserved.
HOLMES
®
and BLIZZARD
®
are registered trademarks of
Sunbeam Products, Inc. used under license.
Question and Answer IconNeed help?

Do you have a question about the Holmes Blizzard 32510134 and is the answer not in the manual?

Summary

Cleaning and Maintenance

Replaceable Fuse

Instructions for replacing a blown fuse in the plug for safety and proper function.

User Servicing Instructions

Step-by-step guide detailing how to safely service and replace the fan's fuse.

Fan Cleaning

Guidelines for safely cleaning the fan using appropriate materials and methods.

Fan Storage

Warranty Information

1 Year Limited Warranty

Details the warranty period and conditions for defects in workmanship and material.

Warranty Service Contact

Provides contact information and hours for customer service regarding warranty issues.

Important Safety Instructions

Polarized Plug Safety

Explanation of the polarized plug and precautions to reduce the risk of electric shock.

Features and Operations

Operating Instructions

Step-by-step guide for setting up and operating the fan's basic functions.

Wall Mounting Instructions

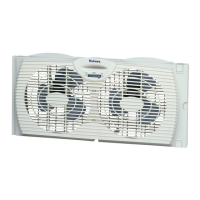
Detailed steps for safely mounting the fan on a wall, including lock mechanisms.

Mounting Location Guide

Diagram and instructions for correct screw placement for safe wall mounting.

Overview

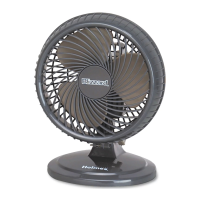
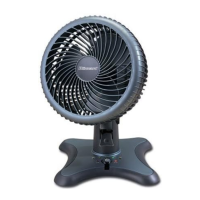
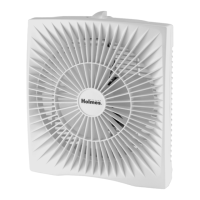
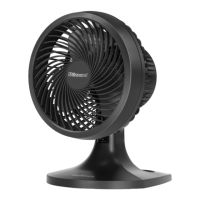
This document describes the Holmes Blizzard® Oscillation Table Fan, a versatile and user-friendly appliance designed for household use. This fan offers both table-top and wall-mounted operation, providing flexibility in placement and air circulation.

Function Description

The Blizzard® Oscillation Table Fan is designed to provide cooling and air circulation in indoor environments. It features an oscillating head that can distribute air across a wider area, or it can be set to a fixed position for direct airflow. The fan offers multiple speed settings, allowing users to adjust the intensity of the airflow to their preference. Its primary function is to enhance comfort by moving air, making it suitable for various rooms in a home.

Usage Features

The fan is designed for straightforward operation and offers several features to enhance user experience:

  • Table-Top Operation: To use the fan on a table, simply place it on a dry, level surface. Ensure the Speed Control Knob is in the Off(0) position before plugging the cord into a standard 120V AC outlet. The Speed Control Knob, located on the back of the fan motor housing, allows you to select from Off(0), HIGH(III), MEDIUM(II), and LOW(I) settings.
  • Oscillation Control: The Oscillation Control Knob is situated on top of the fan motor housing. To activate oscillation, push the knob down. To stop oscillation and direct airflow to a fixed point, pull the knob up.
  • Wall Mounting: The Blizzard® table fan is uniquely designed for wall mounting and can operate from four different positions when mounted. This feature allows for optimal air distribution and space-saving.
    • Positioning: The first three wall-mounted positions are set by gently pushing the fan head to the desired location. For the fourth and furthest back position, firmly press down on the wall mount lock at the back of the fan neck with one hand while simultaneously pushing the fan head back into the fourth position with the other hand.
    • Transitioning from Wall to Table: When converting the fan from wall-mounted to table-top operation, it is crucial to pull the fan head forward out of the fourth wall-position. Gently pull forward until you hear the wall mount lock secure the fan back into table mode. This will restore the three standard table fan positions available for table use.
    • Installation Steps:
      1. Location Selection: Choose a suitable location on the wall. Use the provided mounting location guide to ensure proper screw placement.
      2. Marking and Drilling: Use the holes on the guide to mark the correct spots for screws. Consult a hardware professional for the appropriate screws for your wall type. The model number for the correct mounting guide can be found on the box or the rating label on the back of the fan head.
      3. Screw Installation: Secure the screws almost all the way into the wall using a screwdriver.
      4. Hanging the Fan: Line up the holes on the back of the fan unit with the installed screws and carefully place the fan on them, ensuring the screws are securely in the wall.
  • Polarized Plug: The appliance features a polarized plug (one blade wider than the other) to reduce the risk of electric shock. This plug is designed to fit into a polarized outlet only one way. If it doesn't fit, reverse the plug. If it still doesn't fit, contact a qualified electrician to install a proper outlet. It is important not to modify this plug or defeat this safety feature.
  • Overload Protection (Fuse): The fan is equipped with overload protection in the form of a replaceable fuse. If the fuse blows, it indicates an overload or short-circuit. Unplug the product, replace the fuse according to the user servicing instructions, and check the product. If the replacement fuse blows again, a short circuit may be present, and the product should be discarded or customer service contacted for examination and/or repair.

Maintenance Features

Proper care and maintenance ensure the longevity and safe operation of the fan:

  • General Cleaning:
    • Always unplug the fan before cleaning or disassembling.
    • Use a soft cloth moistened with a mild soap solution for cleaning.
    • Do not allow water to drip on or into the fan motor housing.
    • Avoid using harsh cleaners such as gasoline, thinner, or benzene.
    • Periodically clean the fan by lightly running a vacuum cleaner nozzle over the fan grill to remove accumulated dust or dirt.
  • Fuse Replacement: If the 2.5 Amp, 125 Volt replaceable fuse blows, follow these steps:
    1. Unplug the fan by grasping the plug and removing it from the receptacle; do not pull on the cord.
    2. Open the fuse cover, located on the top of the plug, by sliding it down towards the prongs using your thumb or a flathead screwdriver. Ensure the cover is completely open before attempting to remove the fuse.
    3. Carefully remove the old fuse by using a small screwdriver to pry it out from the compartment by its metal ends.
    4. Place the plug on a solid, flat surface. Insert a new 2.5 Amp, 125 Volt fuse into the compartment and use a small screwdriver to secure its metal ends.
    5. Slide the fuse cover closed completely. If it's difficult to close, ensure the fuse is fully secured by pressing down on its metal ends.
    • CAUTION: Risk of fire. Replace the fuse only with a 2.5 Amp, 125 Volt fuse. Do not replace the attachment plug, as it contains a safety device (fuse) that should not be removed. Discard the product if the attachment plug is damaged.
  • Storage: The fan can be stored in its original (or appropriately sized) box during the off-season. It is important to keep it in a safe, dry location to prevent damage.

For inquiries regarding recycling and proper disposal of the product, users should contact their local waste management facility. The device comes with a 1-year limited warranty from the original date of purchase against workmanship and material defects. For warranty service, contact customer service at info@getholmesfans.com or 1-866-769-3166 (8:30 am - 5:00 pm EST, Monday-Friday).

Holmes Blizzard 32510134 Specifications

General IconGeneral
Model Number32510134
BrandHolmes
Model NameBlizzard
Voltage120V
Fan Speed Settings3
OscillationYes
Height AdjustmentNo
Product TypeFan
Power SourceElectric

Related product manuals