Do you have a question about the HOMCOM 836-048 and is the answer not in the manual?
Provides phone numbers and email addresses for customer support across various countries.
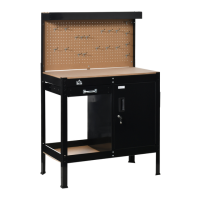
Instructions on how to properly tighten the Quickfit fastener until flush with the panel.
Guidance on the correct orientation and insertion of the Cam Lock before connecting.
Procedure for tightening the Cam Lock by turning it clockwise.
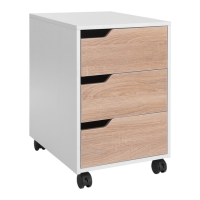
List of all individual parts included in the product package with quantities.
List of all fasteners and tools provided with the product, with specifications.
Attaching the side panels (2, 3) to the base using screws (A).
Securing the back panel (5) using screws (C).
Attaching the base panel (5) to side panel (2) using screws (B).
Attaching the second side panel (5) to the base using screws (B).
Inserting the back board (4) into the assembled frame.
Securing the side panels (2, 3) using dowels (C).
Attaching the casters (13) to the bottom panel (5).
Securing the top panel (1) to the structure using screws (A, B).
Assembling the frame of the drawers using side and back panels with screws (D).
Inserting the drawer bottom panel (11) into the assembled drawer frame.
Attaching the drawer front panels (8) to the drawer structure using screws (D).
Attaching the drawer side panels (6) to the drawer assembly using screws (E).
Attaching drawer runners (12) to the main unit and drawers using screws (F).
Instructions for carefully pushing the drawers into their aligned slides.
Contact and location details for importers in the US, Canada, UK, Germany, France, Italy, Spain, and Portugal.
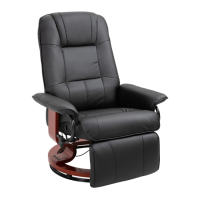
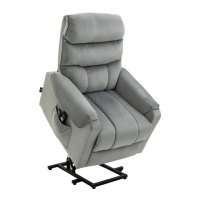
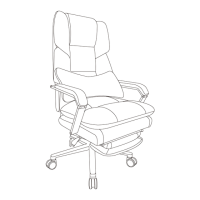
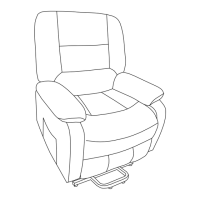
| Product Name | HOMCOM 836-048 |
|---|---|
| Category | Indoor Furnishing |
| Type | Recliner Chair |
| Material | PU Leather, Metal, Foam |
| Color | Black |
| Assembly Required | Yes |
| Seat Dimension | 50W x 52D x 48H cm |