Do you have a question about the HOMCOM CHILDREN’S ELECTRIC RIDE-ON A and is the answer not in the manual?
Details battery, charger, age, load capacity, speed, and size of the ride-on.
Lists all individual parts required for the vehicle body assembly.
Lists the specific parts included in the assembly package.
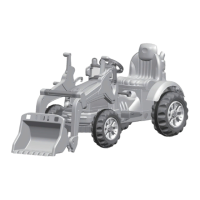
Visual representation of the vehicle body and its main parts.
Illustrates and lists parts specific to the Type A bucket assembly.
Illustrates and lists parts specific to the Type B thumb bucket assembly.
Illustrates and lists parts specific to the Type C tipper assembly.
Critical safety warnings and requirements before starting assembly.
Lists essential tools needed for assembly.
Instructions for attaching the rear axle for 1WD models.
Instructions for attaching the rear axle for 2WD models.
Detailed steps for mounting the rear wheels on 1WD vehicles.
Detailed steps for mounting the rear wheels on 2WD vehicles.
Guide on how to correctly fit the steering plate to the vehicle.
Steps for attaching the front wheels and checking for proper fit.
Instructions for connecting the steering column to the vehicle body.
Steps for securing the steering wheel and attaching the windshield.
How to correctly connect the battery to the vehicle's power system.
Steps for fitting the seat and the rear exhaust component.
Connecting the bucket to the right boom.
Attaching the bucket cover and fitting the bucket lock.
Inserting the bucket tip through the boom and lock.
Bending and fitting the bucket lock to the bucket tip.
Fitting the boom linkage into the slots in each boom.
Installing the Ø12 rod with lock nut and washer.
Inserting the Ø12 rod through booms and placing inner bushings.
Securing the Ø12 rod with a washer and lock nut.
Connecting the thumb bucket to the right boom.
Attaching the bucket cover and fitting the bucket lock.
Inserting the bucket tip through the boom and lock.
Bending and fitting the bucket lock to the bucket tip.
Fitting the boom linkage into the slots in each boom.
Attaching the bucket assembly to the vehicle body.
Inserting the Ø12 rod through booms and placing inner bushings.
Securing the Ø12 rod with a washer and lock nut.
Steps for fitting the tipper onto the vehicle's front end.
Using the tipper lock to secure the tipper to the vehicle body.
Crucial warnings to prevent injuries and deaths during use.
Guidelines for operating the ride-on vehicle safely.
Explanation of switches, buttons, and the foot pedal.
Guidance for advanced driving at higher speeds.
Essential safety warnings related to battery charging.
Information on proper handling and responsible disposal of batteries.
How to read the voltmeter to check battery status.
Step-by-step guide for charging the vehicle's battery.
Explanation of the thermal fuse and its role in overload protection.
Detailed steps for replacing and responsibly disposing of the battery.
A table addressing issues like 'Vehicle does not run' to 'Charger feels warm'.
Ensuring the vehicle is safe and functional before and during use.
Proper methods for cleaning, storing, and protecting the vehicle.
| Brand | HOMCOM |
|---|---|
| Model | CHILDREN’S ELECTRIC RIDE-ON A |
| Category | Motorized Toy Car |
| Language | English |